Posted on 6 Comments

Crochet Mask Lanyard, A Hook-Only Free Pattern

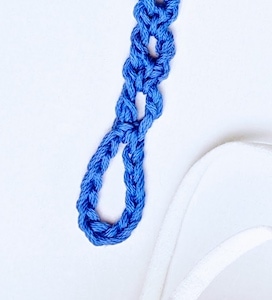
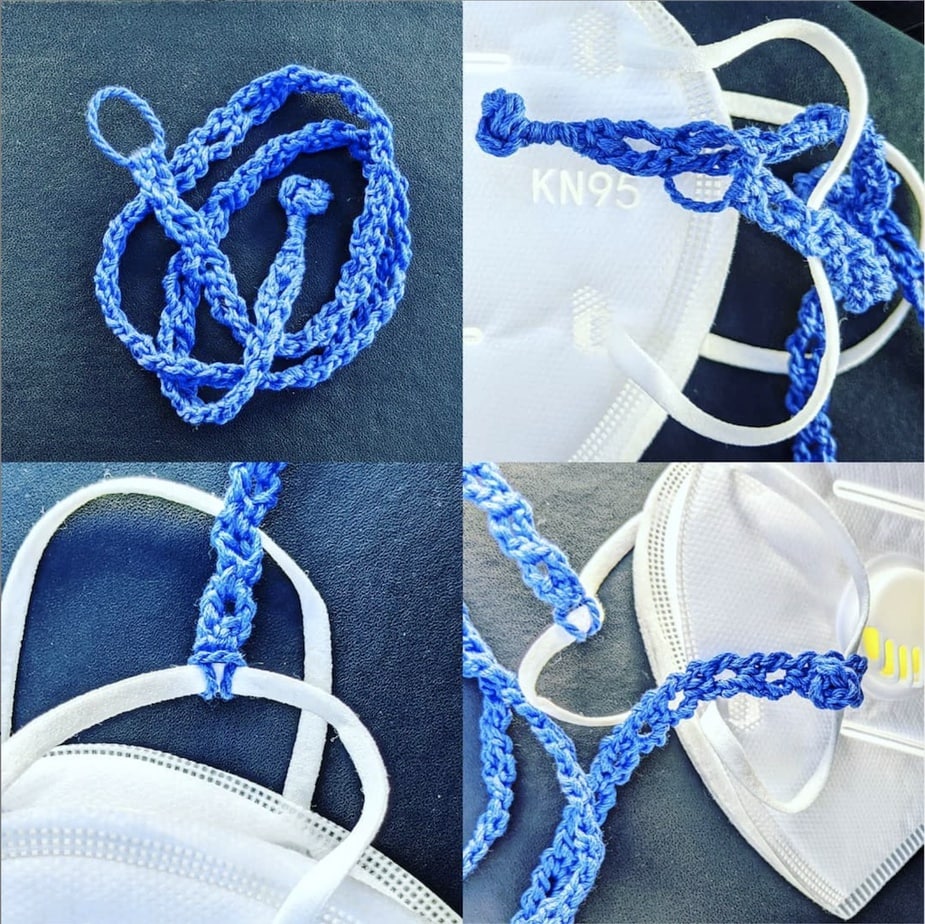
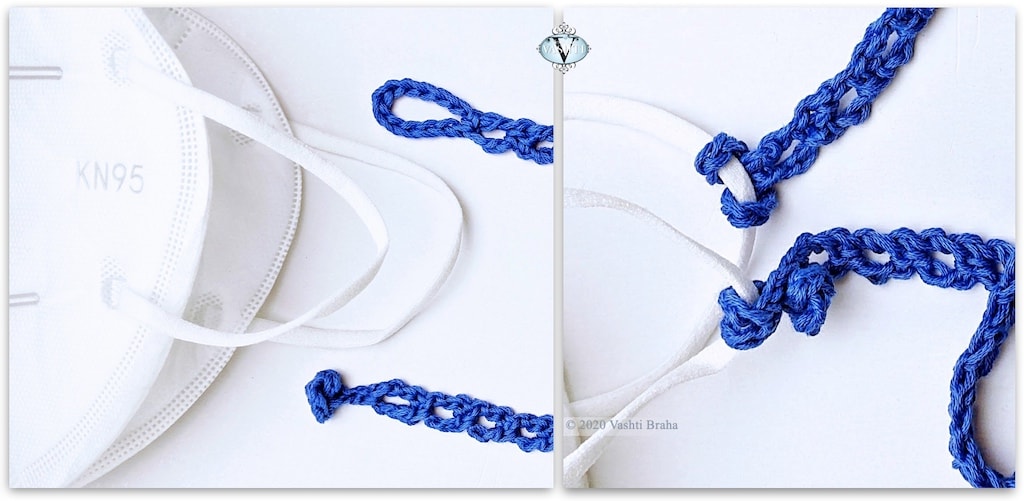
Crocheted fasteners before and after attaching to mask

This reversible crochet mask lanyard attaches to each ear loop of a face mask with 100% crocheted fasteners. No sewing on buttons or metal hardware!

Wear the lanyard around your neck. If you remove your mask, there it hangs, already found, like wearing reading glasses on a chain.

The chain loop end attaches with a lark’s head knot, explained below. The other end has a crocheted peg-like “shank” button. It loops around the other ear loop and buttons into a stitch space of the lanyard. This makes the length easy to adjust. The mask loops can be any thickness.

Three Favorite Things

My favorite thing about this pattern is that it’s “hook-only”: 100% crochet, even the fasteners.

My second-favorite thing is it’s a chance to use my new rosebud button idea for a project. It’s reminiscent of a Chinese frog closure, but like I say, no sewing! Also, unlike some button knots, zero chance of it coming unknotted.
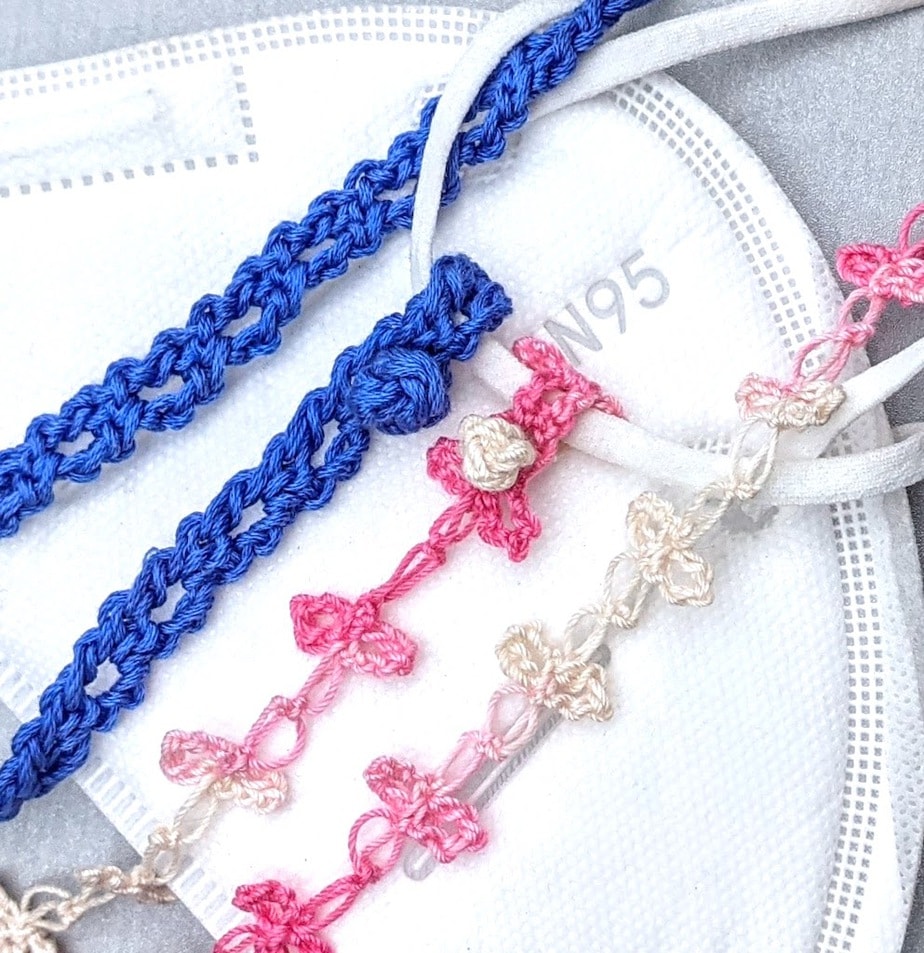
Crochet mask lanyard button in two thread sizes
Free crochet mask lanyard pattern below is for the blue one in sport weight cotton yarn.
The pink one in size 10 thread uses parts of the same pattern.

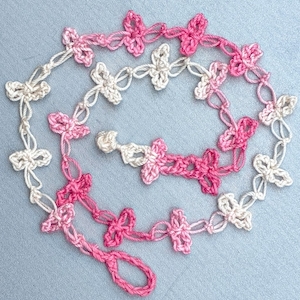
And, third, this pattern doubles as a versatile template. I’m already borrowing individual elements from it. The lacy pink love knot lanyard has the same chain-loop end, rosebud button end, and even a few repeats of the blue cord to serve as buttonholes (near the button end). If you have a cord pattern you like, add a few elements from this pattern to keep it hook-only.


Crochet Mask Lanyard Pattern

A PDF version of this pattern was emailed to members of the Crochet Guild of America (CGOA) as a part of a Holiday Shopping Guide, December 1, 2020.

Materials 

  • About ten yards of a sport weight (CYC Size #2 Fine Weight) yarn. Shown (in blue): Lang Fiorina (100% cotton, 135 yds / 125 m per 1.75 oz/50 g)
  • Size E / 3.5 mm hook
  • A stitch marker is recommended for the first few rows
  • Yarn needle

Abbreviations used

Pattern uses US terms. UK/AUS terms are in { }

  • ch = chain
  • dc = double crochet {UK: treble}
  • hdc = half double crochet {UK: half treble}
  • sc = single crochet {UK: double crochet}
  • sl st = slip stitch
  • st = stitch
  • yo = yarn over {UK: yarn over hook}

Gauge 

8 pattern repeats (row pairs) = 4″ {10 cm}. Exact gauge is not necessary for this pattern to work.

Size

21 inches {53.34 cm} long. Length is determined by the number of pattern repeats so it’s easy to choose a different finished length.

Pattern Notes

  • Pattern begins at the fastening loop and ends at the other end with the button. The strap between these two ends has a two-row repeat: it’s a long narrow column of just one stitch per row.
  • To begin each new row, turn your work clockwise. (If you’re crocheting left handed, turn the other way.) The yarn will end up in back of the hook and turning chains instead of in front of them.

Instructions

Time needed: approximately 30 minutes


Chain 12. Hdc in 12th ch from crochet hook to form a ring.
This is the fastening loop.

  1. Ch 3, dc in the same ch as the hdc.

    Simple chain loop lanyard fastener close up

  2. Ch 1, turn, place marker in bump of ch and in a top loop of dc, sc in space between dc and ch-3.

  3. Ch 3, turn. Dc in bump of turning ch-1 and back loop of dc (the marked loops). 

  4. Ch 1, turn, move marker (until you can identify the loops to crochet into), sc in space between dc and ch-3.

  5. Repeat steps 3 & 4: 38 times or until it’s the length you prefer.

    Do not fasten off.

  6. Rosebud Button

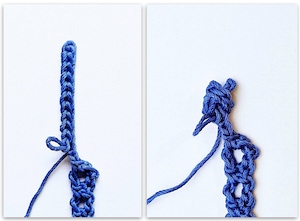
    Crochet all stitches tightly. Ch 13, sl st in the front loop of the 2nd ch from crochet hook, sl st in the front loop of each of next 10 chs. Leave last ch unworked to form the “shank” at the button’s base. Remove crochet hook from loop for the next step. Place marker in loop to secure.
    Tie the strip of 11 sl sts into a simple overhand knot so that the tip of the sl st strip peeks out. Ignore how it looks for the moment. Replace hook in loop and in two or three strands of the sl st tip, and tightly sl st around the unworked ch-1 of shank. (Knot will bend over.) Sl st in same ch, sl st in nearest next stitch, fasten off, and weave in ends.
    Tug on sections of the button knot to even it out; plump it up to make it cute. The goal is to center the shank under a mushroom cap shape. Spritz with water to set it.Crochet Rosebud Button steps 1 & 2 of 4 © Vashti Braha 2020
  7. Attach to face mask

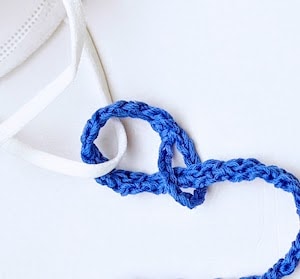
    Slide loop end under an ear loop of the mask. Feed the button end through the loop end and pull the full length of the lanyard through so that the loop wraps around the ear loop tightly with a lark’s head knot.
    Slide the button under the other ear loop of mask. Fold button over and press it through one of the nearby spaces of a dc row. (Reverse these steps to release lanyard from mask.)
    If the length you made doesn’t fit over your head, attach the button end after you’ve placed it around your neck.How to attach crochet loop to mask ear loop
  8. Variation I

    Wrap the fastening loop with the starting yarn end, and wrap the shank of the button with the other yarn end when you’re about to weave in the ends. It’s a nice look. I did this for the button shank of this prototype.Crochet mask lanyard prototype shows a wrapped fastening loop and button shank.

  9. Variation II

    Use your own favorite crochet cord pattern and incorporate sections from this pattern. Here’s how the complete pink love knot example looks:Crochet mask chain of lacy pink love knots and crocheted fasteners.


FAQ About Crochet Mask Lanyards

Why crochet a face mask lanyard? Is it better to crochet one?

Crocheting a lanyard is easy and fast, especially when you can also crochet the fasteners. Crochet makes a strong and durable lanyard with very little yarn (about ten yards).

Are crocheted lanyards washable and comfortable to wear?

Yes: use a soft, washable yarn. It’s comfortable and almost weightless. I forget that I’m wearing it sometimes.

How much yarn do I need to crochet a mask lanyard?

The pretty blue one shown here required only ten yards of a sport weight cotton yarn, and a size E (3.5 mm) crochet hook. Even the lanyard clips are crocheted!

What’s the difference between a mask holder, mask extender, mask chain, and mask lanyard?

“Mask holder” and “mask extender” usually refer to a small strip that has a button at each end. Wear it to eliminate pressure or irritation behind the ears. It shows at the back of the head where the ear loops of the mask hook around the buttons instead of the ears. Another term is “ear saver”.
“Mask chains” and “mask lanyards” drape around the neck like necklaces. It’s the same idea as wearing a badge holder, or a chain for reading glasses.

How long does it take to crochet mask lanyards?

The simplest one of all—just crochet chain stitches—would take 5-10 minutes. The fancier one shown here took 30 minutes.

Do I have to sew buttons or metal clips onto a crocheted mask lanyard?

No. It’s possible to crochet the whole lanyard, even the fasteners! That’s what it means when a crochet project is “hook-only”.
Posted on 5 Comments

What IS Crochet, Really?

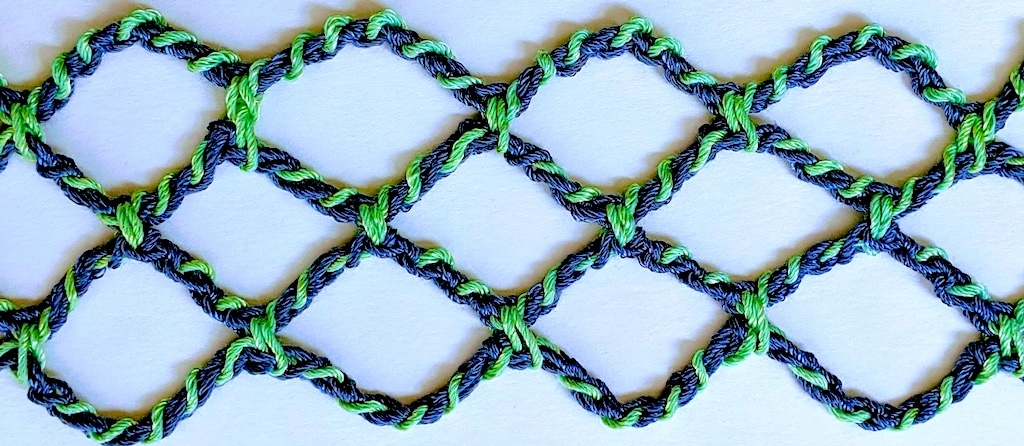
'What is crochet' issue: Unusual mesh of two-color very tall stitches

“What Is Crochet, Really?” was first published as issue #103 of Vashti’s Crochet Inspirations Newsletter. I sent it to 8,043 subscribers on October 9, 2020 with the title, “The Big Picture of Crochet”. I’ve updated the third paragraph (“This idea for a newsletter topic…”) as of Nov. 2, 2020.

I have a fresh big picture of crochet to report.

I’ve worried about whether you’d be interested in my “what is crochet” thoughts, but you know what? It’s crochet theory, which we don’t have enough of, so I’m probably not alone in pondering it. 

For help in my quest I turned to national libraries, big crochet sites, encyclopedias, and academia. How does crochet fit into the larger world? How is it defined by and for non-crocheters, versus crocheters? Within the subject of crochet, how is its huge variety organized into subtopics? 

This idea for a newsletter topic grabbed hold of me thanks to three writers (I’ve listed all mentioned sources at the bottom): Cary Karp, Rachel Maines, and Sue Perez. Cary’s Loopholes blog has several thought-provoking posts and published articles about crochet history and structure; his “Defining Crochet” article had me mulling “what really is crochet” for weeks. It turns out that my “how does crochet fit into the larger world” question is addressed in Rachel’s book. Sue’s new category-crossing crochet book was an indirect trigger (see Links at the bottom).

Continue reading What IS Crochet, Really?
Posted on 9 Comments

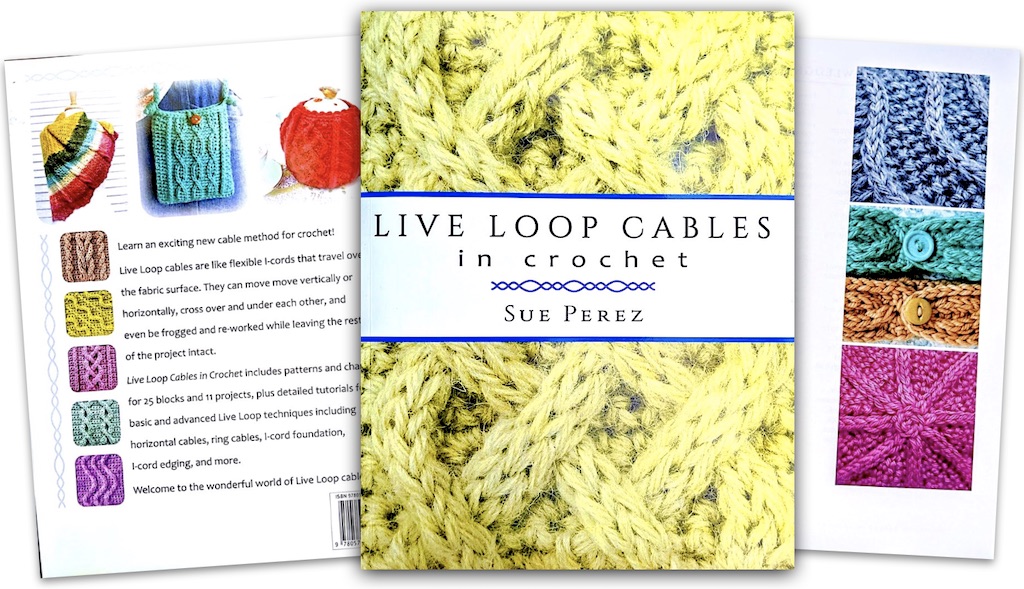
Book Review: Live Loop Cables in Crochet

Live Loop Cables in Crochet book by Sue Perez cover

There’s a new crochet technique book you need to know about: Live Loop Cables in Crochet by Sue Perez, ISBN 9780578720678. This is Sue’s first crochet book, and she’s been writing about crochet for a long time on her blog, Mr. Micawber’s Recipe for Happiness. (Link goes to her post about the book where you can see lots of great photos.) We’ve connected on other geeky stitch tech things over the years, like limpets and weird foundation stitches.

I’m excited about live loop crocheting (I’ve had a newsletter issue in mind about fun with live loops for years), so I bought this book the moment I found out about it. It’s my first Amazon print on demand purchase. The book arrived quickly and the print quality of the full color photos, and detailed diagrams, is great.

“Live Loop”?

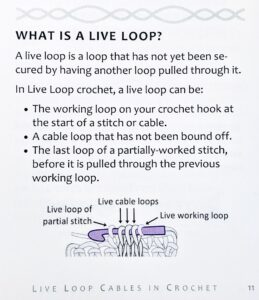
Excerpt: what is a Live Loop from page 11
From Sue Perez’s new book Live Loop Cables in Crochet

A live loop is a simple and unique thing in crochet: it’s a loop that could unravel. It’s in a transitional state. It needs another loop to be pulled through it to secure it.

I’ve also heard the term working loop used for this special loop that’s on your crochet hook as you crochet. If there’s more than one loop on the hook, they’re all working loops or live loops.

I think of “working loop” as referring to the loop(s) on the hook. I think of “live loop” as a working loop that is not on the hook and so it needs to be watched (kind of like a “live wire”).

Partial Stitches

One of the things that excites me about Sue’s book is that it explores what crochet loops can do while in a prolonged live state. It’s like a science fiction story where a little stream of time splits off from the main river of Time. The live loop cables are running on a separate little stream. You can even unravel some cable loops to fix an error without disturbing the background stitches.

The standard crochet method is to work an entire stitch (start, post, end) at a time. But you can also work multiple posts, or partial stitches…then complete them as individual stitches by linking the working loops one at a time.

From page 7, “Standard Crochet vs Live Loop Crochet” in Live Loop Cables in Crochet

A Hybrid Technique?

Knitters seem to recognize something about this technique. I’ve seen a few people associate it with i-cord. I can’t speak to these associations with knitting because I haven’t knitted since I was ten years old. I wouldn’t be writing this review on this blog if any knitting knowledge were needed to understand or enjoy the book.

It’s written with crochet language for crocheters. In fact, there are many little ways that I see a crocheter’s touch in the book design. I also see a crocheter’s understanding of what it’s like to learn a new crochet technique. Sue even developed a way to chart the cables for people who are spatially challenged (“like herself” she says). I also love the guidance she gives about overlooked basics like distinguishing the right side and wrong side versus the front and back. There is so much more than this too.

I mention this for two reasons: first, if you do also knit, something about this technique may be familiar to you. Second, it doesn’t have to be a hybrid technique for you. It isn’t for me. I just experience it as crochet. Theory wise, live loops/working loops are a simple crochet fact, so a technique exploring them holds up as crochet for me. Live loops have been used in other little pockets of crochet for a long time. (Hence the newsletter topic on the back burner.)

Plenty of Projects

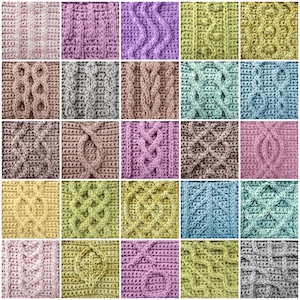
25 live loop cable blocks in Sue Perez's new book
The 25 live loop cable blocks

This is a large-format 173-page book. The first 32 pages are thorough step by step explanations of the technique. THEN, patterns for twenty-five cable blocks take you to page 100. Each block has a color-coded chart, color photo, and often a helpful little diagram of a special step, or a design tip.

For the remaining 73 pages there are eleven projects, plus some reference material at the end. There are hats, mitts, cowls, a scarf, shawl, tea cozy, bag, bowl, and headbands. (Scroll through this blog post to see them all.) They would all make very useful gifts. This is an important new crochet technique.

You may have seen Sue’s designs in Interweave Crochet, I Like Crochet, Love of Crochet, and for SweetGeorgia Yarns. Her designing and pattern writing experience shows.

Congratulations, Sue! It’s a remarkable book that raises the standard for crochet technique book publishing. I know you must have given it your all because it is so finely word-crafted and illustrated. Thank you for your contribution to the field of crochet.


Live Loop Cables in Crochet by Sue Perez is available from Amazon. (The custom link is the author’s.) Sue also has a Youtube channel; view a 2017 video of her live loop technique.

Posted on 8 Comments

Limpet Stitch: Crochet Half Hitches (Issue 3)

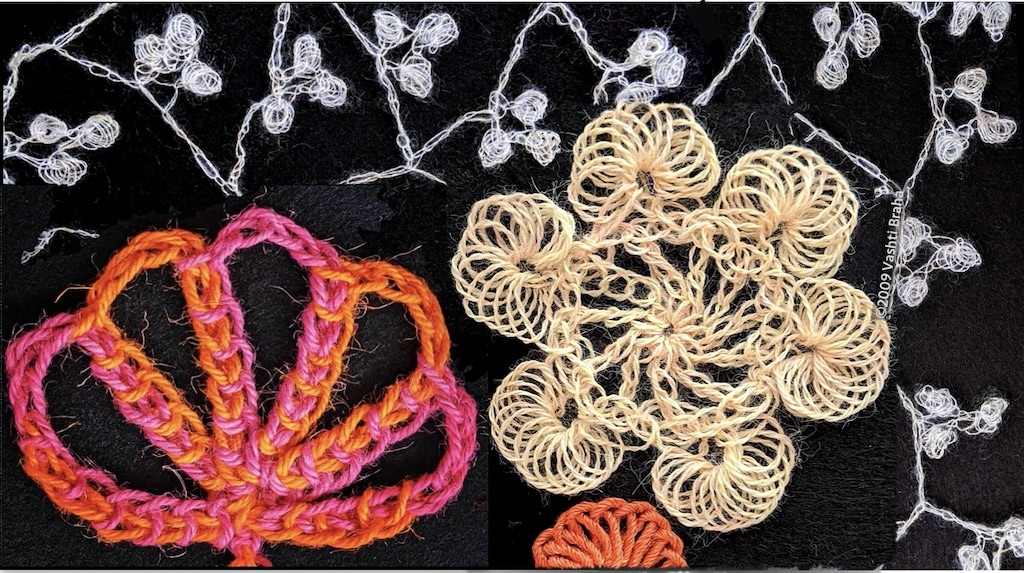
Limpet stitch crochet swatches: an airy net, a lotus-shaped 2-color fan of half hitches, lacy wheel with big limpets around the rim
Limpet Stitch crochet issue 3 original front page
How the original looked. Issue #3 September 2010.

Updates October 20, 2020: I expanded the Timeline entries for 1977, 1982, and 1991.


The limpet stitch crochet topic evolved dramatically in the ten years since I wrote my third newsletter about it. As of September 4, 2020, this greatly updated version is now my ultimate resource page for crocheting limpets, limpet variations, and more reasons to crochet with half hitches. It even has a timeline and a table of related terms.

“Limpets, those cheery, little-used sideways shells.”

Sue Perez (a.k.a. Mrs. Micawber)

Issue #003 went out to just over 370 subscribers in 2010. That’s about 70 more than for issue #002. I remember feeling very encouraged by that. One of my early goals was to find likeminded crocheters. Back then, the only folks talking (enthusiastically!) about the limpet stitch, like Mel, Myra, Barbara, Margaret, and Pippin, were members of FFCrochet, the International Freeform Guild (INTFF) yahoo group. Limpet stitches have expanded their reach, as you’ll see below.

From the Archives: A Very Different Kind of Crochet Stitch

Vashti’s Crochet Inspirations Newsletter, Issue #3 (First Published September 30, 2010)

I’ve been looking forward to writing up a little love letter to the Limpet Stitch. It’s not like any other crochet stitch because it is a fundamentally different way to add loops onto the crochet hook. (September 2010)

The first thing a crocheter learns, after making a slip knot and putting the loop on a crochet hook, is to yarn over (wind or wrap the yarn around the crochet hook). We can’t make any basic stitches without it. Strictly speaking there’s only one way to do it. If you wind the yarn around your hook the opposite direction, it’s a yarn under. (Read all about yarn overs, yarn unders, and reasons to use both.)

There are other ways to add new loops to the crochet hook beside yarning over (or under). The one we use for limpet stitch crochet is challenging at first only because changing how you yarn over feels very alien! It’s actually simple, easy, and quick to do. The limpet stitch has an avid fan club.

Beyond the Standard Yarn Over

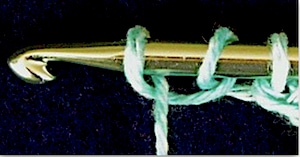
Half hitch or crossed loop on crochet hook
This is a Tunisian crochet hook but any crochet hook is fine for crocheting limpets.

From a crocheter’s point of view, limpet stitch yarn overs have an added half-twist in them. In the photo at right you can see how the two loose loops on the hook have a little twist at the bottom of them. Adding the half-twist as you yarn over is a neat trick.

This simple little twist is powerful. It is the basis of all needle lace, macramé, and tatting. It’s fundamental to sewing and embroidery. Latch hook rug making requires it, and bobbin lace starts with it. It’s the simplest cast on in knitting.

Making room for it in our crochet toolbox means reclaiming the DNA that crochet shares with these other string arts. You may wish to make room for two more, like I have. The little half-twist can turn in two different directions: to the left (counterclockwise), or to the right (clockwise). The two loops in the photo turn to the left, as if a cursive letter “e” is written backwards: “ɘ”.

Continue reading Limpet Stitch: Crochet Half Hitches (Issue 3)
Posted on 5 Comments

Tall Stitch Virtuosity Class Resources

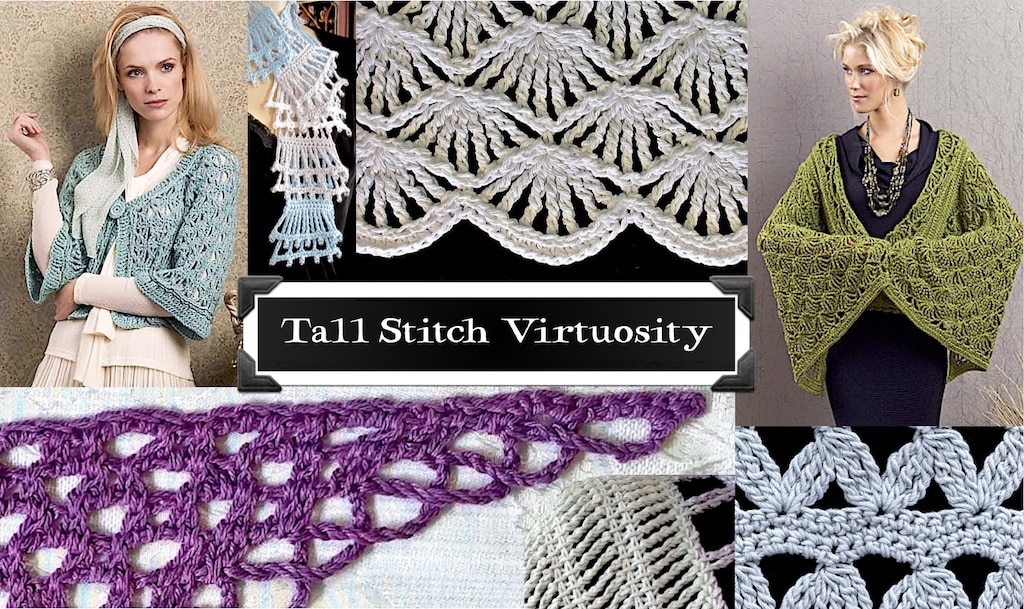
Collage of many examples for Tall Stitch Virtuosity Crochet Class by Vashti Braha

Tall Stitch Virtuosity is a new crochet class for 2020. I’ve discovered more than I imagined is possible about tall stitches! In fact, the official class graphic above is about six months old and already seems out of date.

Originally scheduled for the July 2020 Chain Link conference (an annual national event of the CGOA), Tall Stitch Virtuosity is now virtual. The traditional in-person conference is postponed until next summer. The virtual version is split into one-hour sessions over three consecutive days.

This is the first resource page I’ve created for a virtual class. At first I thought a virtual class wouldn’t need one. I started these pages back in 2012 to make online links easy to visit for an in-person event. I’m finding that I don’t want to load up the class handout (a PDF in this case) with what I think of as miscellany. Also, members might have a chance to visit this page over the three days of the class.

— Vashti Braha

Tall Stitch Virtuosity 2020

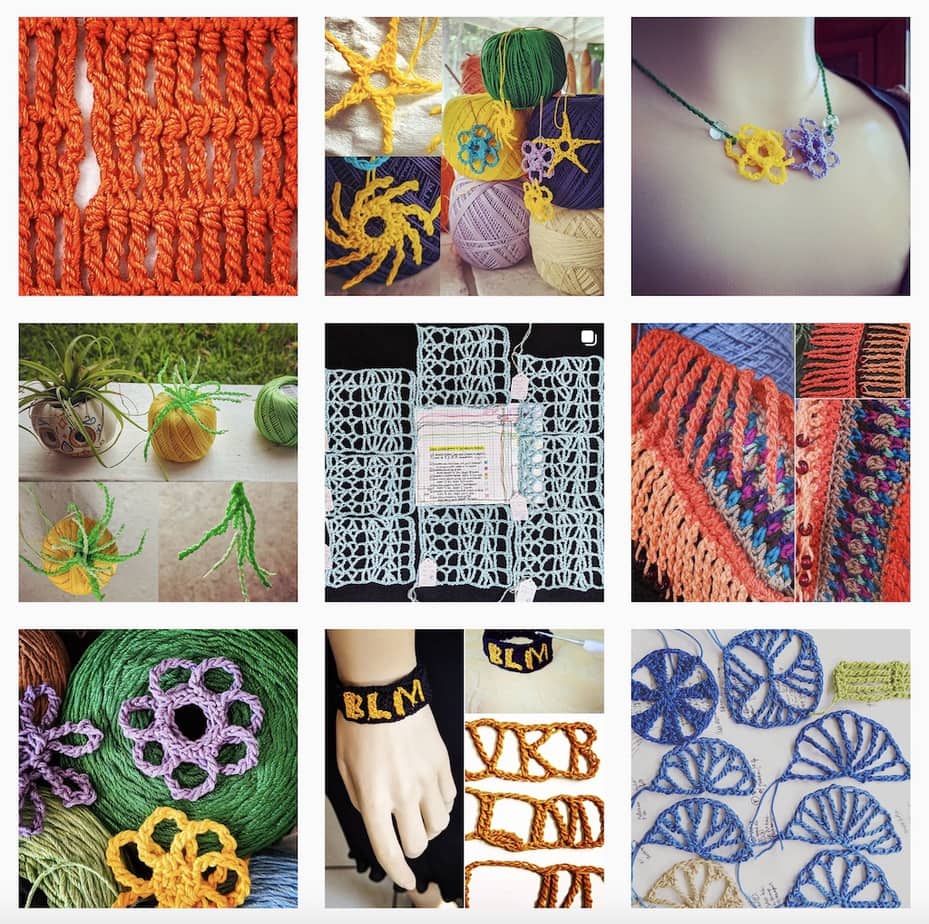
Nine tall stitch crochet experiments that I've posted recently in my Instagram feed.
Recent tall stitch swatches I’ve posted to my Instagram feed.

Newsletter Issues & Blog Posts

These are issues of my Crochet Inspirations Newsletter, and blog posts, spanning 2010 to today. Keep in mind that many links in pre-2018 newsletter issues are broken.

Tall Stitch Patterns

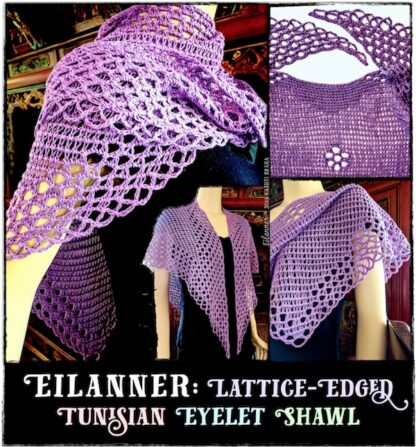
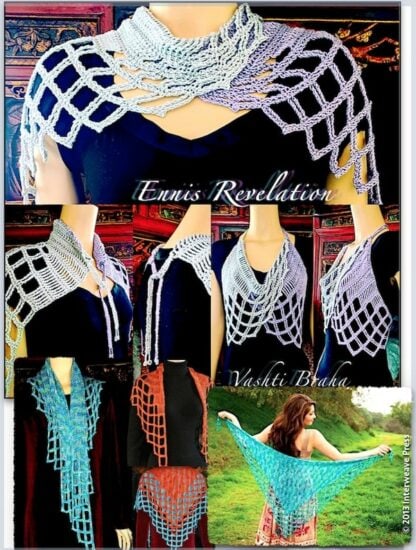
Some of my published tall stitch patterns over the years. Half of them are Tunisian crochet. Click an image for more info. Missing: Cats Eye Lariat (in Ravelry) and Twinkle Links.

Tall Stitch Projects & Swatches

Tall Stitches Around the World Web

  • Tall Crochet Stitch Artistry pinboard (Pinterest)
  • Bloggers on the lack of tall stitches:
    • Jenny Guldin: “Most lists of the basic crochet stitches end with the triple crochet. Call it a new technique, or call it breaking the rules: I’m tired of being limited to the height of a triple crochet, and I’m not going to take it anymore! Why isn’t there a taller stitch? I’ve received varying answers from many crocheters, but I’ve never heard the suggestion “try it”. There are two basic points of view I’ve heard about the subject: It doesn’t exist, or, there’s no purpose for it. With all due respect, I have two responses: I’ve made it exist, and there is a purpose.”
    • CrochetSpot’s Amy Yarbrough: “These stitches are not very well known today because most modern crochet patterns do not use them. This begs the question, when are they used then? Perhaps the most I have seen these taller stitches used would be in patterns with crochet thread. Such as Irish Crochet Lace, crocheted Antebellum Dolls, and crocheted Doilies.”

Issue 102: Wild Whys of Y-Stitches

Crochet Inspirations Newsletter sent to 8,600 subscribers on June 13, 2020.

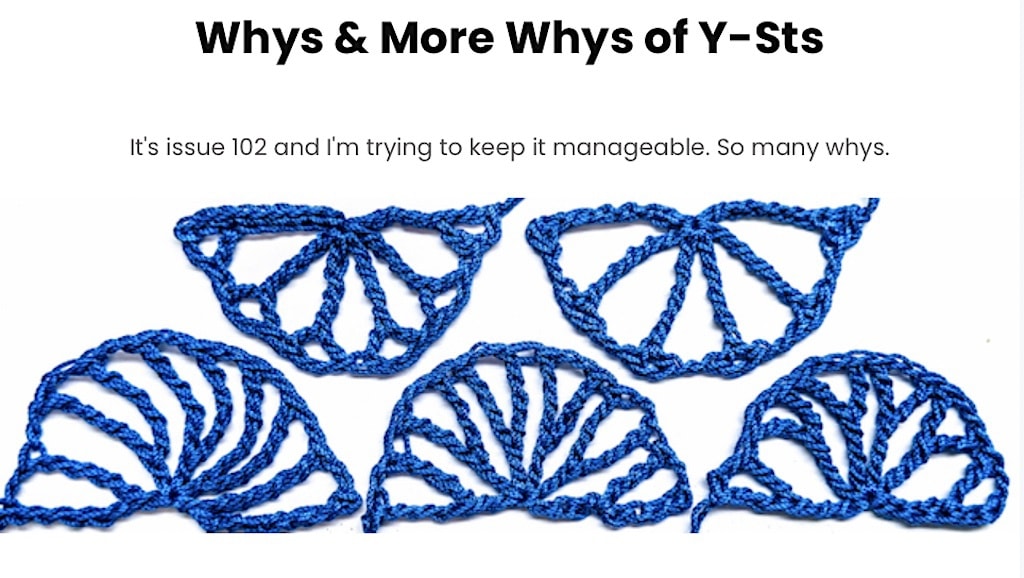
Very tall stitches shown as 5 kinds of Y stitches for improving semicircle shapes
(Original header)

These semi-circles are crocheted of Y-shaped stitches. In each case I started with a quadruple-treble stitch (quad; in the UK and AUS I do believe it’s a quint). Yarn over 5x to begin one. After each completed quad I chained 2, then crocheted a shorter stitch into the side of the quad to turn it into a Y-stitch (Y-st).

I’m going to call the shorter stitch a branch that is crocheted into the taller one, or host stitch

The Y-sts in these semi-circles vary from very deep (farthest left one) to very shallow (upper right). The longest branch, a triple treble (I yarned over 4x to begin it), is crocheted close to the base of its host quad. The shortest branch is a half double (hdc in the US, htr in UK/AUS). I crocheted it up close to the top of the quad.

Don’t you love how the lacy look changes just from this simple difference?

I also really love how Y-sts look when they radiate from a center. It’s what lured me down a rabbit hole of new delights.

Every stitch you see in this newsletter is my own new stuff.

Four tall stitch circles with new looks thanks to the branches you can add to the sides of them

Branched? “Rune” Stitches?

I searched 34 crochet books for these stitches (16 are stitch dictionaries and the rest are guides to crocheting). Of the 34, 14 at least mention X-stitches. Very few include Y’s and inverted Y’s, or really run with with any of them. 

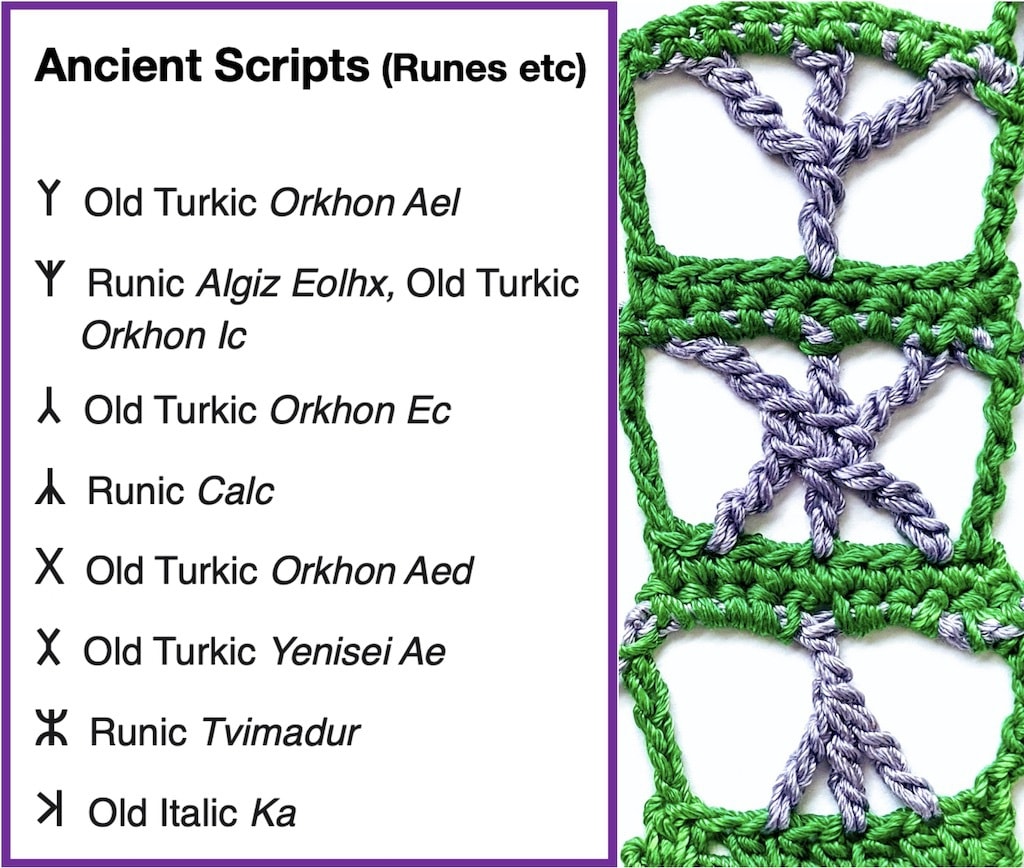
When I think of “Y-stitches” I picture a category of stitches that remind me of runes and ancient symbols! 

Bend a tall stitch or two to form letter shapes

The list above is about half of some old letters I’d like to try crocheting with branchy tall stitches. See my swatch of a few modern letters in Instagram. (These crazy B’s are for Braha and for Black, as in Black lives matter, and for Because of course they do.)

The first blue wheel above was inspired by ancient wedge-shaped cuneiform strokes. I see the green motifs as being Druidic wheels of seven “trees”. In fact, lately I see Y-stitches all over the place in nature!

Key Y-Thinkers

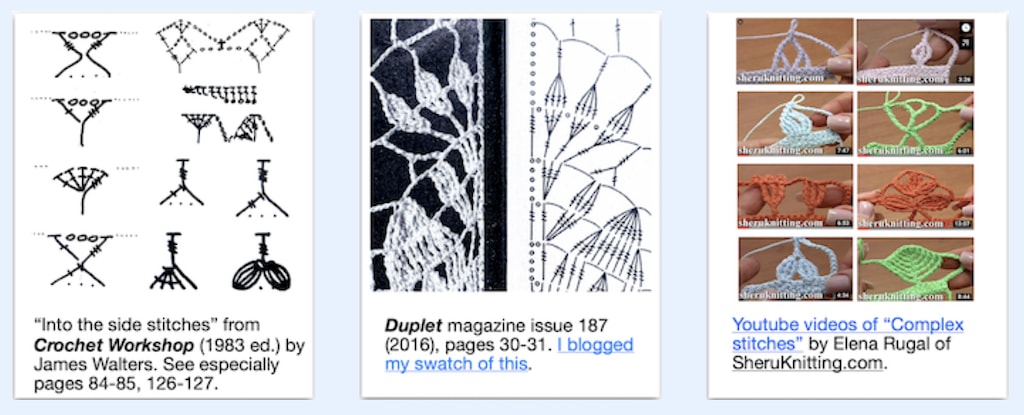
My three favorite sources on these stitches: James Walters, Duplet magazines (Irene Duplet), and Sheruknitting videos (Elena Rugal). It’s not a stitch shape. It’s a way of thinkingThank you so much James, Irene, and Elena!

Examples of tall stitch artistry by James Walters, Irene Duplet, Elena Rugal

How To?

I need to blog that. I have ideas for how to sort out the yarn overs, and make the most of them for motifs. Until then, I mention Y-stitches with a how-to link in my tall-stitch circles blog post. Also try some Sheruknitting videos. 

Can you spot the Y-sts? And X-sts in the upper-right blue circle? Y’s are fabulous for reducing the number of tall stitches in round one AND for suavely doubling every stitch as required in round two.

Using tall stitches for circles is how I got here. I had no idea how practical and problem-solving Y-sts could be for crocheting circles—the taller, the better. They offer creative solutions and pretty options for tall-stitch circle crocheting!

OK One More Y-Why for Today:

Convert Two Rows into One

[This section got its own blog post a few weeks later; the light green swatch referred to is also pictured there.]

Sometimes, two or even three rows of a stitch pattern can be turned into one row, using using taller into-the-side stitches. Here’s a two-row shell-and-cluster stitch pattern (upper swatch) turned into one-row one lower swatch). 

You can get more stitches to face the front this way. It also removes a “grid” effect caused by the connections between every stitch across a row. It fits in the “clever substitutions” category which is the topic of newsletter #92.

That grid effect adds structure to the fabric. Removing them adds more drape. So it depends on the yarn and project.