Posted on Leave a comment

Day 4: Completing Special CGOA Forms

Blog it to Do it? It’s Working!

I’m already seeing that blogging these 50 steps in 50 days helps me do them sooner. Here’s one: filling out special event forms. A few months before every CGOA conference, decisions must be made about fun opportunities. There’s probably a form for it.

DONE: Forms for Teachers and for General Attendees.

All CGOA members are encouraged to enter something in the design competition and in the fashion show. The fashion show takes place during the big gala banquet at the end of the conference. There’s a simple form for that. (Of course attendees also need to fill out the registration form for classes and special events. Reserve this year’s commemorative pin! It’s only $5.)

CGOA teachers filled out most teaching forms back in the fall when they submitted class topic proposals. Other than that, teachers need to:

  • Make sure they’ve registered for the fashion show banquet.
  • Look for the email with the deadline for shipping class materials to what address.

I’m up to date here.

HALF DONE: CGOA Forms for Exhibitors.

I found out last year when I had my first show booth that exhibitors receive two packets of forms and information (in PDF format). The first packet comes from the CGOA staff and the other one comes from the hotel/convention center management. Each usually has handy check off lists.

(Pictured: In this 2015 photo I’m wearing the exhibitor badge that I filled out a form for again this year.)

Last year I read all of the fine print. ALL of it. This year I only need to skim it. I don’t feel overwhelmed with all the information, choices, and deadlines this time. I still have decisions but not the detail overload. It’s easier to prioritize.

I’ve received the first of these two packets so far. The Exhibitor Badge Order Form is the most important one in it. DONE well before the June 15 deadline! And so happy to be able to list Doris Chan and my husband as two of my seven fabulous helpers to receive badges.

Printed out the Grand Prize Donation Form so that I can mull it over. That’s it! If I don’t get to the rest of the first packet (advertising options, etc.) it’s ok.

-:——-:-

CGOA Show opening 2015 San Diego
In this 2015 photo I’m wearing the exhibitor badge that I filled out a form for again this year.

[If you need more information about attending, teaching, or exhibiting at this event, email [email protected] or call 740.452.4541 .]

-:——-:-
 

Posted on Leave a comment

Foundation Star Stitch Love!

Foundation Star Stitch!

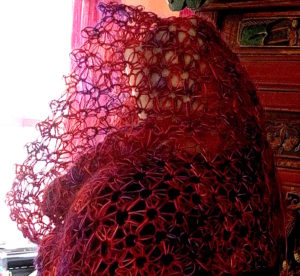
Because why crochet stars into foundation chains when you could start with a supple starry foundation?

This swatch satisfies two of my wishes for The Starwirbel Way: Shaping and Spiraling Star Stitches class. I’ve been dreaming of adding a foundation star stitch to the cool foundation stitch category, and I really like how this one came out. It’s flexible and stretchy with a balanced structure, like a good foundation stitch.

2018 Update! Here’s the step-by-step tutorial for how to crochet it.

I abbreviate it Fstar in keeping with how other crochet foundation stitches tend to be abbreviated in patterns.

Starwirbel could be started with the foundation star, but it’s not part of pattern or the class description, so it’s an extra feature. (I’ll be happy to demonstrate how to do it in class if anyone asks.)

2018 Update! The Starwirbel pattern now includes the Foundation Star and a stitch diagram.

Firewirbel, a Starwirbel crocheted with Alchemy Yarn Tweedy

My other wish was to try a new yarn or two for the design. Schulana Kid-Paillettes is the stunning yarn I used a few years ago for Starwirbel. I found no close substitutes for it back then. I’m excited about the one shown here: Alchemy Yarns’ Tweedy. The way it’s hand dyed gives this foundation star stitch a fiery look! One of the strands that shows up well in the photo is silk raffia. The play of light is unique.

2017 Update! The Alchemy Yarn grew up to become Firewirbel

I also found another special yarn that I’m waiting to swatch: Mohair Luxe Paillettes by Lang.

These are just wishes–not critical requirements to be ready to teach this topic, but crossing these off the wish list makes me happy. And now I’m off to tell my friend Marty Miller, goddess of foundation stitches!

Posted on 2 Comments

Simple Tunisian Lace Nets: Day 2 of 50

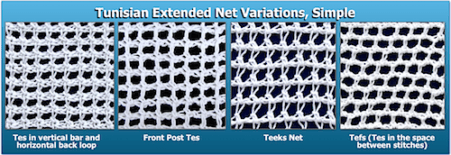
Tunisian extended stitches (Tes) crocheted into each row four different ways (Tefs, Teeks, front post etc)
Four of many simple ways to vary a Tunisian net lace.

Class Handout Progress: Steeking Tunisian Lace

The graphic above completes a section of the Steeking Tunisian Lace class handout. The base stitch is Tunisian Extended Stitch, or Tes. This chameleon-like stitch has other names and many variations (discussed in newsletter #49). It’s versatile, slightly odd, and one of my favorites, so I’m delighted to teach this class topic for the CGOA conference.

These four swatches contrast some of the simplest variations of this Tunisian lace net.

“Teeks” stands for Tunisian knit stitch extended twice. Easier to say than Tkse².

I’m also creating a graphic of fancier variations of these nets for comparison (and inspiration!). Have a look at this ripple variation! And I love these two-color versions.

I plan to pin them to my Pinterest boards like when I swatched and pinned a slew of star stitch variations a few years ago.

Posted on 5 Comments

Day 1 of 50: Crochet Conference Prep

“Day 1 of 50”?

Yes. Fifty days of updates. Fifty is 7 weeks-and-a-day, a nice round number. I need all 50 because I’ll be teaching 5 different 3-hour classes at a crochet conference while managing a booth in its market. It’s epic.

A friend is preparing to teach at the same event for the first time, and another friend is considering it in the future. They’re on my mind as I do this prep again. (It’s my 2nd time having a booth and I think the 6th time teaching lots of classes.)

I’m going to track my progress and thoughts out loud as I go. Some days it’s teaching prep, other days it’s booth merchandise/yarn company stuff, and always lots of swatching and designing. Most days it’s a jumble and I’ll blog a highlight of it. Years from now I’ll enjoy looking back over this.

Today I Cross a Big Teaching Item Off the List

The yarn used in a crochet conference class can matter immensely. Having also taken many crochet classes, I know how hard it is for students to choose which yarns to bring to class.

I asked a yarn company if they would sponsor my Stitch Games class at the crochet conference. This means they would donate enough yarn for all the students to use. Today they said yes

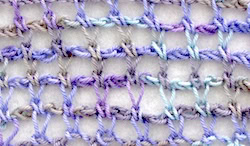
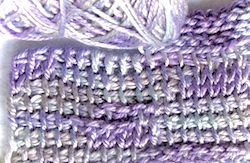
This makes my week. Their hand dyed yarn is my first choice for this class! (Below are swatches of this company’s yarns in soft colors. These are tests for other class topics.)

I’ve used it so much while developing the Stitch Games swatches and designs. I know its fiber, weight, bounce, and twist work for key stitch patterns, and I find the color sequences are dependably easy and fun for crochet. I want each student to have the best possible experience learning something unfamiliar. This yarn helps guarantee it!

This colorway is custom hand dyed for my local yarn shop. It’s called “Grape Jelly” and is based on the colors of the Crown Jellyfish photographed by the yarn shop owner in Fiji’s Rainbow Reef.

Bare Bones Scarf is crocheted corner to corner as a “game” in which you assign stitch groups to yarn colors! It’s one of three patterns in the Crochet to the Colors Playbook.

Posted on 1 Comment

Crochet Along Shaping Thoughts (Jempool CAL)

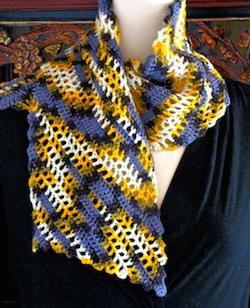
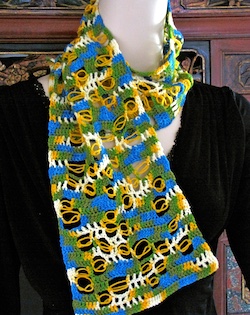
Jem CAL: Crochet Along Announcement for the Jempool Scarf methodThere’s a crochet along (CAL) going on right now for the Jempool Scarf. All the posts are public and it’s free (the pattern and technique info is $5), so anyone can join in any time.

While I was crocheting Jempool, I wondered if I should complete it as a traditional rectangular scarf. Maybe it would like to be something different?

I quickly discovered that when you stack each color of a variegated yarn, you can’t just increase or decrease stitches to shape a sleeve or neckline. The color repeat sequence becomes the pattern repeat.

Below are some sketches from when I was working this out. I needed colored pencils to help me see if there might be a 2-skein version I’d prefer even more than the simple 1-skein scarf.

Sketched ideas for other shapes of the basic Jempool Crochet Along rectangle.
A few ideas for shaping with a fixed-width rectangle.

If one complete color sequence gave me a 9″ (22.86 cm)-wide scarf, that 9″ is a fixed pattern repeat. That means I could double it (or triple, etc). In this case the colors are symmetrical, so I could also halve it; a 4.5″ pattern repeat is easier to design with.

So as part of the crochet along, if you try a Jempool and you’re loving it but you don’t need to end up with a scarf, you could think of it as a repeatable motif. A handy seam here or there could yield a ruana, poncho, shrug, etc.

Jempool is reversible, so it could easily be turned into a möbius. I’d just need to add a half twist then seam together the two ends.