Posted on 6 Comments

Crochet Mask Lanyard, A Hook-Only Free Pattern

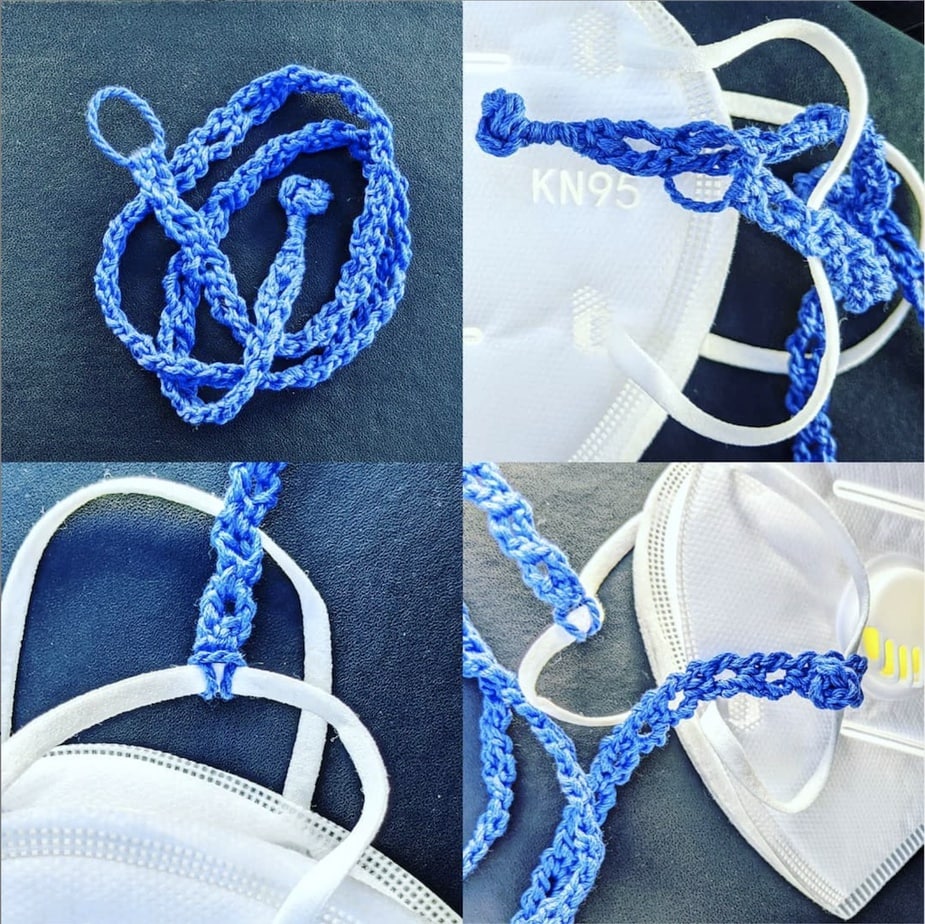
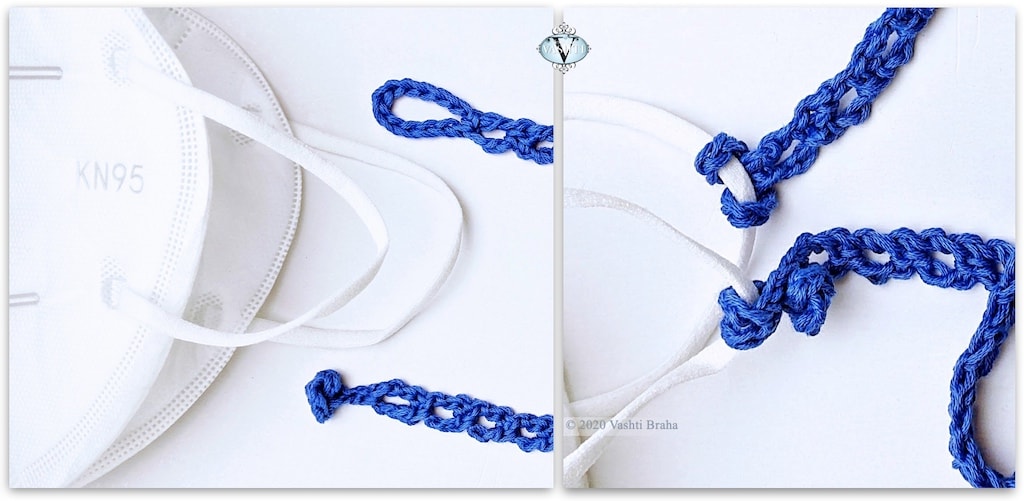
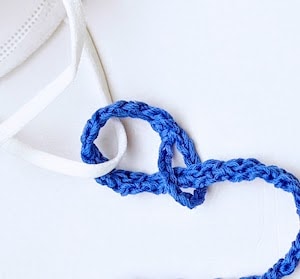
Crocheted fasteners before and after attaching to mask

This reversible crochet mask lanyard attaches to each ear loop of a face mask with 100% crocheted fasteners. No sewing on buttons or metal hardware!

Wear the lanyard around your neck. If you remove your mask, there it hangs, already found, like wearing reading glasses on a chain.

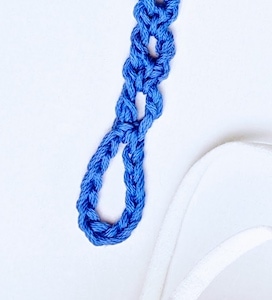
The chain loop end attaches with a lark’s head knot, explained below. The other end has a crocheted peg-like “shank” button. It loops around the other ear loop and buttons into a stitch space of the lanyard. This makes the length easy to adjust. The mask loops can be any thickness.

Three Favorite Things

My favorite thing about this pattern is that it’s “hook-only”: 100% crochet, even the fasteners.

My second-favorite thing is it’s a chance to use my new rosebud button idea for a project. It’s reminiscent of a Chinese frog closure, but like I say, no sewing! Also, unlike some button knots, zero chance of it coming unknotted.
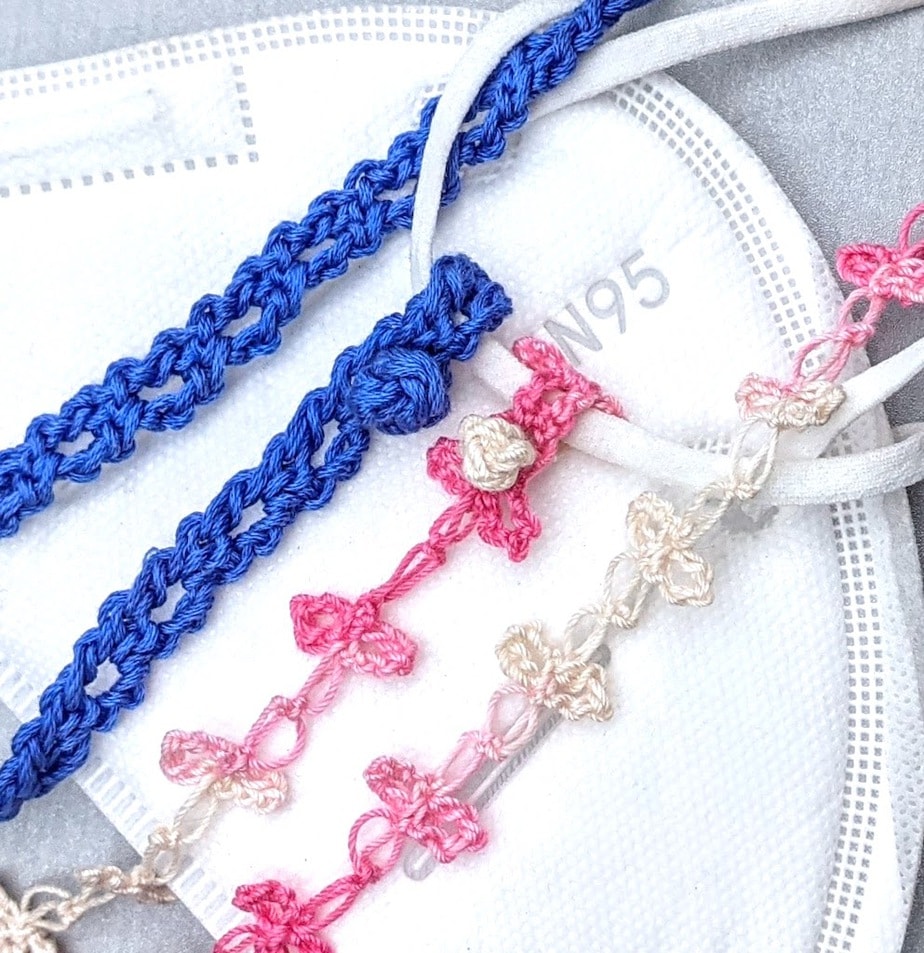
Crochet mask lanyard button in two thread sizes
Free crochet mask lanyard pattern below is for the blue one in sport weight cotton yarn.
The pink one in size 10 thread uses parts of the same pattern.

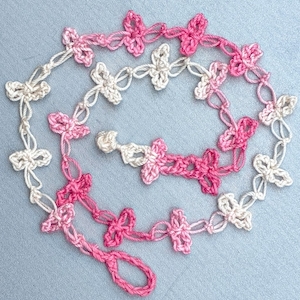
And, third, this pattern doubles as a versatile template. I’m already borrowing individual elements from it. The lacy pink love knot lanyard has the same chain-loop end, rosebud button end, and even a few repeats of the blue cord to serve as buttonholes (near the button end). If you have a cord pattern you like, add a few elements from this pattern to keep it hook-only.


Crochet Mask Lanyard Pattern

A PDF version of this pattern was emailed to members of the Crochet Guild of America (CGOA) as a part of a Holiday Shopping Guide, December 1, 2020.

Materials 

  • About ten yards of a sport weight (CYC Size #2 Fine Weight) yarn. Shown (in blue): Lang Fiorina (100% cotton, 135 yds / 125 m per 1.75 oz/50 g)
  • Size E / 3.5 mm hook
  • A stitch marker is recommended for the first few rows
  • Yarn needle

Abbreviations used

Pattern uses US terms. UK/AUS terms are in { }

  • ch = chain
  • dc = double crochet {UK: treble}
  • hdc = half double crochet {UK: half treble}
  • sc = single crochet {UK: double crochet}
  • sl st = slip stitch
  • st = stitch
  • yo = yarn over {UK: yarn over hook}

Gauge 

8 pattern repeats (row pairs) = 4″ {10 cm}. Exact gauge is not necessary for this pattern to work.

Size

21 inches {53.34 cm} long. Length is determined by the number of pattern repeats so it’s easy to choose a different finished length.

Pattern Notes

  • Pattern begins at the fastening loop and ends at the other end with the button. The strap between these two ends has a two-row repeat: it’s a long narrow column of just one stitch per row.
  • To begin each new row, turn your work clockwise. (If you’re crocheting left handed, turn the other way.) The yarn will end up in back of the hook and turning chains instead of in front of them.

Instructions

Time needed: approximately 30 minutes


Chain 12. Hdc in 12th ch from crochet hook to form a ring.
This is the fastening loop.

  1. Ch 3, dc in the same ch as the hdc.

    Simple chain loop lanyard fastener close up

  2. Ch 1, turn, place marker in bump of ch and in a top loop of dc, sc in space between dc and ch-3.

  3. Ch 3, turn. Dc in bump of turning ch-1 and back loop of dc (the marked loops). 

  4. Ch 1, turn, move marker (until you can identify the loops to crochet into), sc in space between dc and ch-3.

  5. Repeat steps 3 & 4: 38 times or until it’s the length you prefer.

    Do not fasten off.

  6. Rosebud Button

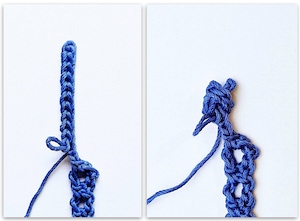
    Crochet all stitches tightly. Ch 13, sl st in the front loop of the 2nd ch from crochet hook, sl st in the front loop of each of next 10 chs. Leave last ch unworked to form the “shank” at the button’s base. Remove crochet hook from loop for the next step. Place marker in loop to secure.
    Tie the strip of 11 sl sts into a simple overhand knot so that the tip of the sl st strip peeks out. Ignore how it looks for the moment. Replace hook in loop and in two or three strands of the sl st tip, and tightly sl st around the unworked ch-1 of shank. (Knot will bend over.) Sl st in same ch, sl st in nearest next stitch, fasten off, and weave in ends.
    Tug on sections of the button knot to even it out; plump it up to make it cute. The goal is to center the shank under a mushroom cap shape. Spritz with water to set it.Crochet Rosebud Button steps 1 & 2 of 4 © Vashti Braha 2020
  7. Attach to face mask

    Slide loop end under an ear loop of the mask. Feed the button end through the loop end and pull the full length of the lanyard through so that the loop wraps around the ear loop tightly with a lark’s head knot.
    Slide the button under the other ear loop of mask. Fold button over and press it through one of the nearby spaces of a dc row. (Reverse these steps to release lanyard from mask.)
    If the length you made doesn’t fit over your head, attach the button end after you’ve placed it around your neck.How to attach crochet loop to mask ear loop
  8. Variation I

    Wrap the fastening loop with the starting yarn end, and wrap the shank of the button with the other yarn end when you’re about to weave in the ends. It’s a nice look. I did this for the button shank of this prototype.Crochet mask lanyard prototype shows a wrapped fastening loop and button shank.

  9. Variation II

    Use your own favorite crochet cord pattern and incorporate sections from this pattern. Here’s how the complete pink love knot example looks:Crochet mask chain of lacy pink love knots and crocheted fasteners.


FAQ About Crochet Mask Lanyards

Why crochet a face mask lanyard? Is it better to crochet one?

Crocheting a lanyard is easy and fast, especially when you can also crochet the fasteners. Crochet makes a strong and durable lanyard with very little yarn (about ten yards).

Are crocheted lanyards washable and comfortable to wear?

Yes: use a soft, washable yarn. It’s comfortable and almost weightless. I forget that I’m wearing it sometimes.

How much yarn do I need to crochet a mask lanyard?

The pretty blue one shown here required only ten yards of a sport weight cotton yarn, and a size E (3.5 mm) crochet hook. Even the lanyard clips are crocheted!

What’s the difference between a mask holder, mask extender, mask chain, and mask lanyard?

“Mask holder” and “mask extender” usually refer to a small strip that has a button at each end. Wear it to eliminate pressure or irritation behind the ears. It shows at the back of the head where the ear loops of the mask hook around the buttons instead of the ears. Another term is “ear saver”.
“Mask chains” and “mask lanyards” drape around the neck like necklaces. It’s the same idea as wearing a badge holder, or a chain for reading glasses.

How long does it take to crochet mask lanyards?

The simplest one of all—just crochet chain stitches—would take 5-10 minutes. The fancier one shown here took 30 minutes.

Do I have to sew buttons or metal clips onto a crocheted mask lanyard?

No. It’s possible to crochet the whole lanyard, even the fasteners! That’s what it means when a crochet project is “hook-only”.
Posted on Leave a comment

Stitch Pattern Spin-Offs from Eilanner

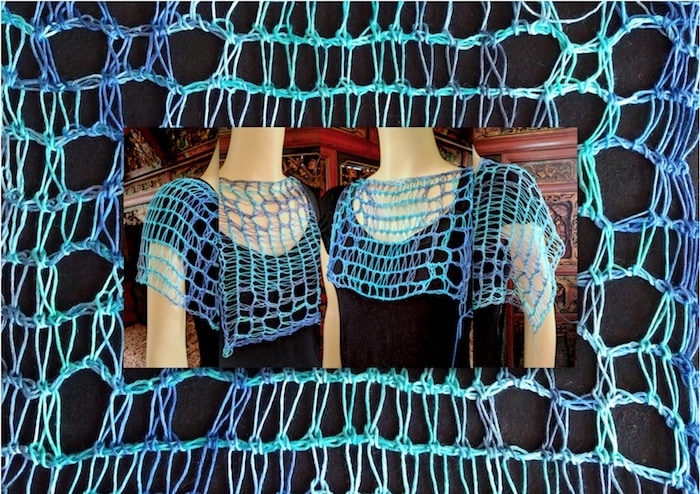
A "spin-off" stitch pattern from Eilanner design, here tested in tencel thread and draped on a mannequin
This is the gauge swatch from the new Eilanner Shawl pattern, but I used tencel thread and a giant hook for kicks. So airy! It inspired me to try draping it on a mannequin different ways. View full size.


I released a new Tunisian crochet pattern the other day. There’s a lot going on in it! I think of the design as containing modules of mini-patterns. Some of them hint at new stitch patterns.

Seeds of New Stitch Patterns

Often if you change one thing about a stitch pattern you can get a whole new effect that’s cool enough to count as a new stitch pattern. (This would be a good newsletter issue, come to think of it…) Here are some I swatched while Eilanner was being edited, and the things I changed to generate them. I posted them to Instagram.

Change the Yarn and/or Gauge

An obvious way to get a new effect with a stitch pattern is to use a dramatically different crochet hook size, or yarn thickness/fiber type, or all of these (as in that first image above). Super summery look! Reminds me of tall grasses.

There’s something else going on with it too: it’s really just a gauge swatch pattern. The skill level for Eilanner is Experienced. Getting the exact gauge is not important for the pattern but I thought it would help some crocheters to focus on just the main stitch pattern without the fancy edging at both row ends and the constant increasing.

Know what else started out as “just a gauge swatch”? Fish Lips Scarf-to-Shrug!

By the way, if you’re interested in Eilanner but worry it’s too challenging, work up to it with its predecessors. Shakti is like “Eilanner 101” and Islander is “Eilanner 102”. (I named Eilanner after Islander.)

Repeat a Special Stitch Group All Over

Another way to do a stitch pattern spin-off is take a stitch group and repeat that. Here’s Eilanner’s “tattoo flower” eyelet group repeated as an all-over motif.

This right here is a fraction of the possible new stitch patterns to generate this way! For example, the eyelets could be grouped differently, or stacked in columns instead of spread out in an alternating way. Moving eyelets around is an art form in itself.

I haven’t even tried sprinkling in stitch texture contrasts. Have a look at what happened when I added a similar stitch texture: love knots!

I woke up this morning with another idea for a stitch pattern that will probably show up in Instagram once I swatch it up. (The way Instagram displays images helps me contemplate designs.)

Isolate One Key Stitch

Not every stitch pattern has a key stitch to isolate. Eilanner does, though: the shallow-extended stitch I blogged about last week. The swatch below is pretty rustic and it’s not easy to see what is different about the stitch, but have a look.

It’s kind of loose so that I can see what the stitch texture is doing. I chose Icelandic wool for this because I love that the shallow-extended stitch is like a reversible and non-curling version of Tunisian Knit stitch.

If you like seeing my experimental swatches, follow me in Instagram where I tend to post them first. And please tell me what you like or don’t about them! It inspires designs and class topics.

Posted on Leave a comment

First Look: Yveline, a Tunisian Wrap

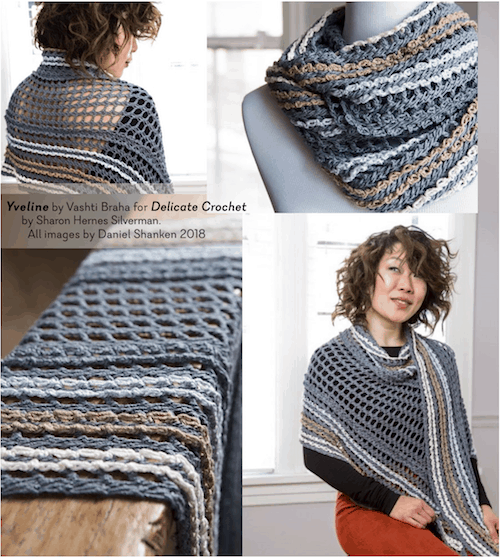
Photos by Daniel Shanken
All Images © 2018.  Photographer: Daniel Shanken for Stackpole Books. View hi-res.

I’ve been looking forward to sharing some sneak peeks! You’re looking at Tunisian crochet eyelets on the diagonal, frilled ? with love knots ?. I used our Lotus yarn in these colors: Carbonite, Pearly Pearl, Satin Grey, and Lustrous Tan.

Yveline is one of two new crochet patterns I contributed to a forthcoming book. It’s called Delicate Crochet: 23 Light and Pretty Designs for Shawls, Tops and More by Sharon Hernes Silverman. The book’s official publication date is December 1, but look for it as early as October. 

Yveline Goes to Class

I’ll be traveling with Yveline to the CGOA crochet conference in Portland OR next month because she wants to meet everyone who is taking the Tunisian Crochet on the Diagonal class AND 21st Century Love Knot Adventures.

If you’re going to the conference and you took one of my earlier Tunisian lace classes, Yveline will want to meet you too. I brought swatches to those earlier classes that have since come of age in the form of the lovely Yveline.

Her Story

First, the name. It started out “Lean In” because that’s what I called the early swatches. It fascinated me how much some Tunisian stitches liked to lean with a little encouragement. Not just how much, but the kind of movement; sometimes it’s like Tunisian lace stitches have hinges or ball joints.

When it came time for a grown up name, I was in a dual swoon from binge-watching the Versailles series while adding the love knot frills! I looked for names associated with Versailles and learned that the city is located in a département called Yvelines.

About Those Love Knots

Wallet-sized beige cashmere bag of Tunisian crochet, embellished with double ruffles, woven with grey satin ribbons.
A small bag I designed 9 years ago inspired the ruffle idea. Image missing? View it here.

I’m still swooning a bit from using love knots for surface embellishment. I haven’t seen anyone else do this and it’s just the kind of odd new thing I like to try each time I teach 21st Century Love Knot Adventures. (I mean, look at what I called the class.)

It did take several swatches. Remember last year when I did a newsletter on ruffles? It was shortly after I shipped Yveline to Sharon, the book author. I’d been swatching and meditating on the essence of a crocheted ruffle for a few months.

The Tunisian eyelet fabric is so airy and “flexy” (another name I gave to the early swatches) that most of the ruffles I tried were too heavy. I love how airy the love knot frills are! Love!

About the Ruffle Idea

The urge to frill has a story too. Years ago I crocheted the cutest little bag. It’s Tunisian simple stitch with ruffles surface-crocheted on it.

So that’s my Delicate Crochet story of Yveline. I have a very different story coming up about the other design I did for the book!

Posted on Leave a comment

Happy [inter-]National Crochet Month

This is my Crochetville NatCroMo blogging day.

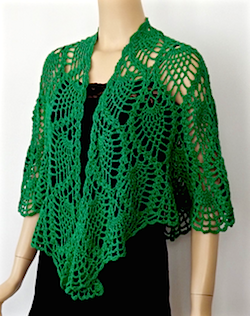
Larger wrap size of DJC Curaçao Wrap in Emerald Deep Lotus yarn
New pineapple crochet lace wrap pattern for Lotus by Doris Chan in Emerald Deep Lotus yarn.

Thanks for stopping by! It’s certainly a big weekend for us crocheters.

Tomorrow is a very green holiday (St. Patrick’s Dayso check out our DesigningVashti Lotus yarn in the new Emerald Deep color. This is a rich, satisfying, inspiring green to take you from winter to spring.

Want to feel warm and cozy quickly? 

I’ve just returned from teaching “Big-Hook Slip Stitch Crochet” in icy Chicago. I urge everyone to gather up their jumbo crochet hooks and super bulky yarns! Some of my slip stitch projects take only an hour or two this way.

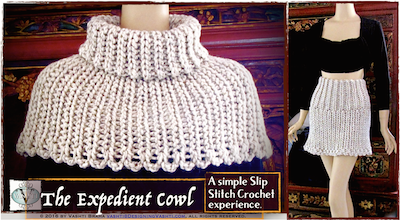
Expedient Cowl Took Only Two Hours to Make.

Beginner slip stitch crochet with a big hook!
Cozy Expedient Cowl: Use beginner slip stitches and a big hook. (Add a third ball and more rows for a trendy skirt!)

Warm up a big hook (size P/11.5 or 12 mm) for this toasty, speedy item. I named it “Expedient” because it took me just two hours tops to make one during LAST year’s surprise cold snap.

No super-bulkies handy? Create your own: just crochet with multiple strands held together of whatever’s in your yarn stash.

Tip: throw in at least one strand of alpaca or angora. These fibers are four times warmer than wool. Add a yarn with a halo like mohair, or a textured novelty yarn, to fill in any gaps between stitches.

Set of 5 Big Crochet Hooks: Perfect for NatCroMo

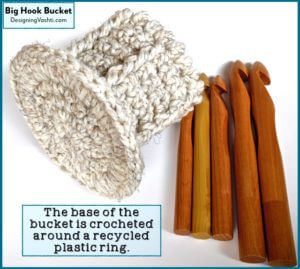
Set of 5 sizes of jumbo wood crochet hooks, and the crocheted "bucket" caddy for them showing the base that's reinforced by crocheting around a recycled plastic ring.
It’s displayed in my studio and I use it all the time now.

Be ready for the next cold snap with this set of five jumbo crochet hooks—sizes Q, R, S, T, and U—bundled with a free Big Hook Bucket pattern. (It’s already at a discount as a kit so I’m unable to discount it further for NatCroMo readers, sorry.) You can buy these crochet hooks individually here.

Armed with these hooks you’ll also be ready for when I release these new Big-Hook Slip Stitch crochet patterns (links currently go to their Ravelry project pages):

Zumie Lace Vest  I used a size S (19 mm) hook for most of it. This one-skein lace item took only 45 minutes to crochet. Yarn: the fun Hikoo Zumie by Skacel.

SS-Luscious Sampler  Size 12 mm (“P”) crochet hook and two skeins of luscious Berroco Noble.

Pink kitty-ears hat with only 95 yds and an M/9 mm hook. It’s simple back loop slip stitch in rows, then seamed on the top and side. It came out smallish on me and perfect on my friend (she kept it!). No yarn left over so I’m mulling a way to get a slightly more out of about 95 yds of yarn for this.

Slip Slab Neckwrap  It was the first prototype for the Expedient Cowl. I needed only 168 yards and a P/12 mm hook.

Also: Happy Spring Break!

Does it start this weekend for your family? My son’s starts this afternoon.

Posted on 1 Comment

Star Stitch Crochet Scarf with Love Knots

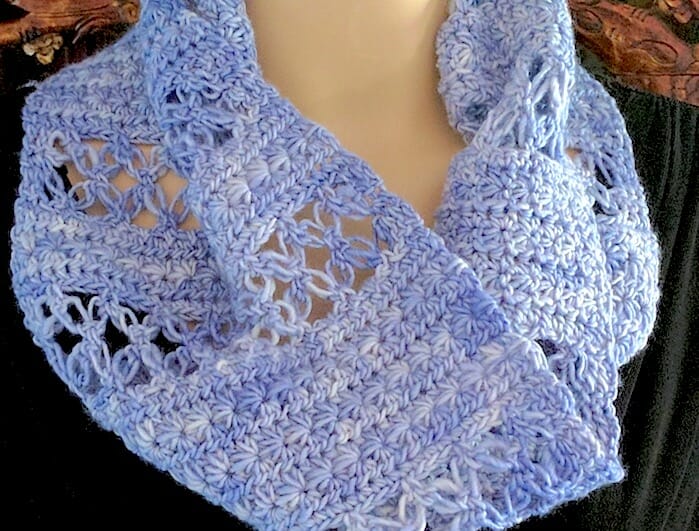
Close up of Lovelace Ring Scarf: bands of love knot mesh alternate with star stitch bands.

Love Knot+Star Stitch Scarf: New Pattern!

A star stitch crochet scarf with love knots? (About as common as a love knot scarf with star stitches.) So beautiful together! I’m calling it Lovelace Ring Scarf.

UPDATE: Lovelace pattern is now in the Designingvashti Shop and Ravelry.

Why Star Stitches With Love Knots? The Story.

I first swatched it in 2014 for CGOA classes I would be teaching: A Star Stitch for Every Purpose (3 hours) and 21st Century Love Knot Adventures (3 hours). Back then I had to set it aside due to stitch compatibility issues. You might be able to see some of this in this first swatch.

Two years later a visitor to the DesigningVashti Facebook page requested the pattern. Again in deep crochet class prep mode, I had to put it off until after teaching and a series of seven crochet tutorials I’d agreed to do for the Cut Out & Keep site.

Double-stranded Lovelace swatch: sport weight Lotus and lace weight glittery mohair.
Alternate yarn idea: Love knots and star stitches both benefit when crocheted with two yarn strands held together. This is Satin Grey Lotus yarn with a lace weight metallic mohair.

By then the US election had just taken place. I appreciated the sweet, loving patterns crochet and knit designers were spontaneously posting. I returned to the 2014 attempts to blend stars and love knots in one pattern. It was a pleasure to finally polish it up into a fun, versatile, balanced stitch pattern. I hoped the idea of harmonizing and unifying two popular stitches of very different traditions might lift others’ spirits.

The basic stitch pattern is available here. I used it to make a 6.5″ square block with DK weight yarn and a G7/4.5 mm hook. A border would probably turn it into a 7″ block.

The Lovelace Ring Scarf design happened next because I needed a self-edging version. It came to me during Thanksgiving. As I lay there contemplating the stitch pattern I’d sent off to Cut Out & Keep, I wondered about giving the basic stitch pattern a selvage (no need to edge it later).

The start and end of the love knot section always looked a bit stringy and unstable to me. I also wanted to vary the texture bands and widen it for a lush, romantic ring scarf.

This is how Lovelace came to be.

Is a Love-Knot-to-Star-Stitch Scarf…Challenging?

Both are Intermediate-level crochet stitches but that doesn’t mean they’re difficult. I include tips and visual aids in the pattern that have worked in my classes. Most of Lovelace is rows of easy, familiar stitches like single and half double crochets (sc and hdc, or as they say in the UK: dc and htr).

These easy stitches are a backdrop to the fancy stitches. Like peacekeeping diplomats they harmonize relations between the two iconic, culturally powerful, individualistic “diva” stitches.

My experience of crocheting star stitches (stars) and love knots (LK) in the same pattern is that I get some comfort zone rows of simple stitches, then a spicy row or two, then more comfort zone.

Dramatic Differences Between Stars & Love Knots

I researched both of these two unique stitches deeply. I don’t recall ever seeing them combined in one stitch pattern. If you have, please let me know in the comments.

Love knots are reversible, star stitches are not. It was an issue with my early swatches.

Love knots are more independent than the usual crochet stitch, and star stitches are the other extreme. This shows in lots of ways. Add Love Knots anywhere like a chain stitch because it’s a type of foundation stitch. Each LK is distinct, complete, and recognizable from a distance.

Star stitches require context. The stitch just before it, after it, and often above it determine how recognizable each star is! 

Love knots likely originated as a southern lace, star stitches as a northern thermal fabric. LK were almost always crocheted in very fine cotton and silk threads for delicate and summery edgings, baby bonnets, and petite “opera bags”.

Stars have been used most often for making thick, dense coats and blankets in wool. Even when early stars looked like fine spidery lace, wool was the fiber of choice. (That’s why my unofficial name for the original swatch is “North and South stitch pattern“.)

Interesting Similarities Between Them

  • Both LK and stars are romantic, iconic, classic/old-fashioned, popular, and beloved.
  • Both originated in the early to mid-1800’s.
  • Both have long been favored for baby things. (Stars: baby blankets and coats; LK: sacques, bonnets, layette edgings.)
  • Both can be lacy. When star stitches are lacy, you’re looking at pulled loops, just like with LK.
  • Both start the same odd, non-intuitive way. I did a newsletter issue on it: “Starting a Stitch with a Backtrack“.
  • Crocheting them with two or more strands of yarn held together enhances their distinctive textures.

Hmm. Double or triple the width of Lovelace to make a stunning shrug or wrap!