Posted on 73 Comments

Delicate Crochet Book Giveaway

Update: I’m so inspired by your comments! Your comment may take a few hours to show because they go into a moderation queue. 

I’m giving away a copy of the new Delicate Crochet book by Sharon Silverman to a randomly chosen commenter on this post. You’re welcome to enter even if you live outside of the USA. If you win and you have a non-USA shipping address, you’ll receive a free downloadable crochet pattern of your choice instead. Scroll down for the book giveaway details.


Pattern Riffing

Over the holidays I “riffed” on the patterns I wrote for Delicate Crochet. I’ll explain how, in case you have (OR WIN!!) this book and want to riff too.

Meet Zegue
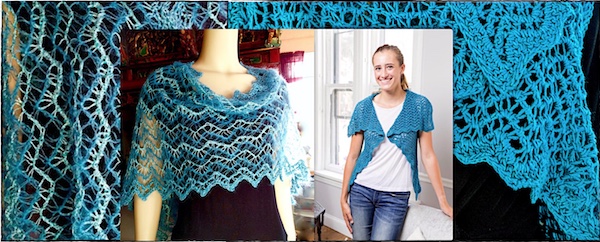
Tunisian ripple stitch Ziggy Vest with its variation Zegue
Zegue (left) with Delicate Crochet’s Ziggy Vest on the right.

Zegue is a simple wrap version of the Ziggy Vest. I used up scraps of fancy yarns in my stash. In Ziggy’s case the armholes are cut into the self-healing stitch pattern. I omitted that step for Zegue. (I could still add a hole later, such as for a one-sleeve wrap, or for a keyhole scarf style like I did for the pink Mesmer. Or go with my original idea: add a seam at each end of the long sides to create tubes (sleeves) for a shrug.)

Yarn: I had one small ball each of the four Stacy Charles Fine fashion yarns I used. (See Zegue’s project page in Ravelry for the yarn facts.) One of them has sequins so I had to use it. Using a mix of yarns for the Ziggy stitch pattern was really fun! I’ve always wanted to do a stripy scrappy ripple, especially in Tunisian stitches.

Crochet Hook: I used the 7.0 mm Addi Tunisian crochet hook from my shop; the Ziggy Vest calls for a 6.0 mm size. A 6.5 mm for Zegue would probably be just as lacy though you might need a few more rows and additional stitch repeat or two.

Finished Dimensions: 14″ x 57″ (35.6 x 144.8 cm), measured flat and blocked. I like wearing it as a wrap. For a shrug option I might add buttons. It weighs 71 g. and I had about a quarter of the Luna mohair and Crystal left over.

I chose the length of each row to match the length from my wrist over the shoulders and across the back to the other wrist while my arms hang at my sides—an easy measurement (57″/144.8 cm). This is because I thought I was going to turn it into a shrug. I just kept adding rows until my forearm would fit through the sleeve tube if I seamed part of the first and last row together; I’d need a minimum of about 9″ (22.9 cm). I figured the yarn amount would get me at least this far.

Foundation and Row Repeats: You’ll need the Delicate Crochet book for the actual Ziggy pattern (starts on page 140). Here are my changes for Zegue:

  • I chained 178 with Color A (Stella).
  • Row 1 forward pass (FP) is also Stella, and then I changed to Color B (Luna) for the return pass (RP) and the Row 2 FP. Fasten off every time you change yarns.
  • Row 2 RP and Row 3 FP: Change to Color C (Céline).
  • Row 3 RP and Row 4 FP: Change to Color B (Luna).
  • Row 4 RP and Row 5 FP: Change to Colors C+D (Céline & Crystal held together).
  • Repeat the color sequence of B, C, B, C+D for a total of 16 rows; for Row 16 RP change to Stella. Complete Row 17 FP and RP with Stella and then fasten off.
  • Edge Row 17 with a strand of Luna and Crystal held together: Single crochet (sc) in first FP stitch, chain 1, slip stitch (ss) in same sc, sc in same stitch, *chain (ch) 1, sc in next FP stitch, ch 1, sc in next stitch group, ch 1, sc in next FP stitch, [sc, ch 1, ss in same sc, sc] in next FP stitch, repeat from * in each remaining FP stitch of row. Fasten off.
  • Attach Stella to first foundation ch. Working along the other side of the foundation, sc in first ch, ch 1 and skip next ch that was not used by a FP stitch, sc in available loop of next used foundation ch, repeat from * in each remaining stitch of row. Fasten off.
  • Attach Luna and Crystal to first sc of Stella. Edge this row the same way you edged Row 17.

Yvelino the Paneled Ring Scarf
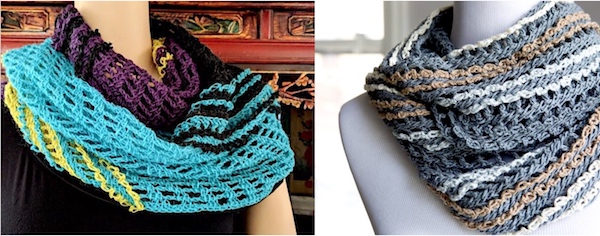
Icelandic wool ring scarf vs DesigningVashti Lotus wrap of Bias-crocheted Tunisian net, surface-crocheted with love knots.
Yvelino Ring (left) with Delicate Crochet‘s Yveline Wrap on the right.


For this version of the Yveline Wrap I used four colors of lace weight Icelandic wool, one ball per color. See its project page for the yarn deets. I loved this yarn; it’s very “sticky” and almost bristly or wiry in a way that works great with this airy bias-worked net.

Crochet Hooks: 5.0 mm (H) Tunisian hook; for the surface-crochet I used a regular 3.5 mm (E) crochet hook.

Finished Dimensions: 13″ wide with a 58″ circumference (33 x 147.3 cm). It weighs 100 g. so I used only half of each ball. (I thought I might want to add a lot of surface crochet, so I reserved yarn for that.) Instead, I like the texture contrast zones.

Foundation and Row Repeats: You’ll need the Delicate Crochet book (starting on page 133) for the actual Yveline pattern. Here are my changes for Yvelino:

  • Chain 58 in Color A. Complete 33 rows. Edge the last row with sc.
  • Slip stitch Color B to the bottom right corner foundation chain of the previous panel. Chain 58. At the end of the Row 1 FP, slip stitch in the first FP stitch of Row 1 of the previous panel and then complete the RP as usual.
  • Repeat this join-as-you-go process at the end of every FP until you’ve completed 33 rows. Edge it with sc like the previous panel.
  • Repeat the above with two more panels. For the last panel, also join-as-you-go the first FP stitch of each row to the last FP stitch of the first panel you completed to create a ring. (Or you could seam the first and last panel sides together to for the ring as a separate step.)

Adding the Frills: The only thing different from the book is that I used a 3.5 mm (E) crochet hook, and surface crocheted a column on each side of the joins.

Oh the Resources Buried in Crochet Patterns

I hold onto lots of crochet pattern books and “mine” them for interesting stitch patterns (love those stitch symbols!), shapes (love those schematics!), and construction methods (love the rare assembly diagram!).

The stitch texture combinationscolor contrasts, or styling ideas in pattern books are also inspiring.

Ravelry takes this into account so I know I’m not the only one who uses books this way. (When creating a new project page, there used to be a box you checked if you improvised from an existing pattern. Now you can choose additional patterns if you’ve incorporated elements from them.)

Delicate Crochet offers hours and hours of riffing on its interesting stitch patterns, shapes, and styles, thanks to the range of designers represented—and thanks to all the stitch diagrams and schematics.

Book Giveaway Details!
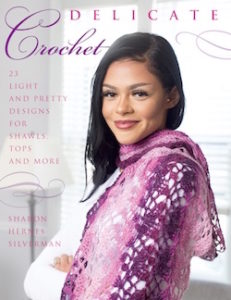
You could win this! Delicate Crochet by Sharon Silverman with 23 patterns by 10 designers.
  • I’ll use a random number generator no earlier than February 18 (Monday, President’s Day) to choose from among the commenters to this post.
  • There may be two winners: one with a shipping address outside of the USA as well as within it. If the first winner has a non-USA shipping address, the prize will be a free downloadable crochet pattern (winner’s choice). I will then draw a new number randomly until the new winner has a USA address to which I can ship the book.
  • To contact the winner(s) I will do these three things: comment on your comment with the news, and announce the winner’s name (as it appears on your comment) in my Ravelry group, and at my Facebook page. I suggest you opt-in to receive alerts of responses to your comment in case you’re a winner.
  • Your comment may respond to my question, “What crochet book would you like me to write?” (as explained in my newsletter #97), or at least be crochet-related. I reserve the right to remove spammy comments as always.
  • Commenting more than once does not improve your chance of winning.
Posted on Leave a comment

Simple Pleasures Crochet Bling Bangles

Several Kinds of Easy Crochet Ribs for Stretchy Holiday Bling Bam Bangles

Crocheting *Bling* Bangles, My Cheerful Distraction

I’ve had several stressful challenges this month. Each evening I curl up with super sparkly yarn, crochet hooks, and simple stitches. I go to bed in a merry mood and drift asleep picturing other stitches or color combinations to try.

As I described in yesterday’s post, these slip-on crochet bling bangles are based on the simplest ribbing stitches. The red one is rows of single crochet in the back loop only (outside of the USA it’s called a double crochet). The silvery one in progress is rows of slip stitch in the back loop only.

* Twinkly * sequined * ribbing * is very satisfying.

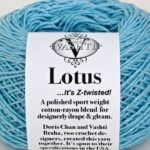
It also makes sense for a slide-on bracelet! Ribbing is nice and stretchy. I had some sequined carry-along metallic threads in my yarn stash. Now is the perfect time to crochet a *bling* strand of Premier Yarns Enchant with a strand of…my Lotus yarn! I chose Lotus for its cheerful colors that can stand up to all the bright bling action.

I also chose Lotus because it’s sport weight: once you crochet double-stranded (with two strands of yarn held together), you naturally make thicker stitches. I didn’t want super thick stitches for these small crochet bling bangles. The bling string I used is slightly thinner (“fingering weight”).

The yarn math: Add 1 sport strand + 1 fingering strand and you get “DK wt,” a.k.a. “light worsted.” A G-7 (4.5 mm) hook is a good all-purpose size to use for this weight.

Let’s Talk About * Sequin * Management *

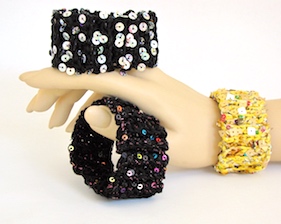
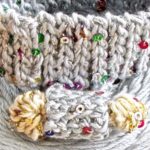
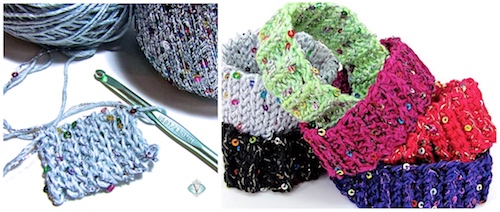
Two Bling Bam Bangles of DesigningVashti Lotus yarn and sequined strands.
I tested the sequin theory with these. See the giant square sequins? It took longer to crochet. Worth it though!

Sometimes, sequins get in the way of smooth, stress-free crocheting. If sequins can catch on a loop while you’re trying to pick up crocheting speed, it slows things down.

The secret is pairing a thick enough yarn with a sequined strand to buffer or neutralize the sequins. To me, “thick enough” means it roughly matches the diameter of the sequins. The tiny sequins in the Enchant yarn match the thickness of my Lotus yarn. Lotus gives the stitch loops smooth passage through other loops.

Result: the sequins only pile on more joy. No interruption of the joy.

The Right Kind of * Stretchy *

Enough stretch puts the bangle in crochet * Bling Bangles *—literally. A bracelet earns the right to be called a bangle when it can be slid on and off instead of requiring some kind of clasp.

The bling string (Enchant) has zero elasticity. I expected this (it’s typical of carry-along bling strings) but didn’t know its strength and durability. To reduce the stress that could be put on the bling strand, I avoided stretchy yarns like wool. DesigningVashti Lotus has no stretch either, so these two yarns are nicely matched: Lotus won’t let my crochet project stretch more than the Enchant strand can, so both yarns will share the wear and tear equally.

It’s the crochet stitches that provide all the necessary stretchiness of a slip-on bangle! That way I can use whatever yarns I wish. The crochet * bling bangle pattern * includes several kinds of ribbing for beginners and beyond.

*  *  *

2018 update: Want to see my cheerful distraction during the 2017 holidays?

Posted on 1 Comment

Bam-Bam Crochet Bangle

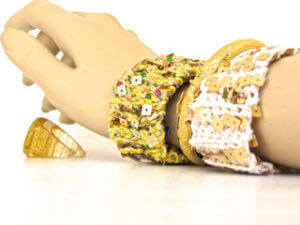
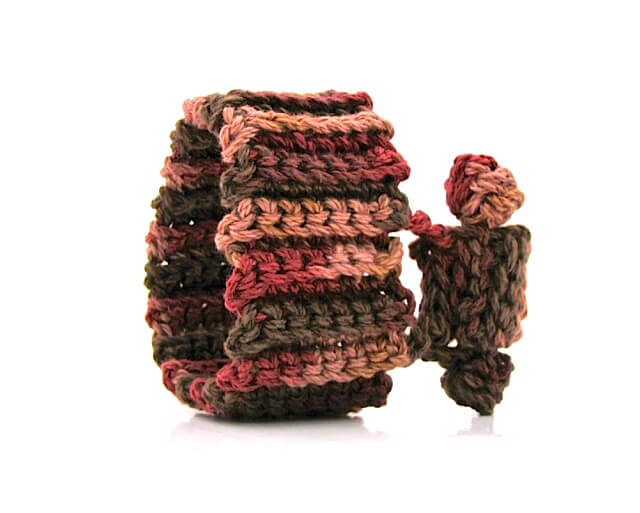
The original experiment, a ribbed slip-on cuff with mock clasp.
This photo is from a mock art gallery-style photoshoot, 2012 (See the whole set in better resolution here)A slip-on cuff experiment with mock bracelet clasp became the prototype for Bling Bam Bangle, my cheerful holiday distraction in Dec. 2014

Crochet Bangle from the Archives

It makes me giggle. “Bam-Bam” began as a test of ribbing stitches for a simple crochet bangle in 2012.

I remember reasoning that if a crochet bracelet is stretchy enough, a clasp is optional. You could just slide it on and off your wrist—i.e., a crochet bangle.

A back-loop slip stitch rib (Bss) version was planned after this back-loop single crochet rib (Bsc) one—minus the “Bam-Bam” part.)

The “Bam-Bam” Part

Remember Pebbles and Bamm Bamm? Back in September 2012, I was preparing to teach a crochet jewelry class at a CGOA conference in Reno NV.

I don’t remember where my head was at, but after completing its band, I amused myself by free-forming the fake clasp. It made me think of Bamm Bamm Rubble, the baby boy who hit everything with a stone club in the The Flintstones cartoon.

Then, to test a new light box, I photographed it as if it’s an art gallery piece, which amuses me even more!

This is its project page in Ravelry. I’m writing a holiday pattern for the Bam-Bam Crochet Bangle now. It makes me giggle too much to keep it to myself.

Update! the pattern is called Bling Bam Bangle. I blogged about managing all the bling!

Posted on Leave a comment

Preview: Aery Faery Lacy Tunisian Crochet Scarf

I’m looking over the photos I’ve taken so far of my newest Tunisian crochet design. Lately, the weather here has created some moody lighting. Have a look at these!

Aery Faery Lacy Tunisian Crochet Scarf End
My first filet-like Tunisian crochet lace in opalescent mohair and silk.

I’m calling it Aery-Faery because it is faerie-like and diaphanous, like fairy wings. I’ve crocheted most of it while watching the first season of Once Upon a Time. In fact, I’m pretty sure the idea for this design first came to me while watching the show.

Aery Faery Lacy Tunisian Crochet Scarf/Stole
Scarf shown draped like a stole. It’s very stretchy!

The yarn is divine for a lacy Tunisian crochet scarf.

It’s Artyarns Silk Mohair Glitter; a strand of Lurex is plied with the silk and mohair. It’s particularly fine and smooth. The dyeing is gorgeous. You can’t tell from some of the photos, but it’s the subtle colors of a milky opal. The colors shift like they do in an opal, too.

The Aery-Faery pattern draft is done. I’m testing a variation tonight and have the final proofreading to do before sending it off for tech editing and testing.


Posted on 2 Comments

Answers: The Electra Wrap Love Knot Pattern

Banner of Love Knot 'Flowers'

I’m seeing new questions in new places about my Electra Wrap love knot pattern.

Electra, a crochet design, continues to attract attention and I’m really happy about that. I’ve blogged questions and answers about Electra here so that people can find them easily when they Google the pattern.

Q: What is this design? I’m having trouble figuring it out!

A: Maybe you’re seeing only a photo with no source (such as in Pinterest or Tumblr). Probably it’s one of the photos below. This is the Electra Wrap love knot pattern. It was designed by Vashti Braha (me) in 2012, and published in Interweave Crochet Magazine in 2013. I released a newly updated version of the Electra pattern in September, 2014.

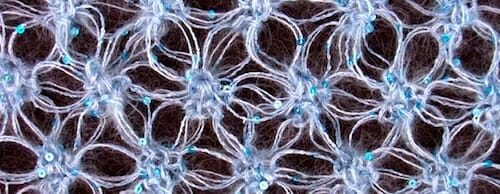
Maybe you mean that you’re having trouble figuring out how it was crocheted. Well, the Electra Wrap is all about visual illusions. It’s actually just a simple rectangular wrap. The stitch pattern is 100% crochet love knots. A big reason for the Electra effect is the triangular grid structure. It’s an uncommon look for love knots. A square mesh grid of love knots, on the other hand, is so common that it’s practically a cliché. My newsletter issue #62 contrasts these two basic types of crochet lace grids.

Q: Yes but it looks like more than just that! Why?

A: Three reasons:

  1. The flowery stars. A beautiful feature of triangular lace grids is how triangles tile into hexagonal six-spoked shapes.
  2. This starry flowery lace is love knots. You can crochet triangular lace grids with many different stitches. Love knots bring their own unique magic. They also show off special yarns…see #3.
  3. I used yarn that is so elegant it dazzles the eye. I’m serious! I’ve worn the Electra Wrap in conferences, guild meetings, yarn shops, and love knot classes. Even when a person is familiar with crocheting triangular lace grids – and the love knot stitch, and sees it up close in person, Electra is still a bit mysterious. The yarn’s a factor.

Q: How did you add all those tiny sequins?

A: I paid the yarn to do that! Tiny sequins were spun right into the yarn for me. (I’d personally never add the sequins by hand because this would interrupt how quick love knots are to crochet.)

Here’s the deal with the yarn. A mystery-enhancing effect of this Electra Wrap love knot pattern is it’s crocheted double-stranded. Each love knot shows off two yarn strands. Each strand plumps up and doubles the 3-D loft.

I held one strand of fine mohair yarn together with one sequined strand while I crocheted. Electra’s yarn specs:

  • Glossy sequined strand: S. Charles Collezione Crystal (85% polyester, 15% cotton; 144 yd {131 m} per .88 oz {25 g}; CYC “#0 Lace Weight”): color #11, 3 skeins.
  • Glittery mohair strand: S. Charles Collezione Luna (71% super kid mohair, 20% silk, 9% lurex; 232 yd {212.5 m} per .88 oz {25 g}; CYC “#0 Lace Weight”): color #25, 2 skeins.

Even the tiniest sequins can be hard to crochet with. They catch on yarn strands as you pull loops through loops. The solution is to buffer the sequins with fibers. Mohair is great for this.

Q: I need to use different yarn, though. Can I? Should I?

A: YES you can, absolutely. The proof is in all the different yarns people have used for their lovely Electras. See this Electra project gallery in Ravelry.

I can think of lots of reasons why one should use a different yarn, and why one should not.

Definitely use the yarns I used if:

  • …You want that ethereal, fairy godmother, fashion couture mystique. I can’t imagine a better yarn combination for this. The yarns I used are top of the line fashion yarns from a venerable Italian mill. They are pricy and yet they’re a bargain. Their high quality is clearly evident in the finished Electra Wrap. It’s part of the mystique. (Hint: it’s the ultimate gift.)
  • …You’re susceptible to swooning while you’re crocheting. I’m not exaggerating when I say that crocheting Electra kept taking my breath away. I finished two of them quickly. I didn’t want to set down my crochet hook! I fantasized about Electra when I was away from it! If you’ve ever “pined” for a crochet project you’ve fallen for, then you know what I mean. The rest of you might be laughing at me right now 🙂
  • …You want practical warmth as well as maximum magic and weightlessness. The mohair in this yarn combo gives other practical benefits, too. (I wrote a newsletter issue about this.)

Use different yarns if:

  • …You’re allergic to mohair. Mohair and love knots have a special affinity. Both add a weightless magical something. One way to get a mohair effect is with a brushed synthetic yarn. Other natural fibers can also add a halo. Angora is an obvious example. Halo is a lace-weight brushed baby alpaca yarn.
  • …You’ve stashed some skinny yarns and bling threads that are difficult to crochet with by themselves. Electra can be a great stashbuster project for these. See this blog post about fun with double stranding.
  • …You want more of a casual daytime layer. Use thicker yarns – two strands held together, or singly. Maybe you want more of a boho artsy look. Try artisan space-dyed torn silk ribbon yarns, or irregular hand spun textures.

Q: I’m confused about the Electra Wrap love knot pattern in the magazine. Can you help me with that?

A. If you have the 2013 magazine version of the pattern and need help with it:

  1. Contact the magazine. The company has pattern support staff for their patterns. They also have a forum called Crochet me.
  2. Ask a question any time in Vashti’s Crochet Lounge – lots of friendly, helpful crocheters there. It’s a Ravelry group. Chances are good that your question has already been answered there. Interweave Crochet magazine fans also have a Ravelry group.
  3. I urge you to buy & download my expanded 2014 edition of this Electra Wrap love knot pattern from the DesigningVashti shop, or my Ravelry shop. It has a stitch diagram, how-to photos, and other details that help students in my love knot classes.

A stitch diagram is essential for this design. Due to space limitations of printed magazines, the 2013 Electra pattern version is missing a stitch diagram and other helpful info. A stitch diagram reveals how simple the construction really is. It breaks the spell (those multiple visual illusions I’ve described above).

Be sure to subscribe to my newsletter where I announce discount codes for new patterns and yarns. Get your feet wet with my three-part series on Love Knot basics and tweaks. (Link goes to the third in the series, and links to the first two are at the top of the entry.)