Posted on 2 Comments

Slip Stitch Crochet Hearts Free Pattern

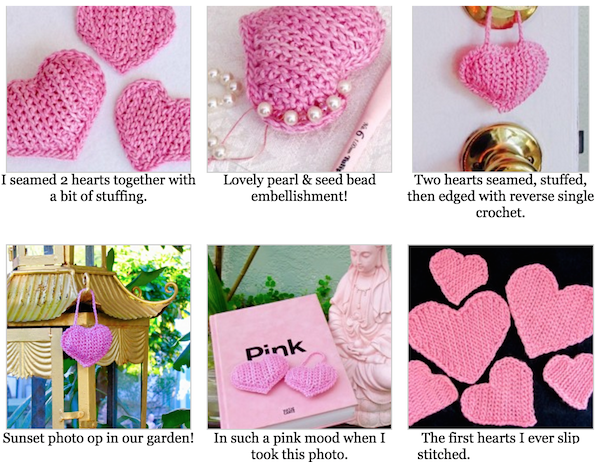
Gallery from the original 2016 "Slip Stitch Hearts Free Pattern" blog post.
If image is missing, see this album.

This blog post is an overflow page for issue #76 of my crochet newsletter. Scroll down to see the heart shape chart, and then the full text of the Slip Stitch Crochet Hearts Free Pattern. To print, click on the little printer icon at the end of this post.

We Need to Talk: Slip Stitch Skill Levels

I rate this pattern Intermediate for slip stitch crocheters, and Advanced if you’re new to Slip Stitch Crochet. A good free crochet pattern for slip stitch beginners would be Eva’s Ribs Scarf. After that, Slip Tectonics or Undaria would bring novices solidly up to speed for these hearts.

Seriously.

These crochet hearts were originally used for a three-hour intermediate-level class on slip stitch shaping methods. “Slip Stitch Crochet 101” class was a prerequisite. After crocheting this heart, students would be equipped to crochet fitted sleeve caps and gracefully shaped armholes!

You’ll be adding or subtracting only a stitch or two to make this heart. Not a big deal if you’ve ever increased and decreased with single crochets. It takes practice, though, to shape every row of slip stitches.

Consider that even if you’ve already completed some slip stitch projects, most existing slip stitch crochet patterns involve only occasional shaping, if any. (If you’ve crocheted a slip stitch pattern with a significant amount of shaping, please tell me about it in the comments.)

For a slip stitch beginner, the biggest challenge is recognizing what the stitches are doing to avoid increasing or decreasing by accident. It’s like learning to crochet all over again—and that’s humbling if you don’t expect it, but what a beautiful thing! How many of us long-time crocheters remember what it was like to learn how to crochet for the first time? If you’ve crocheted for at least ten years already, you can revisit this life changing moment.

Challenge Accepted? Great!

Welcome to the “heart” of slip stitch country. Start with a thick smooth yarn and a big hook.

Slip Stitch Crochet Hearts: Project “Shortbread Cookie”

A Valentine Heart Pattern in Vertical Fss Rows.

Abbreviations: ch=chain, Bss=back-loop-only slip stitch, Fss=front-loop-only slip stitch, sc=single crochet, ss=slip stitch,  st(s)=stitch(es).

Cross off each row when you complete it to easily keep track of where you are. (I have to. For these crochet hearts it’s easier to count stitches, not rows.) For pattern help, visit my fabulous forum.
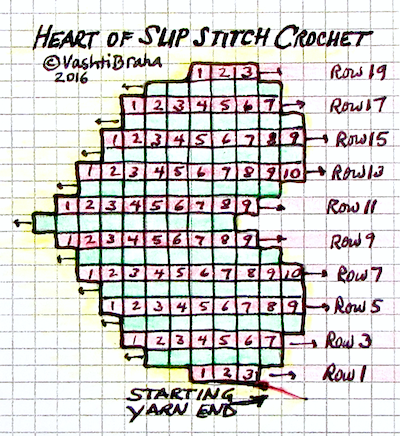
Slip Stitch Hearts Free Pattern charted diagram: each square is a stitch. Right side rows are green, other rows are pink. 19 rows total.
This heart shape is crocheted from side to side. Use any yarn. Image missing? See this album.

Chain 4.

Row 1: Skip ch nearest your hook, ss in any loop of each remaining ch, turn: 3 ss. Easy, right?

Notice that every odd-numbered row ends at the top of the heart and every even-numbered row ends at the bottom of it. The yarn end (called “tail” from now on) is at the top of the heart, so when you crochet toward the tail end, you must be on an odd-numbered row.

Row 2: Ch 2, ss in 2nd ch from your hook (an increase of one st), Fss in first ss, 2 Fss in each of next 2 ss, turn: 6 ss. 

No row will ever have more than 10 sts in it. If you have trouble seeing which loops to crochet into:

  • It will get easier after 3 rows or so. You won’t see the heart shape develop until you’re halfway there (Row 9).
  • The st count matters more than choosing the correct loop. Count as you crochet and add a st in a good enough loop if need be. The most common problem for slip stitchers is identifying which st is the last one of the row. Counting as you go helps and you won’t need to use a stitch marker.
  • I don’t count my rows. As I complete each row I put a check mark next to it on the pattern. I also rely heavily on the yarn tail to know whether I’m crocheting a row toward the tail or away from it.
  • Questions? Ask in my forum

Row 3: Ch 2, ss in 2nd ch from your hook, Fss in each ss, turn: 7 ss.

Rows 4 & 5: Repeat Row 3. At the end of Row 5 you’ll have 9 ss.

Row 6: Ch 1, Fss in each ss, turn: 9 ss.

Row 7: Repeat Row 3: 10 ss.

Row 8: Ch 1, skip first ss (a decrease of one st), Fss in each remaining ss, turn: 9 ss.

Row 9: Ch 2, ss in 2nd ch from your hook, Fss in each ss to last st, turn leaving last st unworked: 9 ss.

Row 10: Ch 1, skip first ss, Fss in each ss to last st, 2 ss in last st, turn: 9 ss.

Row 11: Repeat Row 10: 9 ss.

Row 12: Repeat Row 9: 9 ss.

Row 13: Ch 1, Fss in each ss to last st, 2 ss in last st, turn: 10 ss.

Row 14: Ch 1, Fss in each ss to last st, turn leaving last st unworked: 9 ss.

Row 15: Repeat Row 6: 9 ss.

Row 16-18: Repeat Row 14. At the end of Row 18 you’ll have 6 ss.

Row 19: Ch 1, skip first ss, Fss in next ss, [skip next ss, Fss in next ss] twice, turn: 3 ss.
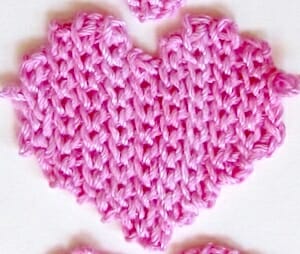
Before edging, the heart shape looks sort of "ragged" around the edges. Slip Stitch Heart Free Pattern, finishing step.
This is how it looks after a quick blocking, and before edging it with a round of slip stitches. (If image is missing, see this album.)

Round 1 (add a border of ss): Fss in each ss of Row 19, ss in one loop at the end of each row to bottom point of heart, [ss, ch 1, ss] in it, continue edging row ends to first row, ss in each of the 3 foundation chs, ss in remaining row ends, join to start of round with a ss.

Note: Edging these crochet hearts is not as laborious as it might seem. Even though it’s not easy to identify the same loop of each each row end, this needn’t slow you down. I mostly just estimate where to put my next stitch, and it comes out fine.

Finishing: Fasten off, or add another round of ss, or reverse sc. Be sure to damp block: stretch all edges in every direction then let it settle into a smooth, symmetrical-enough heart shape and let dry. Make another like the first so that you can seam them together with a ss seam, add a bit of stuffing and hide the ends.

Experiment Freely with this Free Heart Chart

The grid rows of the chart match Fss stitch height, but why impose limits on your heart? Try using single crochets instead; the heart shape may widen or narrow a bit. Or, try back-loop slip stitches (Bss) after you’ve made a few crochet hearts in all front-loop slip stitches (Fss). (The back loops of slip stitches are trickier to find than front loops for some folks at first.)

I hope you’ll show us your crochet hearts in my forum.
Posted on Leave a comment

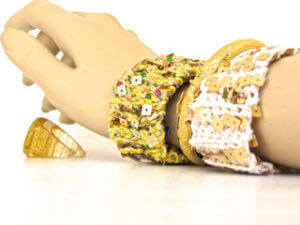
Simple Pleasures Crochet Bling Bangles

Several Kinds of Easy Crochet Ribs for Stretchy Holiday Bling Bam Bangles

Crocheting *Bling* Bangles, My Cheerful Distraction

I’ve had several stressful challenges this month. Each evening I curl up with super sparkly yarn, crochet hooks, and simple stitches. I go to bed in a merry mood and drift asleep picturing other stitches or color combinations to try.

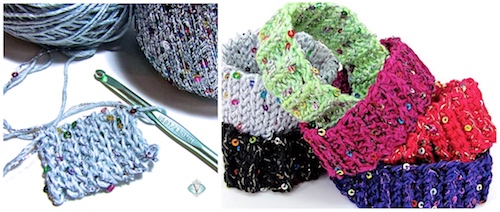
As I described in yesterday’s post, these slip-on crochet bling bangles are based on the simplest ribbing stitches. The red one is rows of single crochet in the back loop only (outside of the USA it’s called a double crochet). The silvery one in progress is rows of slip stitch in the back loop only.

* Twinkly * sequined * ribbing * is very satisfying.

It also makes sense for a slide-on bracelet! Ribbing is nice and stretchy. I had some sequined carry-along metallic threads in my yarn stash. Now is the perfect time to crochet a *bling* strand of Premier Yarns Enchant with a strand of…my Lotus yarn! I chose Lotus for its cheerful colors that can stand up to all the bright bling action.

I also chose Lotus because it’s sport weight: once you crochet double-stranded (with two strands of yarn held together), you naturally make thicker stitches. I didn’t want super thick stitches for these small crochet bling bangles. The bling string I used is slightly thinner (“fingering weight”).

The yarn math: Add 1 sport strand + 1 fingering strand and you get “DK wt,” a.k.a. “light worsted.” A G-7 (4.5 mm) hook is a good all-purpose size to use for this weight.

Let’s Talk About * Sequin * Management *

Two Bling Bam Bangles of DesigningVashti Lotus yarn and sequined strands.
I tested the sequin theory with these. See the giant square sequins? It took longer to crochet. Worth it though!

Sometimes, sequins get in the way of smooth, stress-free crocheting. If sequins can catch on a loop while you’re trying to pick up crocheting speed, it slows things down.

The secret is pairing a thick enough yarn with a sequined strand to buffer or neutralize the sequins. To me, “thick enough” means it roughly matches the diameter of the sequins. The tiny sequins in the Enchant yarn match the thickness of my Lotus yarn. Lotus gives the stitch loops smooth passage through other loops.

Result: the sequins only pile on more joy. No interruption of the joy.

The Right Kind of * Stretchy *

Enough stretch puts the bangle in crochet * Bling Bangles *—literally. A bracelet earns the right to be called a bangle when it can be slid on and off instead of requiring some kind of clasp.

The bling string (Enchant) has zero elasticity. I expected this (it’s typical of carry-along bling strings) but didn’t know its strength and durability. To reduce the stress that could be put on the bling strand, I avoided stretchy yarns like wool. DesigningVashti Lotus has no stretch either, so these two yarns are nicely matched: Lotus won’t let my crochet project stretch more than the Enchant strand can, so both yarns will share the wear and tear equally.

It’s the crochet stitches that provide all the necessary stretchiness of a slip-on bangle! That way I can use whatever yarns I wish. The crochet * bling bangle pattern * includes several kinds of ribbing for beginners and beyond.

*  *  *

2018 update: Want to see my cheerful distraction during the 2017 holidays?

Posted on 5 Comments

Crochet Cable Boot Cuff Pattern in Progress

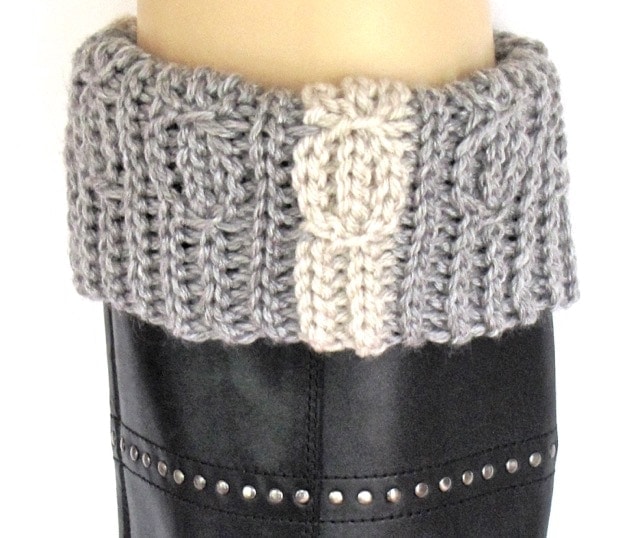
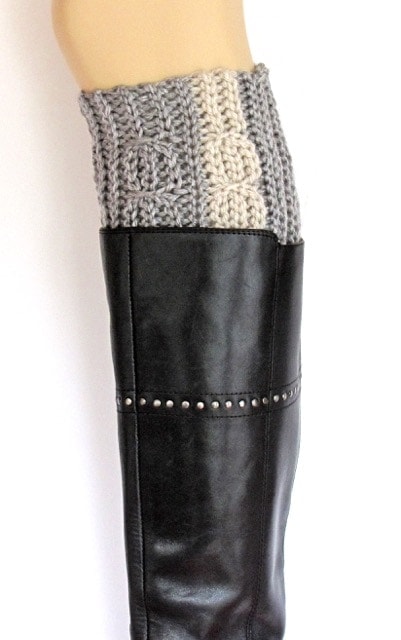
Lucky Twist Bootslip folded over boot top

New Crochet Cable Boot Cuff Pattern!

The Lucky Twist Boot Cuff in action!

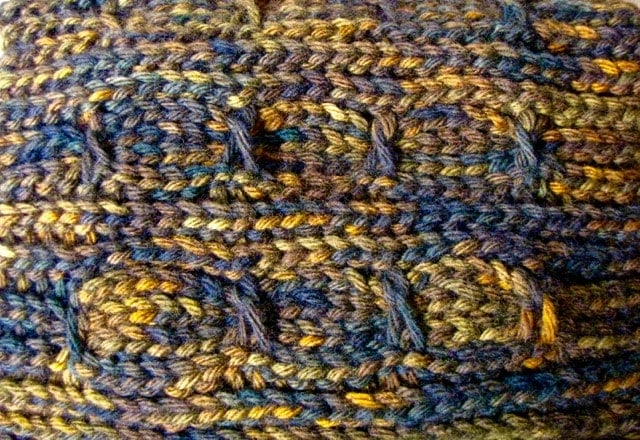
A few days ago I sent out issue #65 of my Crochet Inspirations newsletter: “Mock Cables in Slip Stitch Crochet.” I’m getting questions from readers about the dark brown crochet cable boot cuff photo (shown below). I crocheted that one in November 2012. The gray striped one is fresh off the hook.

The 2012 brown one is actually a prototype of the new crochet slip stitch Lucky Twist Mitts. It’s my newest downloadable pattern. A matching Lucky Twist crochet cable boot cuff pattern is almost finished.

Update: The boot cuff pattern is done!

The early brown Lucky Twist swatch helped me test lots of things. For example, how stretchy the limp five-ply merino yarn would be as a mitt (not enough). How much to taper the ribbed edge with short rows. I wondered about the speckled dyeing and overall dark brown tones.

As I mentioned in the newsletter, I had to dramatically brighten these photos just so that the cabled stitch textures would show up! So in real life I’d need to be standing in full sunshine to see the cabled surface texture in a dark brown yarn. The short amber color flecks are pretty, but they distract a bit from the cables.

First swatch of Lucky Twists Boot Cuffs pattern

This was also the first boot cuff prototype I’d ever crocheted. So I learned about:

  • Finished dimensions for a good crochet cable boot cuff pattern.
  • Stitch surface textures and yarn colors that show up well on that area of the body. (Lighter colors help.)
  • Should one or both edges of a boot cuff taper? (I prefer it tapered at one end only.)
  • How much yarn and time does it take to crochet boot cuffs? (About as long as crocheting just 14 inches of a scarf!)
  • Thickness of yarn and of stitches that fit inside the boot top. (Medium weight yarn seems fine for the boots I own.)
  • Folded, unfolded, scrunched. All ways are fun!

Crochet Boot Cuffs, 2012 and beyond

Back in 2012, crochet boot cuffs were such a new trend that they might have just been a one-season fad. That November I traveled to northern Illinois to teach a crochet retreat. It was a boot-wearing opportunity that I don’t often get here in Florida.

It was in Illinois that I started the brown crochet cable boot cuff pattern prototype. I’d be able to test how much warmth they add, and if I enjoy wearing them.

I discovered that crochet boot cuffs feel great! I wore them over dark tights with skirts. They stayed put. I enjoyed wearing them all ways – scrunched, folded over the boot, and unfolded. Down low into the boot or up near the knee. I did find that I wanted longer ones that covered more of my legs for warmth.

Posted on 5 Comments

Newest Crochet Design: Undaria Flutter Scarf

This is the first blog post using a new feature here at my DesigningVashti website headquarters: I can blog right here at my own website.

I have some design news. The downloadable crochet pattern for Undaria is being tech-edited now. This means it will be available just after Thanksgiving, most likely this Monday, Nov. 28. You can see several wearing styles in the meantime, all possible with the same pattern:

I really enjoyed designing and crocheting this exciting shape.

The next pattern after Undaria will be the Thaxton Hooded Cowl. Both of these designs are cozy new ways to use crochet slip stitches. The short rows keep them interesting.
…and now to see how this new kind of blog post looks!