Posted on Leave a comment

Rosebud Argyle Color Pooling Stitch

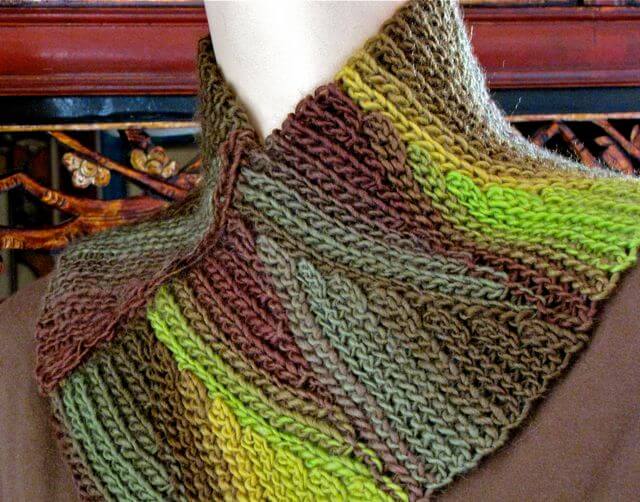
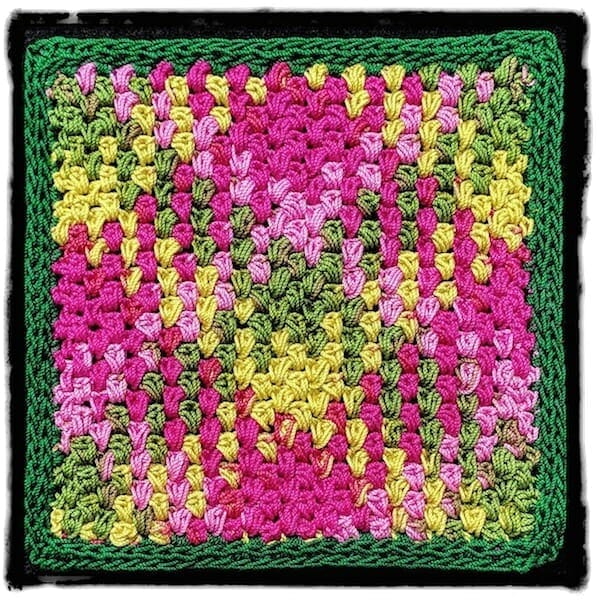
Moss Stitch (linen, granite, seed stitch) modified for longer crochet thread color sequences.
Size 10 variegated Lizbeth cotton thread, color #10-104 Spring Garden. I created a “Color Eater” variation of the moss stitch for it. Row by row pattern below.
View hi-res size.


Have you seen the planned color pooling crocheters are doing to get a cool argyle or plaid look with variegated afghan yarns? You can use lots of different stitches for this, but the height of single crochets (sc, or in UK/AUS: dc) is great, especially with moss stitch (a.k.a. linen, granite, seed stitch).

Planned Pooling with Cotton Thread

I pooled the colors of a size 10 crochet thread into an argyle and “Rosebud Argyle” is the result. It’s 3.5″ x 3.5″ and dense because I used a color-gobbling stitch pattern, so I added a border and turned it into a “mug mat” (coaster). I’ll be bringing it to the Creative Planned Color Pooling class.

If I had used the classic moss stitch pattern of [sc in next ch-space, skip next sc, ch 1], my swatch would have come out more than double that size: over 7″ x 7″ (I ripped it out before measuring exactly how much smaller it is with my stitch variation).

Even the 3.5″ size is bigger than I expected! My original goal was only 1″ or 2″. New lesson learned: the color changes in variegated thread look short until you start crocheting with it. The stitches just don’t take up much thread.

Stitches Change the Color Width

I really wanted the experience (and general look) of a moss stitch pooled argyle, so I needed to substitute with stitches that eat up a lot more thread. Why? The length of each color in a variegated thread or yarn is fixed. When the colors repeat, their sequence is also fixed. The total length of one whole sequence is your fixed width. The way you alter this fixed width is with the stitches you use. (There are other options but not for this post.)

Each row of moss stitch is [sc in next chain-space, skip next sc, ch 1]. With each new row, the sc’s are over the ch’s and the ch’s are over the sc’s. It is common to use half double crochets (hdc, or UK/AUS: htr) instead of sc. I haven’t seen much of it lately, though. I hope crocheters are feeling free to alter the moss stitch, especially if you’re doing planned pooling.

Below I’ve written up the stitch pattern instructions for my color-gobbling moss stitch variation. It’s the one I used for the swatch pictured above. I wrote it as if you’re using a solid colored yarn or thread.

Vashti’s “Color Eater Stitch”

Pattern Notes

  1. The “color eater stitch” is [slip stitch, 2-hdc puff] in the next ch-space. The slip stitch is to keep the hdc puff closer to the height of a sc and puffy (rosebud-like). It also helps keep the color changes distinct when you’re pooling.
  2. Like moss stitch, each row is [color-eating sc substitute in next ch-space, skip next color-eating sc substitute, ch 1]. With each new row, the color eaters are over the ch’s and the ch’s are over the color eaters.
  3. It’s easy to fine tune how much you use of a color when you’re pooling with it. For example, sometimes I did a 3-hdc puff instead of 2 to eat up more color. Or, a tighter ch-1 and shorter puff to eat less color. I got better at this with the later rows. Maybe you can tell in the swatch.
  4. When color pooling with it, do whatever you need to at the row ends: just a ss and hdc to use less color, or even a 4-hdc puff to use much more.

Abbreviations

  • ch – chain stitch
  • hdc – half double crochet (hdc, or UK/AUS: htr)
  • 2-hdc puff – [yarn over, pull up a loop] twice in the same designated stitch, yarn over and pull loop through all 5 loops on hook.
  • ss – slip stitch

How to Crochet It

Foundation chain: With a solid colored thread or yarn for your first swatch, chain an even number.

Row 1: Skip 3 chs, *[ss, 2-hdc puff] in next ch, ch 1, skip next ch, repeat from * until one ch remains, [ss, 2-hdc puff] in last ch, ch 2, turn.

Row 2: Skip first puff and ss, *[ss, 2-hdc puff] in next ch-space, ch 1, skip next puff and ss, repeat from * for rest of row, [ss, 2-hdc puff] in space of turning-ch 2, turn.

Repeat Row 2 for pattern.
For more on planned pooling, you might like this recent blog post: Color Pooling Developments.
Posted on 2 Comments

Foundation Star Stitches Step by Step

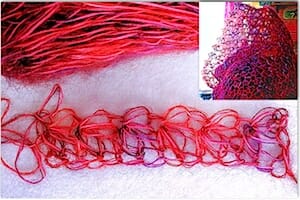
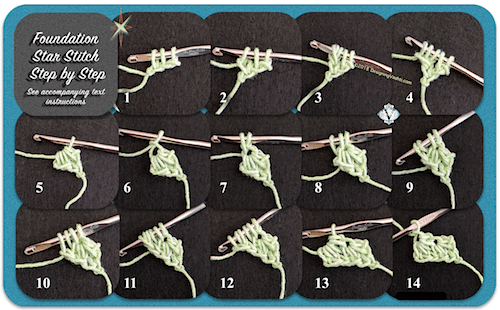
How to Crochet the Foundation Star Stitch in 14 Steps
View the full size hi-res image.

Star Stitch Foundation

It’s the perfect way to start a Starwirbel! We’re going to use it in the upcoming Starwirbel Way class this July. (CGOA Chain Link conference this July in Portland, Oregon).

For this unusual stitch, two foundation chains must be created as you complete each star. In the text instructions below, a [bracketed number] refers to a numbered photo step above.

First foundation star stitch (fstar):

Chain 3 loosely.

  • [image #1] Pull up a loop in each of the second and third chains; you have 3 loops on your hook.
  • [image 2] Chain 1 (counts as first foundation chain of first star),
  • [3] Yarn over and pull up a loop in the two outermost strands of the chain just made,
  • [4] Chain 1 (counts as second foundation chain of first star),
  • [5] Pinch it while you yarn over and pull through all 5 loops on your hook so that the last loop doesn’t tighten,
  • [6] Chain 1 (eye of this first fstar).

Tips: Pinching also helps you recognize which loops are the new foundation chain loops. Pull up loops loosely enough that a second crochet hook could fit in them.

Add more foundation star stitches:

Vashti's lacy Star Stitch Foundation in a hand dyed mohair for the "Firewirbel" Starwirbel Cowl.*Pull up a loop in each of these places:

  • [7] The Eye,
  • [8] Side of star,
  • [9] Two loops of second foundation chain of star;
  • [10] Chain 1 (counts as first foundation chain of next star),
  • [11] Yarn over and pull up loop in chain just made,
  • [12] Chain 1 (counts as second foundation chain of next star) and pinch it,
  • [13] Yarn over and pull through all 6 loops on hook,
  • [14] Chain 1 for eye.

Repeat from * for each new fstar.

You might be interested in the resources page for the Starwirbel Way class.

About My Newsletter

First page of a typical Crochet Inspirations newsletter issue.
Before anyone else, subscribers learned about crocheting lacy star stitches like Starwirbel with issue #60, Star Stitch Lace Pretties.

Vashti’s Crochet Inspirations Newsletter

Since September 2010 I’ve produced an information-rich crochet newsletter once or twice a month. It continues to be unique in the world of crochet, and it’s free. I explain why, below.

New: a chronological and [partially] clickable list of all back issues. The newsletter also has its own Facebook page where you can see additional links, images, and comments for each issue.

Subscribe.

New! Support the newsletter with literally a few dollars.

My Three Goals for the Newsletter

Satisfying these three goals is deeply meaningful for me. This is why the newsletter is free.

1. To say something new about crochet.

I must explore, question, and daydream about crochet stitches and techniques. Not gonna stop. This drives me to produce the newsletters, and they in turn spur me more. They push me to test my “lab swatches” more, and to research deeper into our crochet history.

As an example, the idea for issue 97 (Crocheter’s Life List) came from seeing a book about a “bucket list” for knitters, and wondering about a bucket list for crochet. Crocheters don’t have a book for that and I didn’t find much online. As I made my own, I wanted to offer it to other crocheters. This meant research to attempt the biggest picture possible of crochet and different crocheters’ experiences of it. You can download a Crochet Life List PDF from my blog. It’s designed for you to make it your own.

Not too long, not too short.

The newsletter format has valuable limits. I always turn up too much information for one issue. Often, the process of writing one reveals that the topic (carefully chosen to be neither too long nor short for one issue) is actually like a “zip file”! Often, what seems like one topic is actually a bundle of two or more. My writing about it triggers it to unpack into something much bigger than I expected.

It’s super rewarding when this happens! It’s also frustrating when I’m trying to get the newsletter sent, so I jot down everything and save it. (And, remind myself that this is exactly why I’m doing this: I’m mining for gold and I’ve hit a vein.) My newsletter drafts binder is quite plump.

One result over ten years of this has been that the issues become tight summaries of geeky, fresh, unique crochet topics for me. They often turn out to be seed forms of crochet classes I go on to create. These are classes that regularly fill up to the limit with waiting lists!

2. To find my fellow crochet explorers!

The typical crochet emails you can subscribe to are not true newsletters. They may be someone’s digest of recent blog posts, or really just advertisements to delete. I want to offer to crocheters like me an exciting alternative to the kind of crochet emails that I delete.

As I choose each issue topic and write about it, I think, if I were a subscriber of Vashti’s Crochet Inspirations, would I look forward to this? Would I be inspired to pick up a crochet hook, and to save a print out of the issue to read again? That’s my goal. I want to find out about a forgotten little pocket of crochet, or see something familiar from a new angle. I want to be inspired to think more about what it is about crochet that I love so much.

3. To have one place to share my different kinds of crochet developments.

I can’t imagine a better way to let everyone know when I:

  • Create a new stitch video or step by step photo tutorial;
  • Find important news about crochet that I think we should all know about;
  • Publish a new downloadable crochet pattern, e-book, etc;
  • Offer a crochet class in person or online.

My strongest motivation while serving on the board of directors for the Crochet Guild of America is CGOA’s mission statement, because it’s also my mission: to further the growth and development of my beloved crochet. Writing this newsletter is part of this mission.

Posted on 2 Comments

Crochet Beginners’ Tip: Slip Stitch Fake Facts

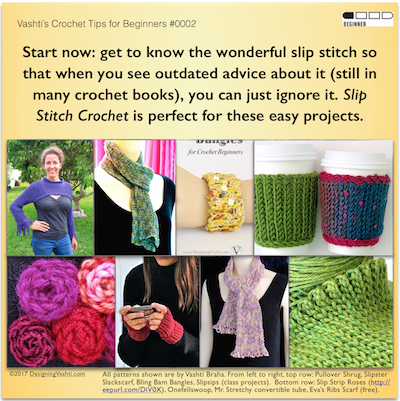
Beginner Crochet tip: tune out the fake facts still being circulated about our most basic and versatile crochet stitch, the slip stitch!

About Today’s Tip for Crochet Beginners

I’m going to unpack that “outdated advice” part in the tip pictured above.

For reasons I still haven’t figured out, misconceptions and outright errors (“alternative facts”?) about slip stitches are still repeated uncritically in English-language crochet books.

This has been going on for decades. Think about how it affects whole generations of crocheters. It’s the only reason it took me 30 years to try crocheting a whole swatch of just slip stitches. I was immediately smitten. My first slip stitch design was the 2004 Pullover Shrug (the cropped purple top I’m wearing in the tip above).

I have distilled every fake fact about slip stitches into the following four sentences, below. I begin my Slip Stitch Crochet 101 classes with them so that we can deal with them head on.

Can you spot all the unhelpful advice?

  1. There is one kind of slip stitch and you crochet it tightly.
  2. It is useful only occasionally, for a few things, such as joining a round, closing a picot, or seaming.
  3. Don’t bother trying to make anything with it, it has no height.
  4. It doesn’t really count as a stitch at all; it’s a nonstitch

(I underlined the fake facts to help you.) This false information discourages crochet beginners and all crocheters from exploring only slip stitches, not other basic stitches. Why? It’s not because slip stitches are tricky for beginners. It’s the most basic crochet stitch of all, along with the chain stitch! In my classes, the experienced crocheters struggle more—but that’s just due to the years of misinformation.

The more I explore slip stitch crocheting, the more insight I get into all crochet. This is why I want every crocheter to know about it. (The things you can make are also awesome.)

New Rules About Slip Stitches

1. Think of slip stitches as a group of stitches.

Lattice textured border of a 100% slip stitch crochet mobius "Bosnian" style (in rounds with no turning).
“Bosnian” crochet: slip stitches crocheted in the round with no turning.

Slip Stitch Crochet is actually a whole technique. When you know this, you can retain what you learn about them easier. It also spurs innovation, and aids pattern writing. I use the abbreviation SSC, as do others in the international SSC community.

Slip stitches look, feel, and behave very differently when crocheted with turning or without (“Bosnian”), and in just the front or back loop or both (or between stitches!). Invert them or twist their loops for more slip stitch types.

2. Go up at least two crochet hook sizes to crochet them loosely. 

Big-hook slip stitch is especially fun! Start with your bounciest wool yarns. 

3. Slip stitches are exceedingly versatile, useful, and pleasing for many of the things crocheters make.

In fact, slip stitches are often preferable to other stitches, such as for ribbing, or for a thin, supple fabric that conserves yarn.

A slip stitch may also be fine for joining a round, closing a picot, or seaming, but not always. For example, slipping a loop through to join is more invisible than a slip stitch. A single crochet sometimes closes a picot better with some yarns or for certain patterns. For seaming, sometimes alternating a slip stitch or single crochet with a chain-1 is better. (I also like to use inverted slip stitches for seams.)

4. Slip stitches clearly have height.

How odd that it needs to be stated. The simple evidence is the heaps of very wearable scarves and sweaters. You should see the overflowing table of them that I bring to classes!

Not only does a slip stitch have height, the height varies depending on the type of slip stitch. As a starting point, expect front-loop types to be taller than back-loop types. (This is the case for single crochet too.) 

Yes, you can even crochet around the post of a slip stitch.

Please Don’t Wait Like I Did.

I learned about crocheting slip stitch projects decades after learning how to crochet everything else. There’s no reason for crochet beginners to wait decades like I did!

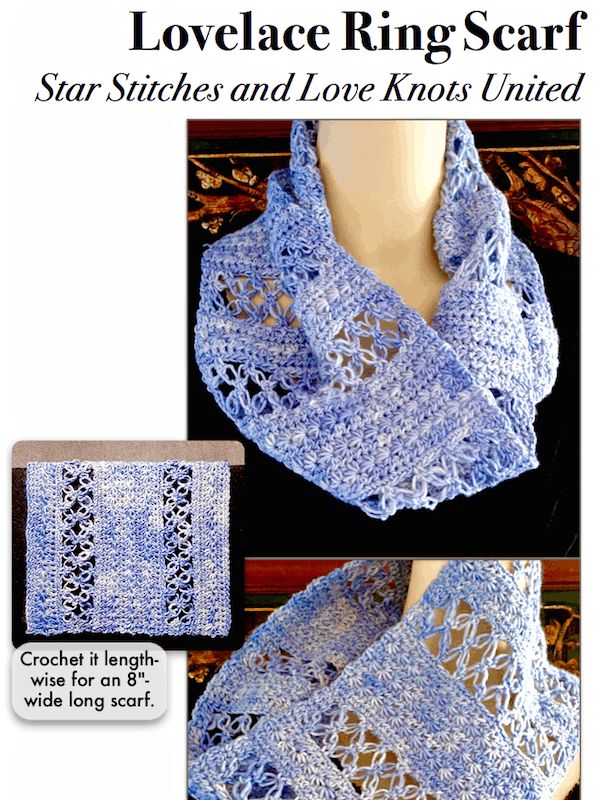
Lovelace Ring Scarf

Two romantic 19th-century crochet stitches from contrasting traditions have gracefully joined forces to warm up 21st-century necks!

I’ve used four basic crochet stitches, from slip stitch to double crochet, to smooth the way for these two unique stitches to work well together. You’ll pick up crocheting speed and never get bored.

As the laciest of the lacy stitches, love knots (aka lovers knot, Solomon’s knot) are ideal for balmy climates. Victorian-era crocheters used the finest cotton and silk threads to make fancy love knot edgings, opera bags, and baby bonnets.

Star stitches are a classic northern European stitch for crocheting thick warm coats and baby blankets in wool yarns. Even the delicate lacy stars of the earliest patterns were crocheted in lace weight wools, not cotton thread.

Pattern includes stitch hows & whys, and scarf customizing tips. The story of this special stitch pattern is blogged here.

Skill Level

Intermediate. Both star stitches and love knots are iconic Intermediate skill level stitches. In fact, the love knot has at times served to distinguish the crochet skill levels.

I teach separate three-hour classes on each of these stitch types. For this pattern I’ve selected the less challenging versions of them, and include some tips, hows, and whys that have helped my students.

You’ll have the opportunity to learn these skills:

  • How to crochet a classic two-row star stitch.
  • How to insert a two-row band of simple love knot mesh that has a selvage, and why.
  • How to customize this new stitch pattern so that you can use it for many other projects.

Finished Dimensions

One-skein scarf is 7.5″ {19 cm} wide and 30″ {76.2 cm} long (circumference of ring). Width is determined by the number of foundation chains. Add a second skein to lengthen.

Materials 

  • Crochet Hook Size G/7 {4.50 mm} or size needed for gauge.
  • Yarn usedMadelinetosh Tosh DK (100% merino wool, 225 yds/206 m per 3.5 oz/100 g), one ball of color Blue Gingham used.

Yarn substitution advice: I recommend that you use wool yarn, or a wool-like blend. A single ply type like I’ve used here shows off these stitch textures especially well. Choose a #3 Light Weight yarn with a recommended crochet hook size range of US G/7 {4.50 mm} to US I/9 {5.5 mm}. These yarns may also be called Light Worsted. 

  • Notions: Scissors. Yarn needle. Large button(s), optional.