Archived Crochet Newsletters: LIST

Have you arrived at this page from Ravelry, Facebook, a blog post, pattern PDF, or elsewhere? Welcome. This is the only place to find the complete list of my archived crochet newsletters, with update notes and direct access to each. Go directly to the list below.

Archived newsletters: first page of a typical issue.

I proudly present a full backlist of my archived crochet newsletters. This page is a public log of my progress as I add each one to its permanent public archive on this site.

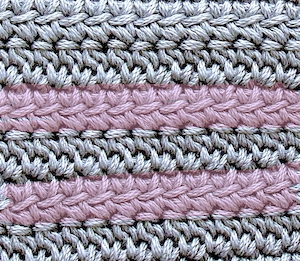
As I upload and update each back issue, I’ll add its direct link to the list below. Use the issue number (such as #60 for the one pictured) to find the issue you want in the list. If it isn’t clickable, it’s not yet republished.

The Originals, Enriched

Each of my archived crochet newsletters is in the process of getting its own permanent page on this website. You’ll be able to leave comments, bookmark and return to it, share, pin, and print out a copy. I love that I can add new stuff as the topic evolves. If I’ve updated it more than once, I’ll note the most recent date at the top of its page.

I’m generally preserving the original issues except for very light editing and link-fixing here and there. Many of the topics continue to evolve. Issue #2 is an example of when I add new material and some original notes that were squeezed out of the issue the first time around. This kind of stuff goes at the end of its page, clearly indicated. In the case of Issue #3, the whole issue got a dramatic overhaul!

How to Find an Issue

Know the number of the issue, or the general date it was sent?

The first-ever issue, #1, was sent September 2, 2010. Issue #100 went out September 1, 2019. Scroll through the list below by issue number, which is also chronological.

I always refer to an issue by its number.

Prefer to browse?

I created this page just for you. And for me, when I just want to scroll through the memories.

Have a topic in mind?

Have a topic in mind, but you don’t know the number or date of the issue(s)? I’m working on a way to display newsletters grouped in subcategories.

Vashti’s Archived Crochet Newsletters Complete List: 2010 to the Present

On a mobile device? Scroll to the left or right if you don’t see FOUR columns (Issue #, Sent Date, Original Title, Notes).

Issue #Sent
Date
Original TitleNotes
#12010-09-02 New Crochet Talk: Inaugural Issue
#22010-09-16A Super Crochet ManeuverUpdated title: Crochet Stitch Equivalents (Issue 2)
#32010-09-30A Very Different Kind of Crochet StitchUpdated title: Limpet Stitch: Crochet Half Hitches (Issue 3)
#42010-10-14Graphing Waterlilies
#52010-10-28A Fever for Neck Warmers
#62010-11-11Thick, Thicker, Thickest
#72010-11-24Tunisian for Yarn Bail Outs
#82010-12-09Commutative Property
#92011-01-06The Ribbing Issue
#102011-01-20Breaking Out of Tunisian Ruts 
#112011-02-03Fibers That ‘Sproing’ 
#122011-02-17Twist Some Loops 
#132011-03-03Shrugging Off Winter 
#142011-03-17Ireland, Japan, and Crochet Lace
#152011-04-01Unpacking V-Stitches 
#162011-04-14Flavor Burst Crochet  
#172011-04-28Fancy Cords in 360º 
#182011-05-13Deep Crochet Research 
#192011-05-26Netting vs. Lace  
#202011-06-09Travel Crochet 
#212011-06-23Wee Pebble Stitches 
#222011-07-08Crochet That Pours 
#232011-07-21If Stitch Patterns Could Speak         
#242011-08-04Mirroring Stitch Types 
#252011-08-18Tweak Those Gaps Along Row Edges?        
#262011-09-01Fun With Stitch Blocking  
#272011-09-15Stalking the Wild Slip Stitch  
#282011-10-06Mohairs for Crochet 
#292011-10-20Short Row Startle! 
#302011-11-05Yarns of Different Stripes 
#312011-11-17Sparkly Crocheting 
#322011-12-01Quick Crochet for Kids 
#332011-12-16Jumbo Hooks 
#342011-12-31Protecting Crochet Creativity 
#352012-01-14Draping Simple Shapes 
#362012-02-17Ribs, Old & New Grooves
#372012-03-08When Stitches Lean 
#382012-03-23A Jewelry Experiment Method 
#392012-04-24Love Knot Research 
#402012-05-14Pulling Up a Long Loop  
#412012-07-12Beachy Kimono & Ruana Shapes 
#422012-08-11“Inverse” (NOT Reverse) Crocheting 
#432012-09-27Silver Wire Crocheting 
#442012-11-08Dainty Eyelets for Winter Lace 
#452012-11-30Slip Stitch FAQ Blogged a version of this: Slip Stitch Crochet FAQ.
#462012-12-13Clones Knots, Open & Closed 
#472013-02-19Rayon Threads. Really? 
#482013-03-14Diagonal Tunisian Crochet Discovery 
#492013-04-20‘TEKSplorations’ for Tunisian LaceBlogged about the Tunisian Extended Stitch: Tunisian Extended Stitch Ripple.
#502013-05-16Those Crochet Stitch “Feet” 
#512013-06-18Lacy Summery Seams 
#522013-07-18Slip Stitches, Wool Breeds, & Plying
#532013-08-06Slip Stitch Flowers 
#542103-09-27How (& Why?) of Crochet Coffee Cozies
#552013-12-02Fun Yarn Tests, and – BIG NEWS! 
#562014-01-09Yarn Color Charms to Make 
#572014-02-14Which Beads Added Which Way?
#582014-03-13About That Bump in the Chain
#592014-04-01Star Stitch, the Tunisian Connection 
#602014-04-25Star Stitch Lace Pretties! 
#612014-06-06When Top Loops Are Optional! 
#622014-09-06Hexagonal Lace TypesBlogged overflow from this issue: Beaded Delta Crochet Types of Lace.
#632014-10-02Fun with Double StrandingBlogged overflow from this issue, Double-Strand Crochet, and more overflow: More on Double Strand Crocheting.
#642014-11-07Dramatic Tunisian Edge IncreasesBlogged a version of this: How to Increase Tunisian Crochet Blocks.
#652014-12-05Mock Cables in Slip Stitches Blogged the project: Crochet Cable Boot Cuff Pattern Progress.
#662014-12-21Hot Trend: Boot Cuffs! 
#672015-02-05That Weird Popcorn Stitch Step 
#682015-05-23Filet Net Textures, Rotated! 
#692015-07-04Wish Bracelets: Why Not Crocheted?
#702015-08-14Starting a Stitch with a Backtrack! 
#712015-09-19Beyond Crochet Hook Debates Blogged: downloadable Crochet Hook Diagram, and Crochet Hook Size Charts.
#722015-10-10“Long Tail” Crochet Blogged: Long Tail Crochet Foundations.
#732015-11-25How to Shape Star Stitches 
#742015-12-16Crochet a Filament of Cheer 
#752016-01-23It’s MORE Than an Invisible Decrease! Blogged a version of this: When to Crochet Between Top Loops.
#762016-02-12Heart Shapes with Slip Stitches Blogged a free heart pattern to go with this issue: Slip Stitch Crochet Hearts. Also see Crochet Bunnies Flat or Puffy.
#772016-03-08Find the Color Code of Short Striping Yarns         Related blog post: Rosebud Argyle Color Pooling Stitch.
#782016-05-02Möbius Mindbending Experiences  Related blog post: Mindbender Mobius News.
#792016-06-11Steek (Cut) Stitches the Fun Way ✂ Blogged the overflow from this issue: Steeking Crochet (Newsletter Overflow).
#802016-09-01Pattern Schematics for Insiders and Outsiders
#812016-11-04Crocheting Pendant Loops ➰ 
#822016-12-10Holiday 2016 + Foundation Star How-to[includes #82.5 (12/15/2016) Updates to Last Week’s Issue] 
#83 2017-02-28Hidden Pictures in CUT Stitches! 
#842017-05-05Crocheted Ruffles
#852017-07-07New Stitch Patterns 
#862017-08-10Edgings That Multitask 
#872017-08-24Announcing a Ruana ‘DAL CAL’ (design-along crochet-along) 
#882017-11-18Yarn Overs⤵, Unders⤴, and ‘Purlwise’Blogged overflow from this issue: Yarn Over, Yarn Under (Newsletter Overflow).
#892018-01-13Crochet Around a Ring *Differently* Blogged the design that inspired this issue: Last Minute Crochet Jewelry Gift.
#902018-03-04Elegant Tall Stitches
#912018-04-07Crocheting a Yarn’s Twist Energy 
#922018-05-19Clever Substitutions
#932018-07-21Unzip Foundation Chains
#942018-09-01Referring to Stitch Parts
#952018-10-19Color Revolution
#962018-11-29Choosing Holiday Projects         Blogged the charts of ideas: Holiday Crochet Project Habits.
#972019-02-10Crochet “Life Lists”                               Downloadable PDF of Crochet Bucket List.
#982019-04-06Tricky Tunisian/Afghan Hooks                  
#992019-06-07Barefoot Sandal Phenomenon
#100 2019-09-01It’s Issue 100!: Scaling Every Which Way
#1012020-04-25How I Reset Major Crochet Slumps
#1022020-06-13Wild Whys of Y-StitchesCurrently included in the Tall Stitch Class Resources Page until it gets its own permanent page.
#1032020-10-09Big Picture of CrochetUpdated title: What IS Crochet, Really?
#1042022-01-26The Paradoxical Return PassYou might be able to view it here until I add it to this site.
#1052022-04-22Ripple Stitch DNAView it here until I add it to this site.
#106ooo
Vashti’s Crochet Inspirations Newsletter all issues.

Subscribe

Become a Newsletter Supporter

Posted on 1 Comment

How I Crochet Two Rows at Once (Lacy)

Crochet two rows at once of this lace stitch pattern by using X-stitches and shells of linked taller stitches. One-row version is on the right.

There’s more than one way to crochet two rows at once. You can also crochet three or more rows as one. I’ve only seen other people combine two rows with plain and fairly dense stitches, like rows of all single crochet or double crochet (in UK & AUS that’s doubles and trebles). I’m going to show you how I did it with a lacy stitch pattern.

The green swatches below are from my newsletter, issue #102: “Wild Whys of Y-Stitches”. I didn’t have room to include the lavender ones shown above. That means this post also qualifies as newsletter overflow, woo-hoo!

Crocheting two rows as one is a tall stitch “hack” that I stumbled on while researching X- and Y-shaped stitches with my upcoming online class in mind, Tall Stitch Virtuosity. In this post I’ll break it down, ending with actual row-by-row instructions for a 2-row stitch pattern, and for my one-row version of it.

Linked Stitches: Classic & Beyond

First, we all need to be on the same page about linked stitches if we’re going to crochet two rows at once.

A world of special effects with linking opens up when you can identify the individual strands of a tall stitch. I’m surprised how long it took for my eyes to distinguish what goes on in tall stitches, structurally. I used to think they were like bundles of muscles and ligaments.

So, let’s dig in to what each strand is doing in the post (a.k.a. stem) of an astonishingly tall 2-color stitch. I loaded yarn overs onto my hook with blue yarn. Then I worked them all off the standard way (two by two) with brown yarn. I crocheted it loosely so you can see through the stitch:

Close up of a very tall crochet stitch. The yarn overs are done with a contrasting color to show that intiial yarn overs are a separate strand that wraps around a series of chain stitches. Together this creates the post of a basic tall crochet stitch.
I used this image in issue #94 of my newsletter, “Stitch Parts: Where We’re At” to compare Tunisian crochet similarities.
Close up of stitch pattern with tall stitch clusters; the yarn over strands have been tinted to highlight them within a cluster.

Find the Yarn Over Strands

Here’s a row of 6-dtr split clusters (dtr = double treble; in the UK/AUS it’s ttr). I yarned over 3 times to begin each dtr. The tinting shows where the three yarn overs end up in each stitch post.

Tip: Just count the yarn overs in a stitch post and you know which tall stitch was used…as long as it’s not a variation, such as an extended stitch.

Linking the Classic Way

A classic linked stitch is a tall stitch that is linked all along its post to the yarn over strands of the stitch just before it. I call this “classic” because it seems to be the default or expected way to do a linked stitch, even though in actuality the ways to link them are infinite.

The classic method welds them together from top to bottom. In photo A below, all of the tall stitches are linked in three places. The right cluster is “classic”: all 3 yarn overs link to the 3 yarn overs of the previous stitch. In photo B, this is what you get when you link the yarn over of each double crochet of every row.

In photo C, I forgot to link the clusters in the middle row. The clusters in the bottom and top rows are linked only with the middle yarn over. Can you see the horizontal strands where they’re linked? It causes the cluster to flatten just a bit and to move as one unit, almost like a coin. I like their surface texture. They’d probably become stiff and a bit concave if I linked them the classic way, with all three of their yarn overs.

I’ve used classic linked stitches as borders for Tunisian designs like Liebling and Graven. The pros and cons of classic linked stitches resemble those of Tunisian simple stitch (Tss):

  • It eliminates gaps between tall stitches. This may be its most common use. It also tightens the gauge a bit. It’s a great fabric for a bag (Sterling).
  • It changes the surface texture to the flatter woven look of Tss.
  • The fabric feels thinner. It has less stretch and less drape. Stitch fronts may bend slightly inward in a concave way. (Akin to the “Tunisian curl”.)
A dtr that is linked in only one of its 3 yarn overs.

Selective Linking

Here’s a row of 3-dtr clusters in progress; I’m linking only their middles. The 3 initial yarn overs of each dtr are tinted. See how the middle pink and blue yarn overs are linked? The other blue and pink ones are not.

Yellow-tinted yarn overs for a new dtr are on the hook. See that the 2nd yellow one is linked to the 2nd pink one? Here’s how:

Yarn over (counts as 1st of 3 initial yarn overs in yellow); insert hook down through the top of the the 2nd (pink) yarn over of the previous dtr, yarn over and pull up a loop in it (counts as 2nd of 3 initial yarn overs); yarn over (counts as 3rd of these yarn overs). To complete stitch, insert hook in same stitch of row as the previous two dtr, *yarn over and pull up a loop, yarn over and pull through two loops on hook, repeat from * twice. In this case for a cluster, yarn over and pull through the remaining loops on the hook.


Crochet Two Rows at Once, Creatively

I hope you’ll explore what you can do with linked stitches. Here are some that need future blog posts.

  • X- and Y-stitches are very much like linked stitches; the main difference is the next stitch is started in the side of the stitch post, not just linked to it. For an X or Y shape, the next stitch is shorter, like a branch crocheted onto the “trunk” of a taller stitch. I needed X-stitches for the lavender swatch (top of the page) to be able to crochet two rows at once. The two-row version has a V-stitch crocheted into an inverted V-stitch. Isn’t that a two-row X?
  • I’ve discussed where to link, and how many times to link in the same stitch. What about how you might link. The equivalent of a slip stitched link is where you insert your hook in a strand of the previous stitch and leave it on the hook (don’t yarn over and pull up a loop in it). The opposite would be to start a taller stitch there: it worked for me when I crocheted a letter A-shape.

A Sample Two-Rows-as-One Pattern

  • Pattern abbreviations: ch = chain stitch, dc = double crochet (UK/AUS tr), dtr = double treble (UK/AUS ttr), sc = single crochet (UK/AUS dc), st(s) = stitch(es), yo = yarn over hook
  • Special Stitches:
    • Shell = [2-dc cluster, dc, 2-dc cluster] all into designated stitch
    • 2-dc cluster = *yo, pull up loop in designated stitch, yo and pull through two loops on hook, repeat from * in same stitch, yo and pull through all loops on hook.
    • Split Cluster = [*yo, pull up loop in first st of Shell, yo and pull through two loops on hook, repeat from * in same stitch], [yo, pull up loop in 2nd st of Shell, yo and pull through two loops on hook], [*yo, pull up loop in 3rd st of Shell, yo and pull through two loops on hook, repeat from * in same stitch], yo and pull through all 6 loops on hook.
    • Coin-Cluster = Yo 3 times, insert hook in next st, *yo and pull up a loop, [yo and pull through 2 loops on hook] 3 times, yo, insert hook in 2nd yo strand of previous st, yo and pull up a loop, yo, insert hook in same st of row, repeat from * four times, [yo and pull through 2 loops on hook] 3 times, yo and pull through all 6 loops on hook.

Original Two-Row Stitch Pattern

Chain 20 for a swatch. (Multiple of 6 stitches + 5.)

  1. Row 1: Dc in 8th ch from your hook, *ch 1, skip next 2 sts of row, Shell, ch 1, skip next 2 sts of row, dc in next st, repeat from *. Ch 5, turn.
  2. Row 2: Skip next 2 ch, *dc in next dc, ch 2, skip next ch, Split Cluster over next 3 sts of Shell, ch 2, repeat from *, dc in next dc, ch 2, dc in 2nd ch of turning ch.
  3. Repeat Rows 1 and 2 for pattern. Or, for Row 3 put Shells where the dc are, and dc where the Shells are to stagger the pattern.

The One-Row Version

Chain 23 for a swatch. (Multiple of 6 stitches + 7.)

  1. Row 1: Dtr in 11th ch from your hook, *ch 2, skip next 2 sts of row, Coin-Cluster, ch 2, skip next 2 sts of row, dtr in next st, repeat from *.
  2. If you don’t mind having the wrong side of Coin-Clusters facing every other row, repeat Row 1. To have them all face the right side, work this pattern in the round with no turning. Or, use this Row 2 as shown in the swatch: Ch 1, turn. Sc in first dtr, *ch 2, skip next 2 ch, sc in next st, repeat from * to the end of the row, placing last sc in the next turning ch after you skip 2 of them.
  3. Repeat Rows 1 and 2 for pattern. Or, for Row 3 put Coin-Clusters where the dtr are, and dtr where the Coin-Clusters are to stagger the pattern.

So I’d like to hear from you if you’ve had linking adventures, or troubles.

Want to crochet two rows at once of a favorite stitch pattern? I think some probably can’t be done, while with others there could be several ways to combine rows.

I’m eyeing a pattern right now that has 3 rows of single crochet, then 1 row of clusters. I’m mulling how I could turn its 4-row repeat into 2: turn a sc row + cluster row + sc row into one row, and have the sc row that separates them be the one row that faces the wrong side!

Posted on 1 Comment

Crochet Bunnies Flat or Puffy

2 flat crocheted bunnies (sihouette), 2 stuffed ones, in different slip stitch crochet textures.

This past month I used Tunisian and slip stitches to crochet bunnies flat, rather than in the round. Make two, seam together, and stuff for 3D bunnies. Leave flat for appliqué!

Compare all the shapes in the photo above and below: there are some side-view silhouettes (the yellow wool bunnies) plus several marshmallow candy style bunnies in light blue Lotus yarn.

Two are stuffed, but all started out flat. The stuffed white wool bunny (above far right) uses the square method: I crocheted a flat square of inverse slip stitches, and then seamed and stuffed it. (I followed this tutorial for a knitted square bunny.)

Five marshmallow-candy-shape bunnies lined up from shortest (3 slip stitch) to tallest (2 Tunisian crochet)
From left to right: Three slip stitch bunnies (front-loop slip; inverted back loop; inverted front loop). Two Tunisian crochet bunnies, flat: TSS (simple stitch), TKS (knit stitch). I also added a simple slip stitch outline to all bunnies except the TSS one.

My informal and rather obsessive online research tells me that 95% of all the crochet amigurumi (stuffed toys) are single crochet stitches in the round. The other 5% are single crochet flat, in rows. It’s easy to know which were crocheted in rows because the texture is very different from rounds with no turning. Crochet designers Donna & Michaelene rock the flat method with single crochet.

Internal or External Shaping?

5 slip stitch roses of different colors and petal shapes
Slip Stitches are fabulous
for shaping flower petals

When you crochet bunnies flat, all the shaping happens at the beginning and/or end of a row; never in the middle of a row. This is external shaping. I’ve liked this kind of crochet ever since I swatched lots of shaping techniques for my Slip Stitch Shapes and Special FX class.

External shaping should be an elementary challenge, but it depends on the stitch and the shape. Each row might be different from the rest. I bet crocheters rarely do it constantly for a whole project, though. See my free heart pattern. It’s an easier shape than a bunny because you’re adding or subtracting no more than two stitches at a time.

New to external shaping in every row? Use the short stitch you’re most familiar with: single crochet (sc), slip stitch (sl st), or Tunisian simple stitch (TSS). You need to be able to easily count your rows and stitches. For most people it’s single crochet.

Crocheting any shape in the round (other than a straight tube) requires internal shaping. It kind of depends on the crocheter how basic that is. It’s probably easier for those who started early on with granny squares, flowers, and other motifs in the round.

Slip Stitches, or Tunisian Crochet?

I found no examples of TSS or sl st crochet bunnies, flat or otherwise, except this sweet one in Tunisian knit stitch (TKS). (You’ll need a Ravelry account to view it). I decided to do side by side bunny comparisons. Yes, I went down a rabbit hole.

Surprising Differences

I used the same chart size for each blue bunny. The Tunisian bunnies are much bigger! After making several sl st bunnies, the forward and return passes of Tunisian felt like double the work for the same bunny. Compared to sl st fabric, the return pass seemed to add padding and height to the stitches. The TKS one also feels heavy. It has so much more yarn in it than the others.

Two flat crochet bunnies and a stuffed one, all "marshmallow peeps style" in light blue Lotus yarn
Three slip stitch amigos. See more in progress
on their project page.

Of the three blue sl st bunnies, the inverse front loop one (far right) has the most height. I used it for two bunnies in the first photo above too: the smaller yellow silhouette, and the white bunny from a square.

TSS is similar to using sc. Besides being of similar height, it’s easy to count rows, especially the TSS rows. Both prevent stuffing from showing through (so does sl st). Unlike sc and sl st, Tunisian stitches do lean, but more weakly than it appears. The lean readily blocks out.

Tunisian crochet has a few strong advantages over sc and sl st. There is no turning, so following a charted shape is the easiest. Another big advantage is when edging the shape. I like to edge flat shapes with a round of slip stitches before I seam them together. Crocheting into Tunisian row ends is a joy. “Joy” isn’t the word that comes to mind when crocheting into row ends of sc or sl st.

Happy Easter 2020 everyone!

Posted on Leave a comment

Moleskine Crochet Fix

Three half-flowers in antique gold and silver colors attached to spine of large Molestine crochet notebook.

I have a pack of three large Moleskine notebooks. They started out identical and very plain. I use two of them for crochet work. How to distinguish them all from each other? Hmm.

Moleskine + crochet go together so nicely. I see folks using the notebooks for crochet journaling, and crocheting covers for them. They’re great for me too except in two ways.

I can’t wait to show you my new crochet solution. The spine of my crochet notebook now sports a title in a universal language.

Pre-Crochet Prep

Moleskine crochet notebook completed: 3 crocheted half-flowers sewn to the binding and the cover is a protective coating.

I mention this because I needed to try a paper-coating idea before adding the crochet to its spine. This is why its cover color ends up differing from the other two in this image.

First, about the cover. It’s plain cardstock. (My old design notebook was a fat spiral-bound graph paper pad with a durable plastic cover.) I like this slim one better, although its rather absorbent cover retains every scuff and stain. Its medium gray color is also fading.

First, I lightly spray-painted it with fine silver glitter. Then I used a fat metallic silver paint marker to add random speckles of different sizes, and a border. These cover up spots and marks.

Unfortunately, even though it’s spray paint, the glitter rubbed off. After I took the next photo below, I lightly sprayed a few layers of glossy sealer on it. It works on the glitter and adds a durable feel to the cover. It also darkened and changed the gray color of the paper, even more than the spray paint did.

Moleskine crochet hook fit: find the steel hook size that fits in the seam stitch without stretching it.
This steel crochet hook is very small, about 1.10 mm. A larger one would be hard to insert without fraying or stretching the thread. I don’t want to weaken the binding!
You can also see how the upper notebook has faded and yellowed a bit compared to the unused one under it.

The Crochet Fix

Here’s what I said when I started swatching the first of these three flower pieces:

The 3 half-flowers in pewter and antique gold colors before sewing Molestine crochet notebook seam

I’m trying out a tall-stitch flower motif but as an edging, and alternating an old gold color with an old silver color of thread I bought in Paris to see what happens with a glass of wine, to then see if this is the way I want to spruce up a Moleskine notebook. If it is, I shall blog it.

I’m wondering if this Scheepjes Maxi Sweet Treat crochet thread might satisfy my longing for the discontinued Opera thread ?

I adapted these flower pieces from flowery motif patterns in old Duplet magazines in my Tall Stitch Virtuosity class prep pile. The color changes made it easy to cover yarn ends, so weaving ends wasn’t an issue.

The second of the three notebooks is for slip stitch teaching thoughts. It will be fun to crochet a spine trim for it with slip stitches.

Crocheting Into Non-Crochet

I’ve blogged before about crocheting along the edge of a greeting card, a t-shirt, and foam sheets. (Crocheting a wide border onto a plastic-coated tablecloth is an adventure I thought I blogged; link goes to its Ravelry page.) I’ve even crocheted pages of a book together. I don’t recall ever wanting to stick a crochet hook into the saddle-stitch binding of a simple notebook before.

My Plans Changed as I Swatched

I figured I’d pick a half-flower I liked and then create a whole repeating strip of it to form an edging. Instead, my Moleskine crochet ended up being 3 flower fragments that I attached one by one. I so love it.

The other thing I assumed was that I’d crochet right onto the notebook binding. This was the original inspiration! I worried more and more about weakening the binding string. Ultimately, I fastened off the third flower piece with a very long yarn end. I used this to sew each crocheted piece to the binding with a sewing needle and simple overhand stitches.

Moleskine’s no-frills design is easy to find in other brands too. I love Moleskine’s rounded corners and the paper quality.

I’m not sure this Moleskine crochet idea would have occurred to me if it weren’t Day 27 of the Great Quarantine! Maybe it would have, but would I have followed through on it? Or blogged about it?

“I Didn’t Know You Could Crochet With That!”

Vashti models a mesh poncho crocheted of a mauve-pink silky angora-like medium weight yarn called Gedifra Micro Chic.
CGOA fashion show,
Manchester NH, 2004.

I wrote “I Didn’t Know You Could Crochet With That!” for the May 2006 issue of Yarn Market News. I wonder how often comments like these are still overheard in yarn shops today. At the time I was teaching in a new boutique-type yarn shop. It featured novelty-textured European yarns and youthful, trendy fashion patterns.

This is a poncho I crocheted in 2004 with yarn I purchased at the shop. It’s a silky and angora-like yarn called Gedifra Micro Chic.

Here’s the first of six News from the CGOA columns I wrote. Text of my original, updated submission follows.

Page of “I Didn’t Know You Could Crochet With That!”, my first CGOA column published in Yarn Market News May 2006.
This is the only article of the six for which I’m missing the magazine’s cover image.

“I Didn’t Know You Could Crochet With That!”

When I started teaching crochet at a local high-end yarn shop two years ago, I expected to meet a lot of knitters, and I did. What I did not expect was how often I overheard a customer exclaim, “I didn’t know you could crochet with that!” Invariably it was in reference to a new yarn with an unusual texture, done up as a trendy skinny scarf or other small project.

Knitted samples usually outnumber crocheted ones in yarn shops. It’s often the case in big craft stores too. If instead someone said, “I’ve never seen this yarn crocheted before,” I would be less surprised.

Surprise! The person who says “I didn’t know you could crochet with that!” may be a lapsed crocheter—one who hasn’t crocheted since the 1970’s. Back then, smooth worsted-weight wool imitations were in vogue. I sense liberation in their tone along with the element of wonder. It’s the sound of creativity sparking.

Then come the follow-up questions: “Do you give crochet classes here too?”, “Did someone here crochet these?” or “And can I crochet with that yarn too?”

Benefits of Lacy Stitches

A new yarn doesn’t have to be crocheted up into a whole scarf, bag, or wrap to generate sparks. A simple swatch can have the same effect when you try the more open crochet stitches.

The added benefit of open stitches is they work up faster than the usual all single crochet or all double crochet stitches. Open stitches can look fancy and still use the same stitches that all beginners learn.

If you already know how to make beginner crochet stitches (chain, single crochet, double crochet), here are three swatches to try, but there are many more possibilities.

  • Swatch #1: alternate one row of all single or double crochet (a “solid” row) with a row of 1 double crochet–skip the next stitch–1 chain stitch–across (an “open” row).
  • Swatch #2: for the first row, do 2 double crochet into the same stitch, skip the next stitch, and repeat across (creates “V” stitches); for the rest of the rows, do 2 double crochets into each “V” stitch space of the row below.
  • Swatch #3: Using a yarn that has big texture, do each row in all single crochet in the front loop only, with a hook that is at least four sizes larger than recommended on the ball band!

Update a Swatch or Two

Swatch #3 is an example of loosening up the stitching gauge dramatically to update a swatch. Another easy update: change the shape to flowers and round motifs.

Fashion runways and magazines have primed customers to spot crochet with a single glance for many seasons now. The trend showing no signs of abating!

Hang up an openwork crochet swatch next to a knitted one and watch people make a beeline to it. It will double the possibilities of the yarn in customers’ minds, and they will associate your store with the liberating feeling of “I didn’t know you could crochet with that!”


(Sidebar) CGOA’s national conference takes place annually in July. Two enduringly popular events book-end it: Professional Development Day and our yearly fashion show banquet. For more information and to register, go to http://www.crochet.org/.


This article is the first of six “News From the CGOA” columns I wrote for Yarn Market News. Find links to all six in the Advice for Yarn Shops blog post.