Posted on 1 Comment

DesigningVashti Update 2020

I’ll be blogging most days of this Great Quarantine of 2020. Some posts will be short check ins, all will be crochet related.

Newsletter Update

Vashti wears her crocheted angora "Orbit Halo" cowl in a stone-walled breakfast cafe in the old part of Paris
Lots of travel happened, more on that below. I’m sporting an angora Orbit Cowl at a cafe in old Paris (Le Marais district).

I sent out issue #100 of my crochet newsletter to over 8,000 subscribers on September 1, 2019. Don’t worry, you haven’t missed out on issue #101. I haven’t sent it yet. There was a big disruption in the newsletter-sending force. The service provider I’d used for nine years revamped their pricing for legacy accounts like mine. (I’d already been paying too much!)

I’ll be using a new email service provider starting with issue #101. I’m mulling the topic now. It’s thanks to this corona virus quarantine that I powered through the technical steps needed to switch to the new service.

Just before CGOA issued their call for teaching proposals (October 2019) I was updating early newsletters to republish on my blog. Here is a completed one: Issue #2, Stitch Equivalents. I tried a few blog templates, a few new swatches. I’m pleased with it.

What, only issue #2, you say? CGOA‘s teacher call came out while I was working on #3.

New Classes for CGOA

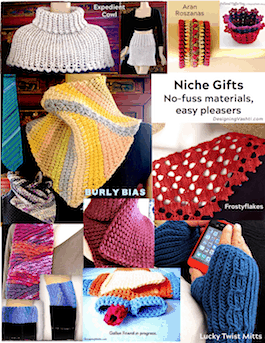
October was a blur of class topic testing, research, and photo optimizing. The submission process becomes arduous when the topics you submit are new ones. I had a lot. It’s so worth the extra effort. What crocheter doesn’t want new class topics to choose from?

I tapped into an endless fountain of new class topics, it seems. It took me by surprise. This was the bulk of October for ol’ Designing Vashti. Maybe I should expand the October update a bit and blog about this behind-the-scenes activity.

The grand outcome: CGOA’s Class Selection Committee chose seven topics. This means I’ll be teaching a class in every time slot of the conference. (Note that this summer’s conference will likely—not 100% certain yet—be postponed or canceled. The chance that by July it could commence as planned does look slim right now.)

Three views of a Parisian yarn shop: inside, outside, and my souvenir purchases with tote bag
The first of two yarn shops I visited in Paris. This one carried gorgeous locally dyed French yarns. I chose Mamy Factory’s cashmere Archiduchesse for my mom, partly because grandmothers on her side of my family are called Mamie.

Wow the Travel!

From November to January I was either traveling, or preparing for the next big trip, or recovering from jet lag. I didn’t recognize my life; I’m not a big traveler. Usually I do weekend road trips and one long distance domestic flight, at most (often to a conference).

Souvenir yarn and 3 crochet hooks (size 2mm, 2.5mm, and 7mm) from Phildar yarn shop in Paris
Souvenir purchases at the second yarn shop I found in Paris. It offered only Phildar yarns. These are my first Phildar crochet hooks. I chose 2 mm, 2.5 mm, and 7 mm.

November 2019 was all about Sedona, Arizona. It was work-related for my husband, and I fully enjoyed the resort room provided to us. It had a fireplace omg. There was a cool-looking pomegranate tree outside our window.

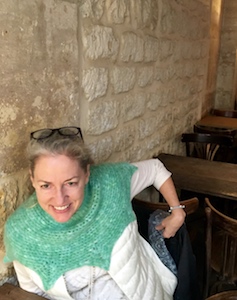
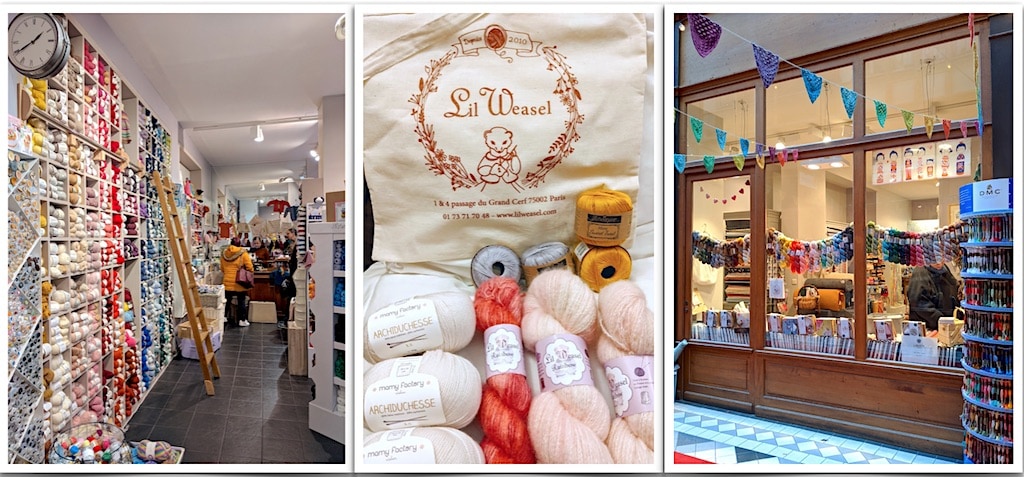
December was all about Paris, France. I love just being able to say that. It was an early surprise birthday present! My husband, son and I spent almost three weeks there. It was epic.

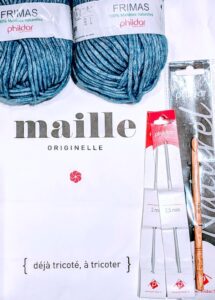
Crochet-wise, I expected to crochet a French market bag I designed, but didn’t get far enough on it. I did visit two delightful yarn shops where I bought yarns and crochet hooks made in France.

Imagine being in Paris when you find out which class topics you’ll be teaching in 2020. (I didn’t even know until a month before that I’d be going.) Not only does it alter the course of your days and months to find out whether your classes were picked for the conference. It also matters which and how many classes.

Some class topics take more preparation and testing than others. Others coordinate with each other so that prep for one also applies in some helpful way for another. A few are unique head trips that require gear-switching. One requires perfect text instructions, while another needs extreme close up photos or giant floor models. This is some of the stuff I thought about on the flight home.

Jetlag January

I began January blissfully jet-lagged and facing the big messy room I used for creating the topic proposals in October. Back then I’d closed the door on it until I knew which ones CGOA chose. Now I could clear away all the materials for classes that were not picked. That’s a perfect task while jet lagged.

I gave each chosen topic its own pocket folder. These seven pocket folders start out as in-bins. If I have a thought about what would work great for a topic’s class handout, I drop a note in its in-bin. If I see a relevant design in a magazine, I tear it out and toss it into an in-bin.

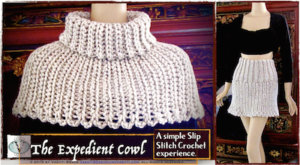
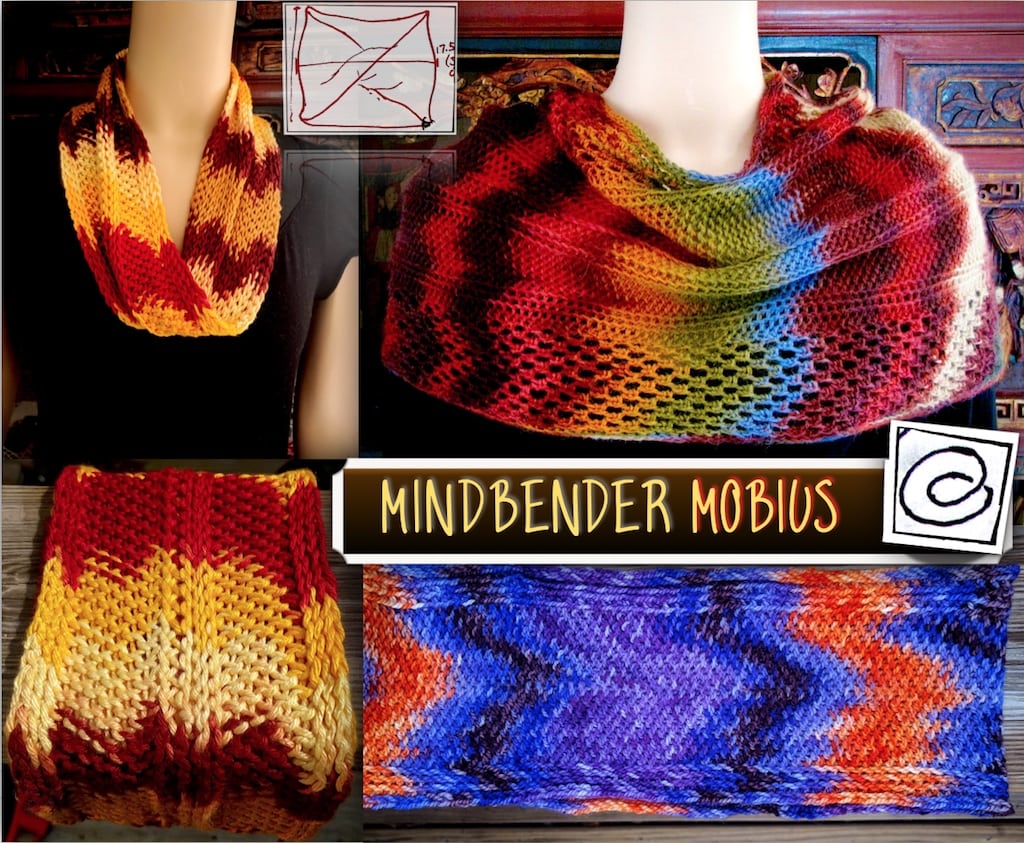
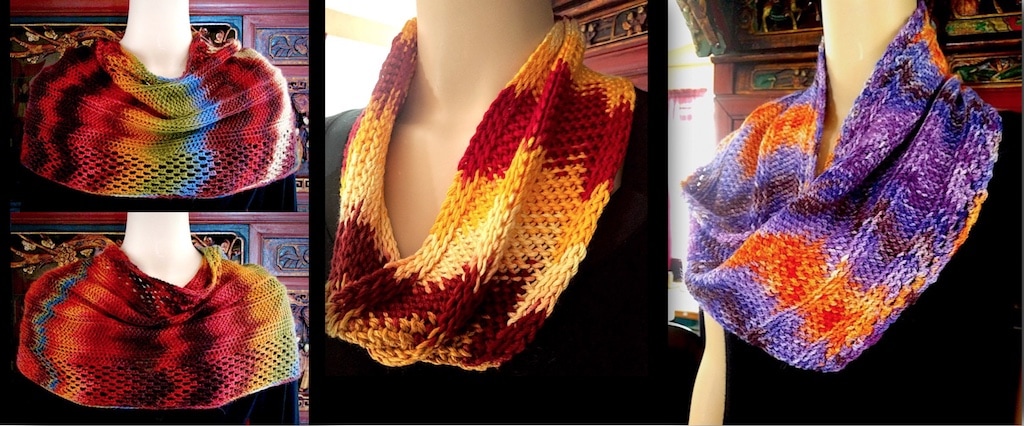
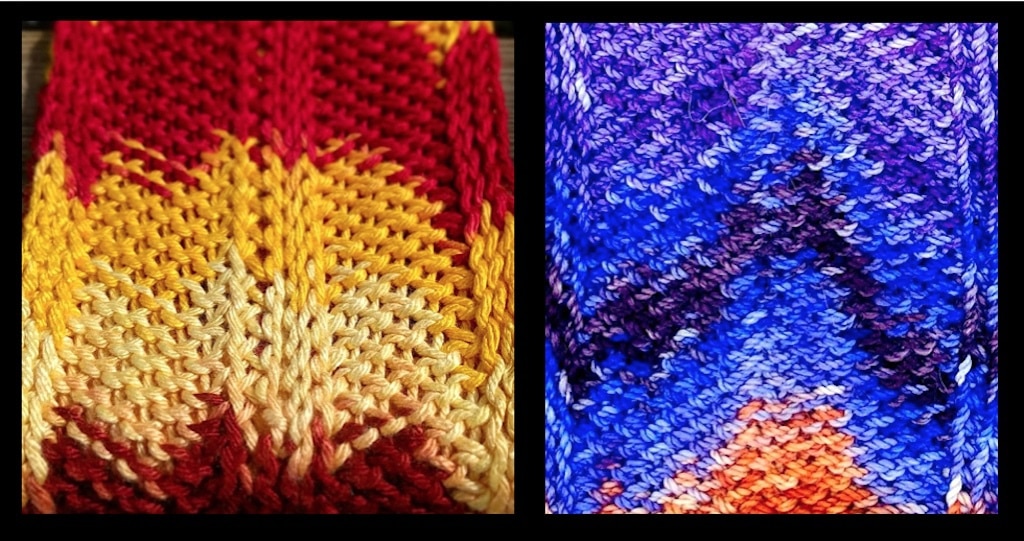
This update is almost complete: we’re at February now. That’s when I created this Mindbender Mobius class information page. February was a big prep month for two of my newest class topics: Tall Stitch Virtuosity and Return-Pass Hijinks. I remember it as full of eurekas. (I’m mulling whether any would make a good newsletter #101 topic.)

Aside from crochet, January and February were also about realizing it was time for us to move—to get our house ready to put on the market. I think the France trip helped give us the refreshed headspace to admit this and get going on it. We’ve lived here for 25 years so it’s a big change. We started renovating the kitchen…and…it’s still a construction zone. Just in time for a quarantine.

Quarantine Crocheting

There’s a lot of uncertainty right now. I need to continue preparing to teach classes even if the event is postponed or canceled, but it feels weird. I need to share and connect with crocheters, especially everyone I’m used to seeing at conferences. My crochet inspiration is erratic. I wonder if that’s the case for you too, lately?

I’m just going to be blogging my quarantine crocheting. Please pop in and say hi. Check in directly at https://www.designingvashti.com/blog/ or subscribe to this blog, or to my newsletter. You could also sign up for alerts from my Facebook page or from my Twitter feed. I announce every new blog post in these places.

Mindbender Mobius News

Mindbender Mobius crochet class for CGOA conference

I am excited about teaching a class on this special mobius design! It’s one topic of my seven three-hour class topics scheduled for the big Chain Link conference this July (2020) in New Orleans. This crochet conference has been produced every year since 1993 by the Crochet Guild of America. It’s the longest-running national-level conference. (I’m tempted to call it international because over the years many teachers have visited from other countries.)

As we get closer to July I may update this page with discoveries and other news. For example, when I create a Mindbender Mobius Class Resources page. I’ll add a note at the top of this page saying when it was updated last. It’s likely I’d also announce the news in my newsletters, so subscribe (free) if you want to stay in the loop.

Each One is Unique

Each Mindbender Mobius is unique and so is the experience of crocheting it. It’s a true mobius shape and this means it’s crocheted in infinity rounds—picture a figure-8 path. All you do is add a half-twist to the foundation row before joining it into your starting ring. This simple twist introduces features that have fascinated mathematicians for decades. See the newsletter issue I did about it four years ago; I still enjoy reading it.

I’ve made three Mindbenders so far:

Three different Mindbender Mobiuses due to dye method, fiber blend, yarn weight, and crochet hook size
Mindbender Mobiuses from left to right: Bosni-Misti-Moiré (2016), Dragon Bee (2019), Renegade (2019).

What’s So Different About This Mobius?

These Mindbenders don’t look crocheted. I promise zero knitting is involved. It’s 100% crochet with a regular crochet hook, preferably one that is two or three sizes larger than normally used for the yarn you choose.

For the first one on the left I used Misti Alpaca “dyed to the stitch” Hand Paint Sock, a fingering weight yarn. It calls for a 3.25mm or so crochet hook size on the label. I used size 5.5mm. The dyeing method used for it baffled me to no end! This mobius is the test of my theory and proof of my triumph when I finally cracked its true color repeat. I’ll explain what’s going on with this kind of variegated yarn in class. Have a look at this earlier blog post, Hand Dyed Yarn Three Ways about this yarn.

Thumbnail of issue #78 of Vashti's Crochet Inspirations newsletter: "Mindbending Mobius"
Issue #78, Mindbending Mobius, (Vashti’s Crochet Inspirations newsletter, May 2016)

I wanted to try several more things with the first one, and that’s what brings on the mindbending. When colors change quickly in a variegated yarn, like they do in the Misti Alpaca one, slip stitches are fabulous because they take up very little yarn per stitch. Even if you use a big hook. Just look at how slip stitches helped me get the most out every color in the Jempool scarf!

Unlike Jempool though, I couldn’t stack the colors of the Misti yarn unless I crocheted it in the round with no turning. With slip stitches that means Bosnian crochet.

Challenge accepted! I had never tried planned pooling with Bosnian. I knew it would be interesting because it has an innate lean. And what does the lean do if the rounds are figure-8’s? Each round builds on the others on both sides of the foundation. In other words, the foundation (or Round 1) runs down the center of a true mobius. I think of it as its spine.

Mobius Foundation “Spine”

You can disguise/hide the spine, or emphasize it and turn it into a design detail. For this class I found a simple way to make it blend in so well that it’s invisible. (In the projects above you’re seeing mostly planned texture changes in some of the rounds, not the spines.) Look below at a close up of the Dragon Bee and the Renegade mobiuses: it’s quite pronounced in the one on the left; in the Renegade it melts away to nothing. You can’t even feel it.

The foundation round of a true mobius runs down the center and is usually an obvious ridge unless you do something to make it blend in.
Foundation round at the center of Dragon Bee (left) is a pronounced “spine”. It’s hidden in the Renegade Mindbender on the right.

Here’s another mobius oddity to address: if you’ve ever crocheted a true mobius, you know that not only does the foundation run down the center of it, but all the stitches above the foundation face one way, and all of them below the foundation face the other. It depends on the stitch pattern whether it’s obvious or not. (For example, Doris’ Snow Day is a true mobius and you don’t notice the foundation OR whether the fronts or backs of stitches are facing.)

The back of Bosnian crochet looks distinctly different from the front. It really does look like it’s the back. Tunisian crochet is often like this too. So, what to do? I need to crochet the yarn in the round with no turning if I want to play a moiré color pooling game with it. I could omit the mobius twist and make a simple tube shape, but I wouldn’t be able to add increases to shape it at the shoulders. It would throw off the color stacking. (Have a look at Misti Fondant, which I’ll bring to class. The Mindbender inspired it; I found a way to do it in rounds with turning, plus I shaped it without throwing off the colors by using vertical ribbing.)

It turns out inverse slip stitches work great! It wouldn’t be a mindbender without them. Check the close up photos of the spines above: don’t the stitches match each other on both sides of the spine and look symmetrical?

Prepare to Take This Class

Registration will open in early March. The Mindbender Mobius pattern will be available for the first time in class. The class is rated Advanced. A great way to get up to speed for it is to brush up on three skills:

  1. Slip stitch crochet. Try one of my slip stitch patterns. For the simplest first experience, try the Slipster Slackscarf or Eva’s Ribs. I designed the Luckyslips Mitts for students of my Slip Stitch Crochet 101 classes.
  2. Simple planned pooling. After some slip stitch crocheting, try is Jempool. It combines simple slip stitches with simple planned pooling in color stacks. Have a look at my Planned Pooling class resources.
  3. Crochet a true mobius. Doris Chan’s Snow Day would be perfect!
Posted on 73 Comments

Delicate Crochet Book Giveaway

Update: I’m so inspired by your comments! Your comment may take a few hours to show because they go into a moderation queue. 

I’m giving away a copy of the new Delicate Crochet book by Sharon Silverman to a randomly chosen commenter on this post. You’re welcome to enter even if you live outside of the USA. If you win and you have a non-USA shipping address, you’ll receive a free downloadable crochet pattern of your choice instead. Scroll down for the book giveaway details.


Pattern Riffing

Over the holidays I “riffed” on the patterns I wrote for Delicate Crochet. I’ll explain how, in case you have (OR WIN!!) this book and want to riff too.

Meet Zegue

Tunisian ripple stitch Ziggy Vest with its variation Zegue
Zegue (left) with Delicate Crochet’s Ziggy Vest on the right.

Zegue is a simple wrap version of the Ziggy Vest. I used up scraps of fancy yarns in my stash. In Ziggy’s case the armholes are cut into the self-healing stitch pattern. I omitted that step for Zegue. (I could still add a hole later, such as for a one-sleeve wrap, or for a keyhole scarf style like I did for the pink Mesmer. Or go with my original idea: add a seam at each end of the long sides to create tubes (sleeves) for a shrug.)

Yarn: I had one small ball each of the four Stacy Charles Fine fashion yarns I used. (See Zegue’s project page in Ravelry for the yarn facts.) One of them has sequins so I had to use it. Using a mix of yarns for the Ziggy stitch pattern was really fun! I’ve always wanted to do a stripy scrappy ripple, especially in Tunisian stitches.

Crochet Hook: I used the 7.0 mm Addi Tunisian crochet hook from my shop; the Ziggy Vest calls for a 6.0 mm size. A 6.5 mm for Zegue would probably be just as lacy though you might need a few more rows and additional stitch repeat or two.

Finished Dimensions: 14″ x 57″ (35.6 x 144.8 cm), measured flat and blocked. I like wearing it as a wrap. For a shrug option I might add buttons. It weighs 71 g. and I had about a quarter of the Luna mohair and Crystal left over.

I chose the length of each row to match the length from my wrist over the shoulders and across the back to the other wrist while my arms hang at my sides—an easy measurement (57″/144.8 cm). This is because I thought I was going to turn it into a shrug. I just kept adding rows until my forearm would fit through the sleeve tube if I seamed part of the first and last row together; I’d need a minimum of about 9″ (22.9 cm). I figured the yarn amount would get me at least this far.

Foundation and Row Repeats: You’ll need the Delicate Crochet book for the actual Ziggy pattern (starts on page 140). Here are my changes for Zegue:

  • I chained 178 with Color A (Stella).
  • Row 1 forward pass (FP) is also Stella, and then I changed to Color B (Luna) for the return pass (RP) and the Row 2 FP. Fasten off every time you change yarns.
  • Row 2 RP and Row 3 FP: Change to Color C (Céline).
  • Row 3 RP and Row 4 FP: Change to Color B (Luna).
  • Row 4 RP and Row 5 FP: Change to Colors C+D (Céline & Crystal held together).
  • Repeat the color sequence of B, C, B, C+D for a total of 16 rows; for Row 16 RP change to Stella. Complete Row 17 FP and RP with Stella and then fasten off.
  • Edge Row 17 with a strand of Luna and Crystal held together: Single crochet (sc) in first FP stitch, chain 1, slip stitch (ss) in same sc, sc in same stitch, *chain (ch) 1, sc in next FP stitch, ch 1, sc in next stitch group, ch 1, sc in next FP stitch, [sc, ch 1, ss in same sc, sc] in next FP stitch, repeat from * in each remaining FP stitch of row. Fasten off.
  • Attach Stella to first foundation ch. Working along the other side of the foundation, sc in first ch, ch 1 and skip next ch that was not used by a FP stitch, sc in available loop of next used foundation ch, repeat from * in each remaining stitch of row. Fasten off.
  • Attach Luna and Crystal to first sc of Stella. Edge this row the same way you edged Row 17.

Yvelino the Paneled Ring Scarf

Icelandic wool ring scarf vs DesigningVashti Lotus wrap of Bias-crocheted Tunisian net, surface-crocheted with love knots.
Yvelino Ring (left) with Delicate Crochet‘s Yveline Wrap on the right.


For this version of the Yveline Wrap I used four colors of lace weight Icelandic wool, one ball per color. See its project page for the yarn deets. I loved this yarn; it’s very “sticky” and almost bristly or wiry in a way that works great with this airy bias-worked net.

Crochet Hooks: 5.0 mm (H) Tunisian hook; for the surface-crochet I used a regular 3.5 mm (E) crochet hook.

Finished Dimensions: 13″ wide with a 58″ circumference (33 x 147.3 cm). It weighs 100 g. so I used only half of each ball. (I thought I might want to add a lot of surface crochet, so I reserved yarn for that.) Instead, I like the texture contrast zones.

Foundation and Row Repeats: You’ll need the Delicate Crochet book (starting on page 133) for the actual Yveline pattern. Here are my changes for Yvelino:

  • Chain 58 in Color A. Complete 33 rows. Edge the last row with sc.
  • Slip stitch Color B to the bottom right corner foundation chain of the previous panel. Chain 58. At the end of the Row 1 FP, slip stitch in the first FP stitch of Row 1 of the previous panel and then complete the RP as usual.
  • Repeat this join-as-you-go process at the end of every FP until you’ve completed 33 rows. Edge it with sc like the previous panel.
  • Repeat the above with two more panels. For the last panel, also join-as-you-go the first FP stitch of each row to the last FP stitch of the first panel you completed to create a ring. (Or you could seam the first and last panel sides together to for the ring as a separate step.)

Adding the Frills: The only thing different from the book is that I used a 3.5 mm (E) crochet hook, and surface crocheted a column on each side of the joins.

Oh the Resources Buried in Crochet Patterns

I hold onto lots of crochet pattern books and “mine” them for interesting stitch patterns (love those stitch symbols!), shapes (love those schematics!), and construction methods (love the rare assembly diagram!).

The stitch texture combinationscolor contrasts, or styling ideas in pattern books are also inspiring.

Ravelry takes this into account so I know I’m not the only one who uses books this way. (When creating a new project page, there used to be a box you checked if you improvised from an existing pattern. Now you can choose additional patterns if you’ve incorporated elements from them.)

Delicate Crochet offers hours and hours of riffing on its interesting stitch patterns, shapes, and styles, thanks to the range of designers represented—and thanks to all the stitch diagrams and schematics.

Book Giveaway Details!

You could win this! Delicate Crochet by Sharon Silverman with 23 patterns by 10 designers.
  • I’ll use a random number generator no earlier than February 18 (Monday, President’s Day) to choose from among the commenters to this post.
  • There may be two winners: one with a shipping address outside of the USA as well as within it. If the first winner has a non-USA shipping address, the prize will be a free downloadable crochet pattern (winner’s choice). I will then draw a new number randomly until the new winner has a USA address to which I can ship the book.
  • To contact the winner(s) I will do these three things: comment on your comment with the news, and announce the winner’s name (as it appears on your comment) in my Ravelry group, and at my Facebook page. I suggest you opt-in to receive alerts of responses to your comment in case you’re a winner.
  • Your comment may respond to my question, “What crochet book would you like me to write?” (as explained in my newsletter #97), or at least be crochet-related. I reserve the right to remove spammy comments as always.
  • Commenting more than once does not improve your chance of winning.
Posted on 2 Comments

Holiday Crochet Project Habits

This blog post is part of today’s newsletter issue #96. That issue has a storewide 25% off coupon code in it as a thank you to my subscribers. Look for it in your inbox later today. Also check your spam folder because this is a high-volume week for email. (Not a subscriber? It’s not too late.)

The clean, bold holiday template I used for issue #96 limits how I want to write, so here’s the rest of the story. This year I look at my holiday crochet project habits over the years. (By “holidays” I mean from Thanksgiving in the USA to New Years Day.)

Holiday Crochet Project Types

It turns out I look for about eight kinds of holiday crochet projects! Sounds like a lot but they usually overlap. I wonder if you are the same way? I’ve compressed my list into three in no special order.

Feel the Peace of the Season

Relaxing & rejuvenating holiday crochet projects of Decembers past (2011-2017)
Image #1. View full size.

Crochet is my go-to to relax and recharge, and it has been ever since I was nine years old. (When I learned how to do Transcendental Meditation, my first thought was, “This is like crocheting.”)

The crochet that replenishes me during the holidays is an instinctive thing and unique to each year. I loved looking back at these!

Clockwise from top left of image #1:

  • Big Hook Bucket of 2016 (I made three). Seeing it daily in my studio makes me happy.
  • Luckyslip Mitts of 2013: I just kept making ’em in all kinds of yarns, sizes, and stitch accents.
  • Antoinette Sparklescarf of 2011: The one shown is made with the same breathtaking yarn that inspired Starwirbel later. I made about ten and turned some into reusable gift wrapping ribbon.
  • Solstice Bangles of 2017. I really needed a lot of gem-like bling last year. Each was a tiny retreat: I got totally immersed for short moments because the materials were tricky, but each bangle was quick to complete.
  • Bling Bam Bangles of 2014: Took me by surprise. I wondered what it would be like to crochet Lotus yarn with a strand of sequined thread and I couldn’t stop. Very simple. A mindless, familiar rhythm.

Last-Minute Gift Making

I’m easily inspired by great new gift ideas to crochet, but I typically don’t have a sense of occasion until the last minute. (Fortunately crocheting smaller items is fun. They often become new designs instead of gifts though.) I greatly admire event planners and others who can plan ahead well, like those who have crochet gift lists they work through months ahead.

Last minute gift crocheting puts a burden on a crochet pattern to be easy to understand, and to call for no-fuss materials. It’s sort of like freelance crocheting for magazines in the sense that it’s tight deadline crochet.

If the item is a crowd pleaser, then it’s production crochet territory. Ideally the pattern is easy to memorize for make multiple items from it, efficiently (and still be fun).

Niche Crochet Gifts

Crochet patterns for niche gifts: no-fuss materials, easy pleasers.
Image #2, Niche Gifts. View full size.

Niche items are about specialized appeal and could be the perfect thing for someone. I focused on some in the newsletter: men, boys, teens, tweens, teachers, and mothers-in-law. These are the patterns shown clockwise from top left of image #2:

  • Expedient Cowl: Has trend appeal for teens and 20-somethings, including as a skirt! What makes it fast and easy enough is the super-bulky yarn, big hook size, and simple stitches.
  • Aran Rozsana cuff: Folk-boho jewelry trend. A mood boost to crochet with fingering or sport yarns and embroidery flosses because of the colors. Mostly single crochet (UK/AUS: dc).
  • Petticoat Cozy: Just a token gift item. It’s the double layer of lace that appeals to people. Same yarns as Aran Rozsana.
  • Frostyflakes: A really popular pattern and addictive to crochet! It has special appeal to women over 30. Use any yarn; I even made a bookmark with size 20 thread.
  • Gallon Friend: This curio is very niche. Make them for grade school and ESL school teachers, children, and for home cooks. I’ve always wanted to try a keychain size in thread!
  • Lucky Twist Mitts: One of the patterns that comes to mind for men. Has sizing for both sexes, same with Luckyslip Mitts.
  • Slip Slope: The scarf is a crowd pleaser and Google Trends tells me the boot cuffs are still trending high for younger folks! Also see the Lucky Twist Boot Cuff pattern in Ravelry.
  • Burly (center) and Burly Bias: The basic Burly scarf for men and boys, and the niche diagonal Tunisian necktie for the man who has everything. I love making the ice creamy one and like how it settles on my shoulders and frames my face.

Crochet Gifts for Mothers-in-Law

Seems oddly specific, doesn’t it? I’m surprised by the number of times someone has told me they used one of my patterns, or took one of my classes, specifically so that they could make the item for their mother-in-law. (My own mother-in-law wanted a white angora hat to keep her ears warm.) The mother-in-law patterns:

Hostess Gifts

Some Decembers I go to so many parties. A pile of small crocheted gifts on hand would be great. Maybe a sack or decoration for a wine bottle, to decorate the lid of fresh-spiced nuts, etc.

Last year I had extra Solstice Bangles to toss onto a wine bottle neck—so festive! And the hostess ends up with new bangles.

Trend-Inspired

I checked on this season’s knitwear trends and this is what I found:

  • Creative use of fringe remains a strong fashion trend. My first thought is the Starpath Scarf because at this time of year it’s easy to set it down and remember what you were doing when you get back to it. Also, no ends to weave in, no matter how many colors you use.
  • Giant yarns, stitches, and accessories. Burly and the Expedient Cowl in super-bulky yarn (see Image #2 above) are tame compared to what’s on the runway. A Q-Star Coverlet in bulky yarn would be a lavish winter blanket! Or rug/bath mat?
  • Asymmetry, and diagonal/multidirectional seams and surface grain. Hello, Burly Bias (see above).

Go Luxe!

Splurge-worthy for 2018: Doris Chan patterns, Vashti's investment patterns, yarns, hooks, and the new Delicate Crochet book
Image #3, Splurge-worthy. View full size.

The holidays is when I splurge and reinvest in my craft. I hope you also treat yourself or another crocheter. Beyond shopping and spending, to me it’s about using this time to crochet with my fanciest yarn stash and maybe break in some new crochet hooks.

Other years it has been about bling. This year I’m feeling very angora-luxe. I’ve been hoarding angora yarn for too long.

If someone asked me what they should get from my shop and money was no object for them (or they want to make the most of the coupon code in the newsletter), these come to my mind in no special order:

I wish for you the experience I aim to have with my 2018 holiday crochet projects: peace, cheer, inspiration, and warmth inside and out.

Posted on 5 Comments

All Crochet Hook Sizes in Charts

Crochet Hook Sizing with easy to see size gaps: my size charts (for steel, for medium-range, and for jumbo hooks) include the MISSING sizes.
Download the three charts shown above—with extra columns!—as a free PDF. See below. There was no room for this material in my newsletter issue about crochet hooks. It pairs well with this one: Deluxe Crochet Hook Diagram.


Hey there, New Crocheter?: On the face of it, crochet hook sizes are beginner-level stuff. Question one quirky thing and you can end up in a maze. I did. Over the years I’ve had five key realizations. They build on each other in a logical order, below. I wish I could have read this post when I started questioning! Bookmark this if you’re not quite ready for it yet. Better yet, add a comment about where you’re at.

Crochet Hook Sizes Explained

Charts of all crochet hook Sizes! Easy to see size gaps. My size charts (for steel, for medium-range, and for jumbo hooks) include the MISSING sizes.
Vashti’s Charts of Crochet Hook Sizes

First, download my Crochet Hook Size Charts, and then the Deluxe Crochet Hook Diagram. You might want to refer to them as you read further.

I originally created these charts for my own use.The PDF has more information than the three charts pictured at the top of this blog. For example, two more columns, and how to use the charts and understand the size increments. Each chart is a full-page size:

  1. All Steel Crochet Hook Sizes in 0.10 mm increments: 0.40 mm – 3.50 mm
  2. NON-Steel Crochet Hooks, medium-range in 0.25 mm increments: 1.75 mm – 7.75 mm
  3. NON-Steel Crochet Hooks, jumbo sizes in 1.00 mm increments: 8.00 mm – 36.00 mm

Crochet Hook Sizes, the Five Keys

1. I watch exactly where on the hook I make each stitch.

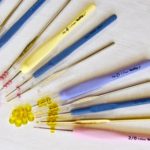
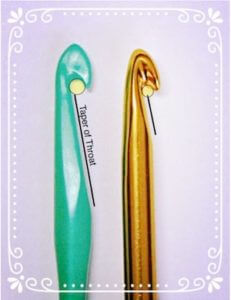
I especially watch the starting loop on the hook because it will become the top two loops of the new stitch. My goal is to avoid forming stitches on the tapered part (“throat”) of the crochet hook.

Some hooks have such a long throat that I can’t avoid making my stitches there. This is a big deal with some stitches. The taper will give my tall stitches loose top loops.

Pictured at right is my first crochet hook (green) and one of my current favorites (gold). My green crochet hook made my stitches look more stringy and uneven than they had to, even for a newer crocheter.

A big revelation for me (thank you Nancy Nehring) was that the crochet hook’s true size is where my stitches are made on it. So the other reason I watch where I make stitches on the hook is to know where to measure the hook size.

2. I treasure my slide gauge tool.

Needle gauges, the kind with holes, are everywhere. They’re even given out for free at yarn shops and conferences. I tossed them all out and only use a slide gauge. If I could find a reliable source for my favorite slide gauge I’d have it in my shop already. Lacis has had this one for a long time. It’s now also at JoAnn Fabrics, Amazon, Walmart, etc. Here’s another one. You can also search for millimeter calipers.

Once I know where on the hook I make my stitches (see #1 above), I measure that with a slide gauge or caliper. I get my true size of each hook in a jiffy. No forcing a hook in or out of the holes of a needle sizer with the risk of scratching the hook in the process!

When I did this with all of my crochet hooks, I found out that about a third of them were not the sizes I thought they were (based on how I use them).

3. I base my stitch gauge on my hook size.

Beginner slip stitch crochet with a big hook!
So stretchy! Easy slip stitch Expedient Cowl.

At some point in my crochet life I realized why we have so many crochet hook sizes. When the stitch gauge is based on the hook size and not on the yarn thickness, or personal habit, some amazing crochet fabrics are possible! Starwirbel, Weightless, stretchy slip stitches, and many more.

There are two more reasons: it’s the way to get the most polished stitching gauge for each project. It also standardizes our results as an international crochet community.

Before this realization I thought the different hook sizes were there to make crocheting with different yarns more pleasant. “I think this yarn is too thick for this hook. Must mean I need a bigger hook size”. That’s a fine reason, but if it were the real reason for the sizes, we’d only need about eight sizes—one per yarn thickness category. See the How Many Crochet Hooks? section of my other crochet hook post.

4. I think in millimeter (mm) sizes.

Instead of the “H hook” of my childhood I now think “5 mm hook”. It has improved every day of my crocheting life. I no longer have to deal with traditional hook size systems that are riddled with overlaps and exceptions.

Not only that, the mm sizing makes it plain where there are gaps in the standard hook sizes, and how large each gap is. This in turn opened up to me a wonderland of in-between or nonstandard crochet hook sizes. Hello handmade crochet hooks, imported hooks, and other collectibles, including odd manufacturing runs of established brands.

5. The actual number of crochet hook sizes? Infinite.

The American Craft Yarn Council (CYC) maintains a chart of 29 steel and 28 non-steel crochet hook sizes according to American and British standards. It’s a good start and includes equivalent mm sizes. I build on it in my crochet hook sizing charts by adding Japanese hook sizes and placeholders for missing sizes.

The millimeter measure accounts for all possible hook sizes, including the sizing standards of other countries. I love seeing how US, UK, and Japanese hook sizes all fit together.

Does an infinite number of crochet hook sizes seem overwhelming? Every crocheter needs a different number of sizes. Check for yourself with my list of five factors.

How Did We Get Here?

I think of the non-metric crochet hook sizing systems as being two great crochet traditions (cotton/silk threads vs. wool yarns) that got mushed together, then sprinkled with sizing standards of different countries. It’s quite the heady brew.

Steel crochet hooks were designed for lace crochet with thread. Steel is very strong for even the finest hook sizes. They’re numbered from 00 to 14 (sometimes 16). The larger the number, the smaller the hook.

Non-steel crochet hooks, whether made of aluminum, wood, bamboo, plastic, or glass, get numbered and lettered sizes (from B to U so far) according to an American system. Sizing systems in other countries use different numbering systems. Unlike the steel sizes, the large the number, the larger the hook.

Let’s talk about the size “G” hook. The CYC lists three non-steel G hooks: 4.0 mm, 4.25 mm, and 4.5 mm. Each one is a useful size. Labeling all of them size “G” is unnecessarily confusing.

The Way of Peace

Just focus on the millimeter size. A crochet hook that measures 4.0 mm (on the part of the hook where you make the stitches) will always be that size for you. It won’t matter what it’s made of, where you live, or which country manufactured the hook. Feels peaceful, doesn’t it?

I’ve added this to an experimental blog post series: Vashti’s How to Crochet Book